
Table of Contents
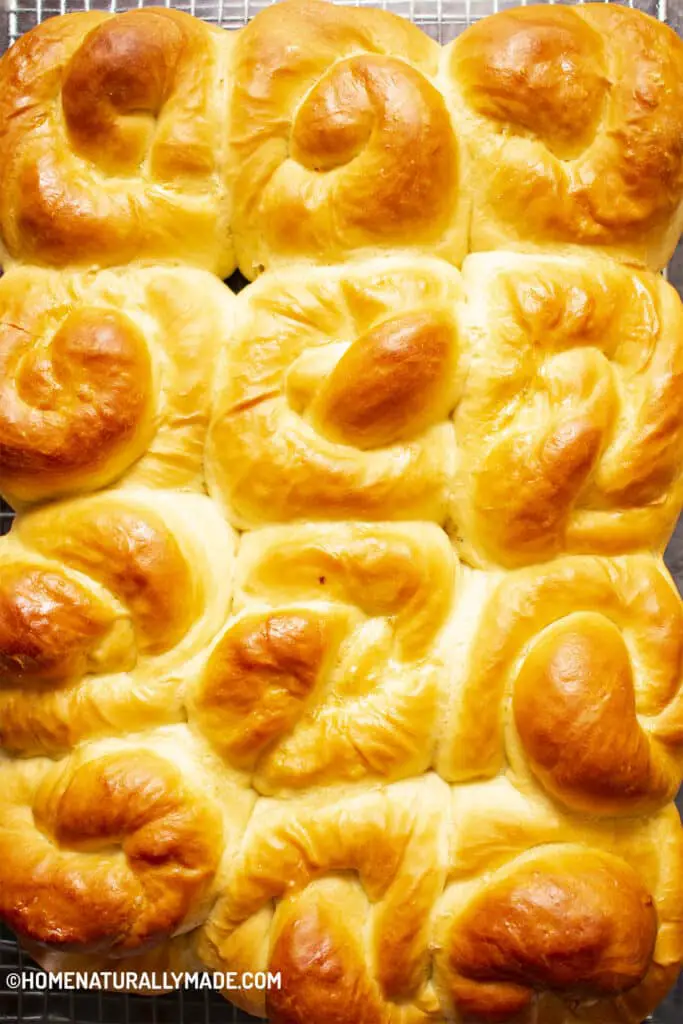
Home hand made Milk Bread Rolls using organic all-purpose flour is so fluffy and satisfyingly yummy. Perfect for breakfast, a side dish or a snack. One of my all-time favorites. And yes, you do not need bread flour to make this tasty milk bread rolls as long as you know a few tips and tricks on how to work on the all-purpose flour properly.
How to use all-purpose flour to make soft Milk Bread Rolls or any bread?
To use all-purpose flour to make milk bread or any bread is ultimately all about how to activate the gluten inside the flour fully and to a maximum degree. Bread flour is essentially flour having a higher gluten content. Gluten, when optimally activated, is the key to the softness. So how to activate the gluten inside the flour to the maximum effect?
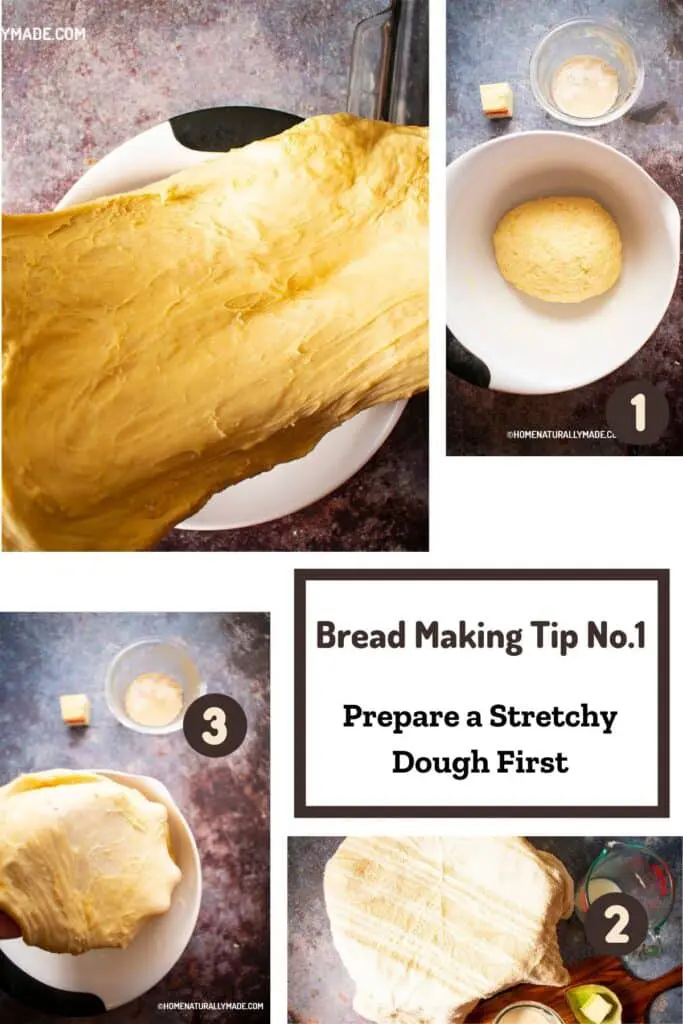
Tip No.1 is to make a super stretchy dough first
First thing first is to make a dough without adding active dry yeast or butter. Cover the mixing bowl with a damp thick kitchen towel and let it rest for about 1-2 hours. The higher the surrounding temperature, the less time it requires. Therefore, you will probably need 1 hour during summer and 2 hours or maybe even a little longer during winter.
The purpose of this is to allow the gluten to be activated over the time. When the dough becomes super stretch, meaning you can easily stretch them out like a sheet, you know the dough is ready for next step.
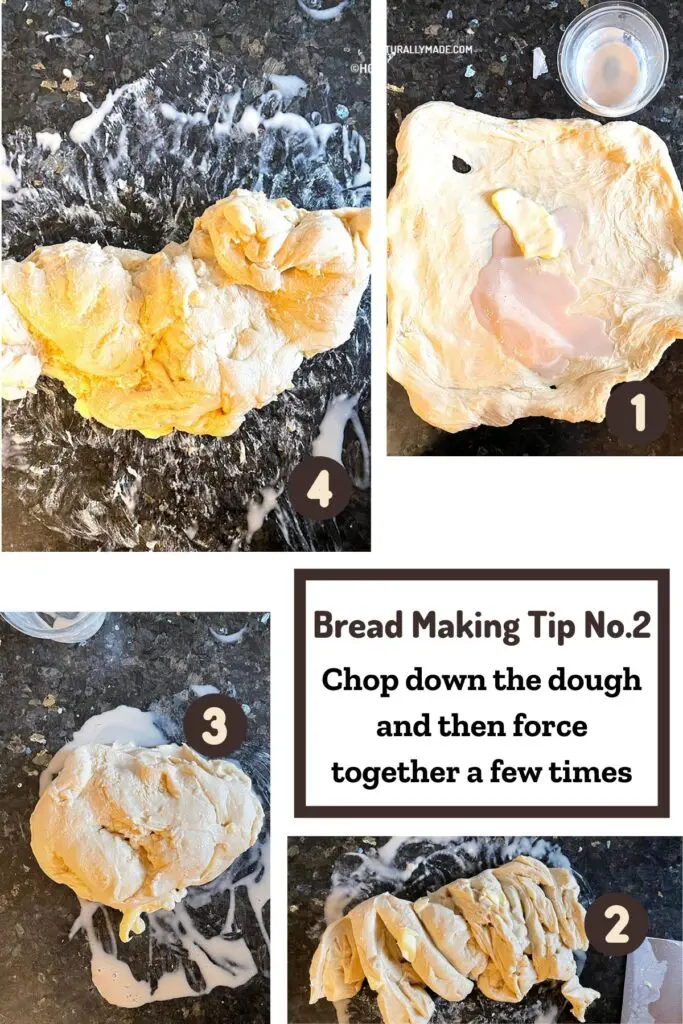
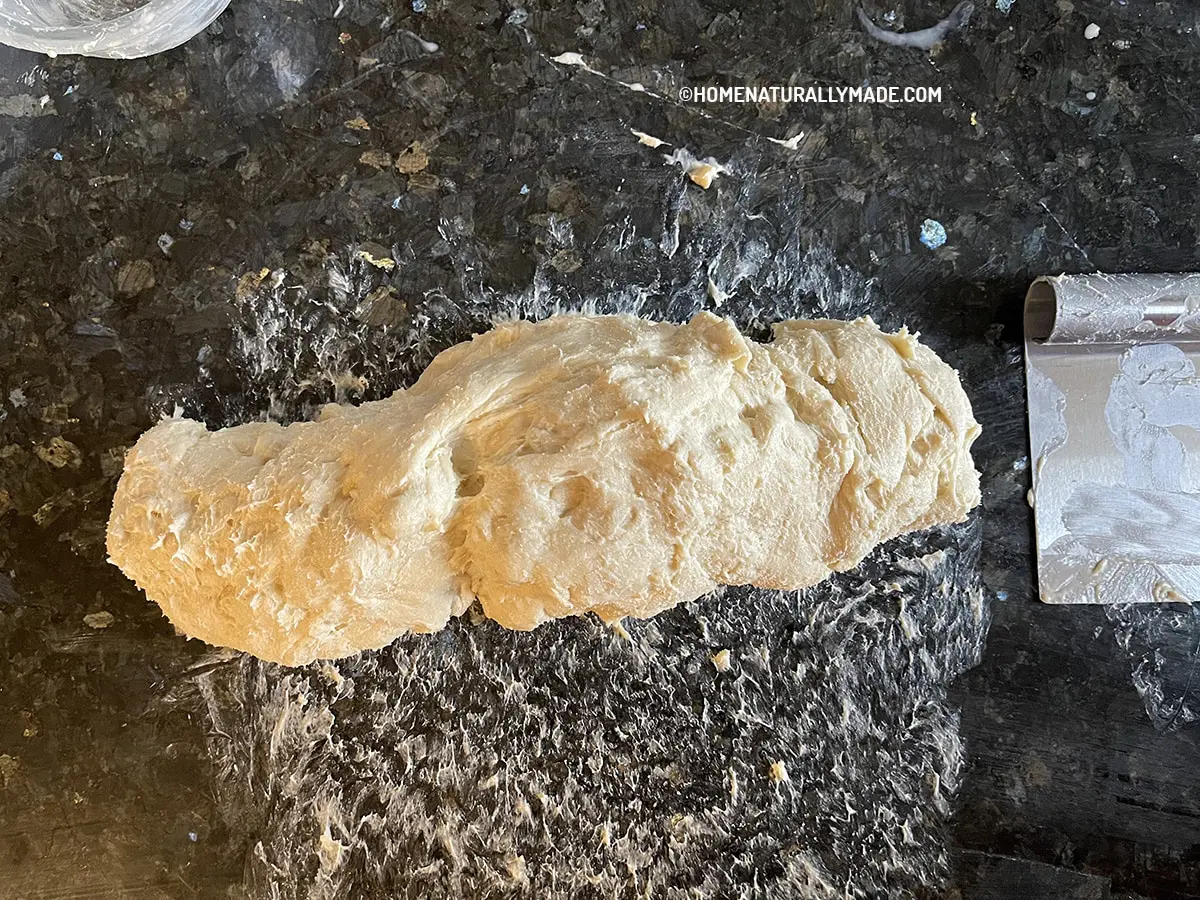
Tip No.2 is to chop down the dough and force them together for a few times for fluffy Mild Bread Rolls
Once you have a stretchy dough, fold the active dry yeast paste and butter into the stretchy dough. Knead the dough into one block, and then chop down into chunks using a dough cutter. Then force them together by kneading and pressing. Repeat this a few times.
This strengthens the bonding of the protein molecules, which ultimately leads to a more fluffy bread.
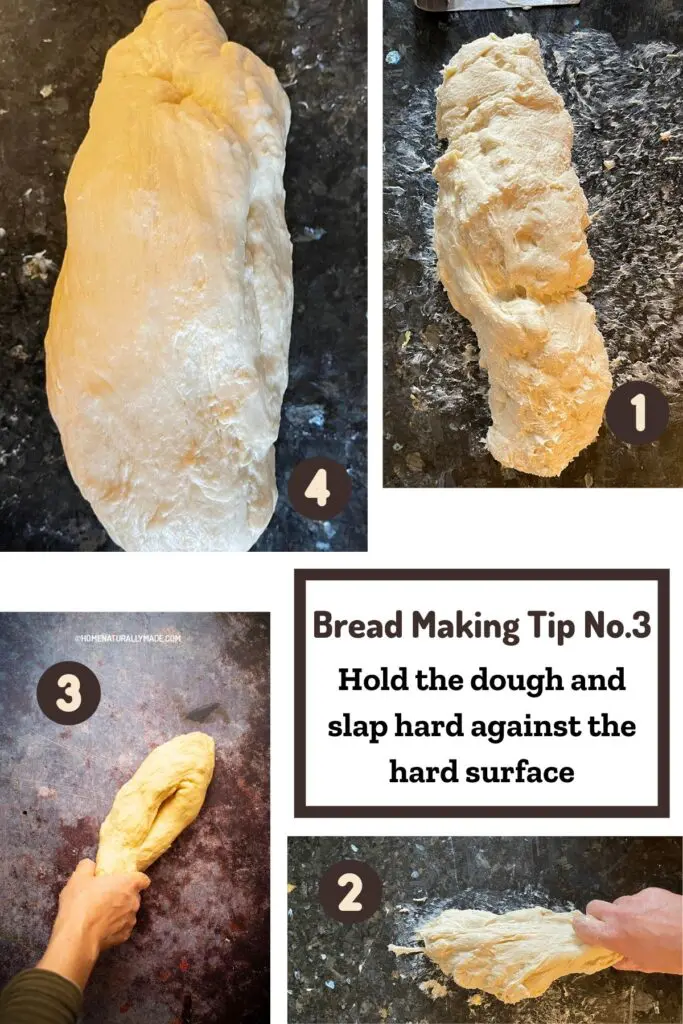
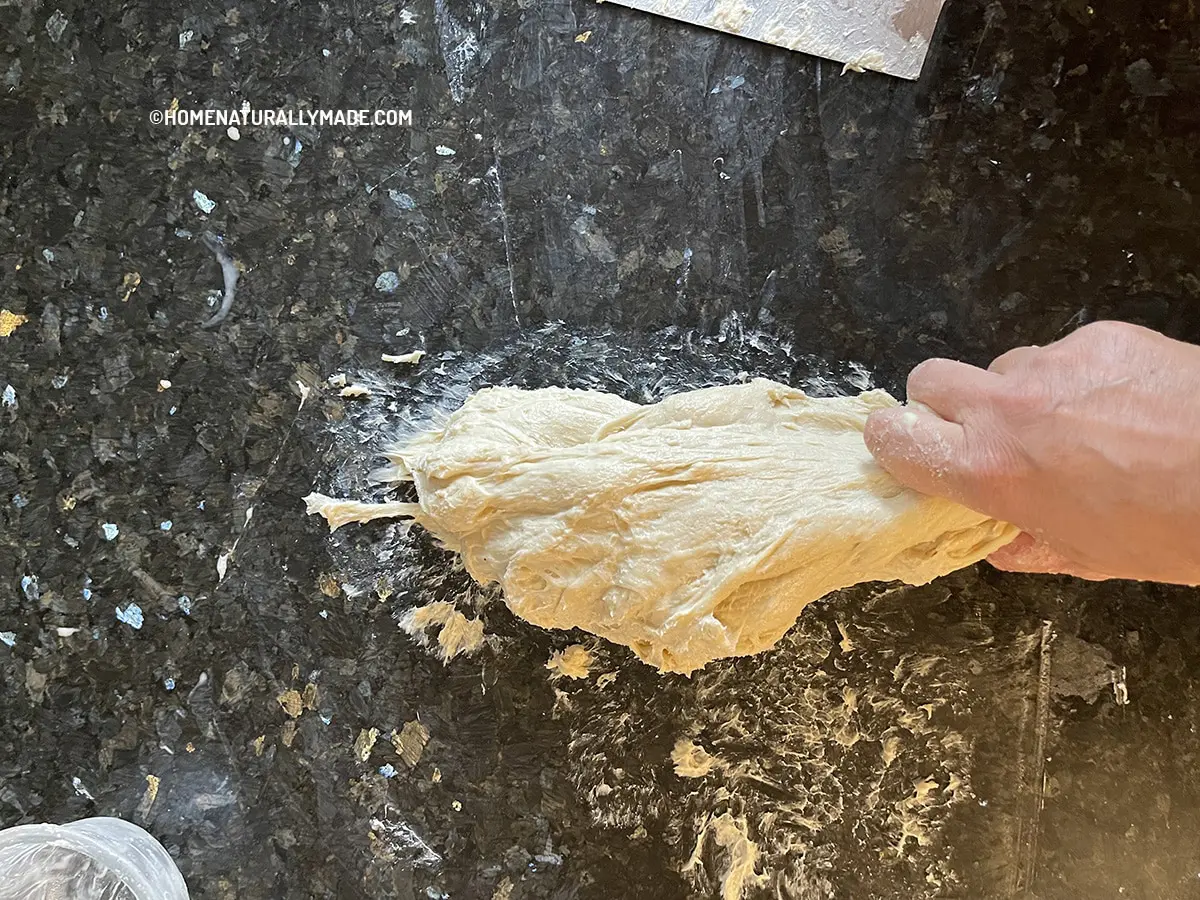
Tip No.3 is to slap the dough hard against a hard surface
You may feel the dough is very sticky, and may also see bits of butter is not fully blended. Don’t worry. This third step of slapping the dough should take care of both situations.
Hold firmly one end of the dough and slap hard against a hard surface, such as a granite countertop. Knead into a long roll and continue to slap until the dough becomes smooth and has absorbed all active dry yeast paste.
The purpose of this is to further force the protein molecules to stretch out and smooth out, giving the bread that extra fluffy yumminess.
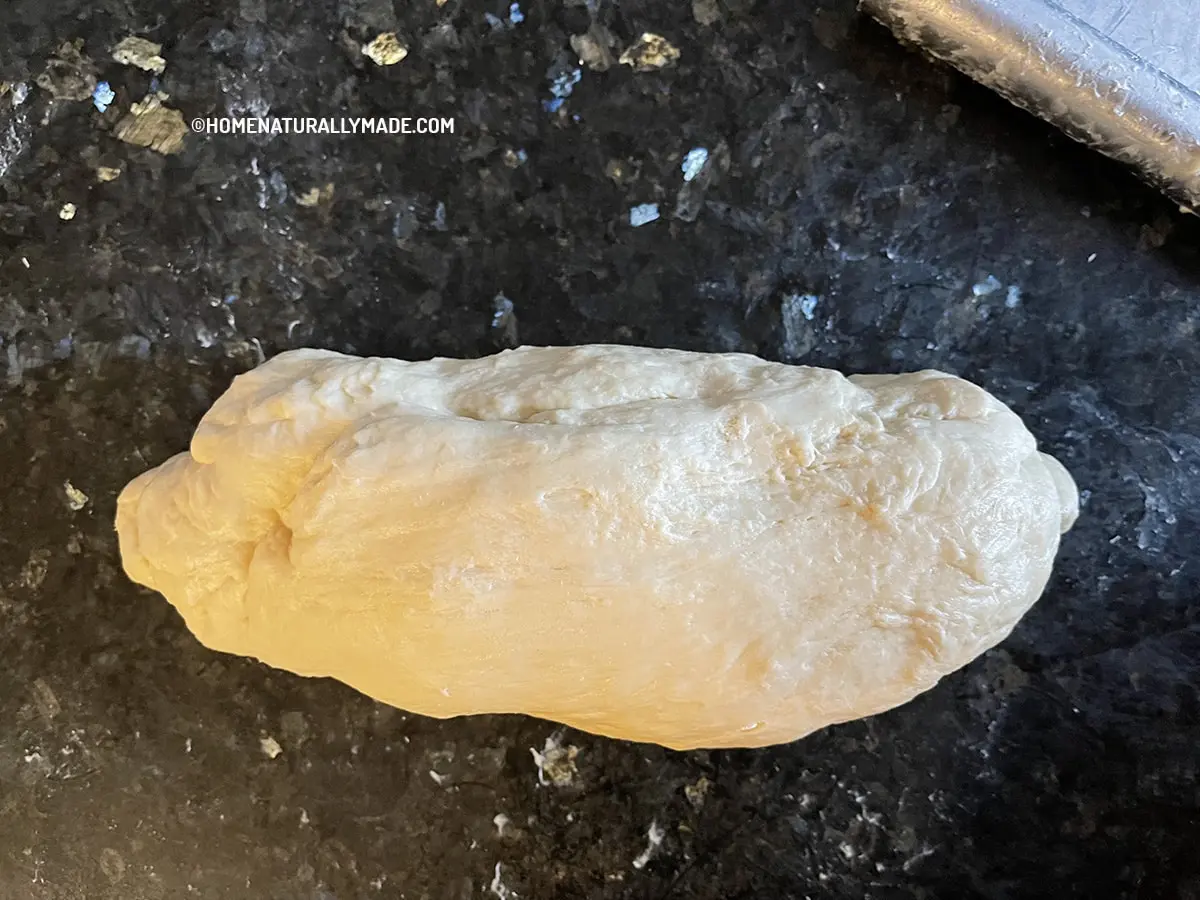
Once you a smooth fluffy dough, you are ready to fold it into the desired shape and let it proof.
How to fold Milk Bread Rolls?
This recipe makes 12 milk bread rolls that can be fit into a 11-inch X 15-inch baking pan, or similar sized baking pan. I use an easy folding method which I used to make Chinese scallion pancakes or Chinese steamed buns flower rolls.
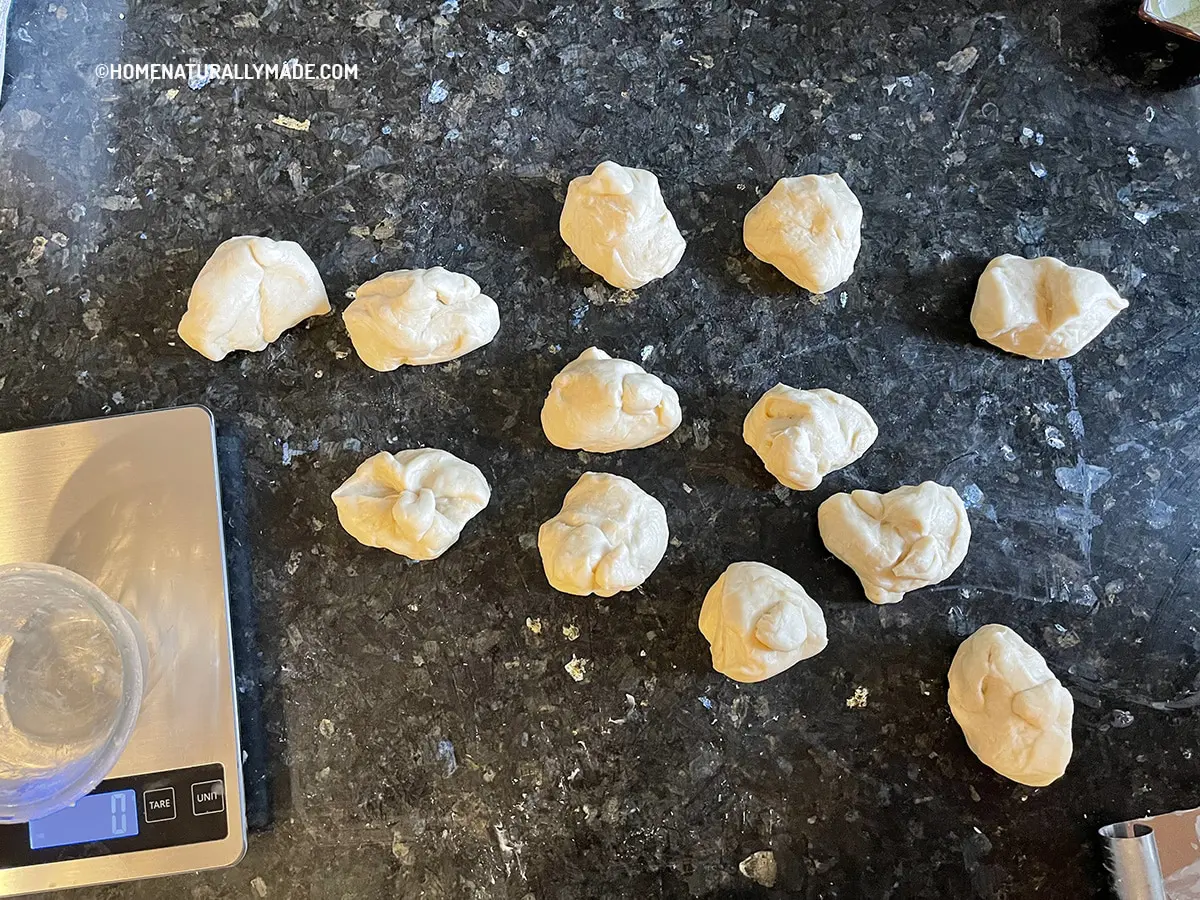
1). Divided the dough into 12 equal portions, each portion weighs about 96 grams.
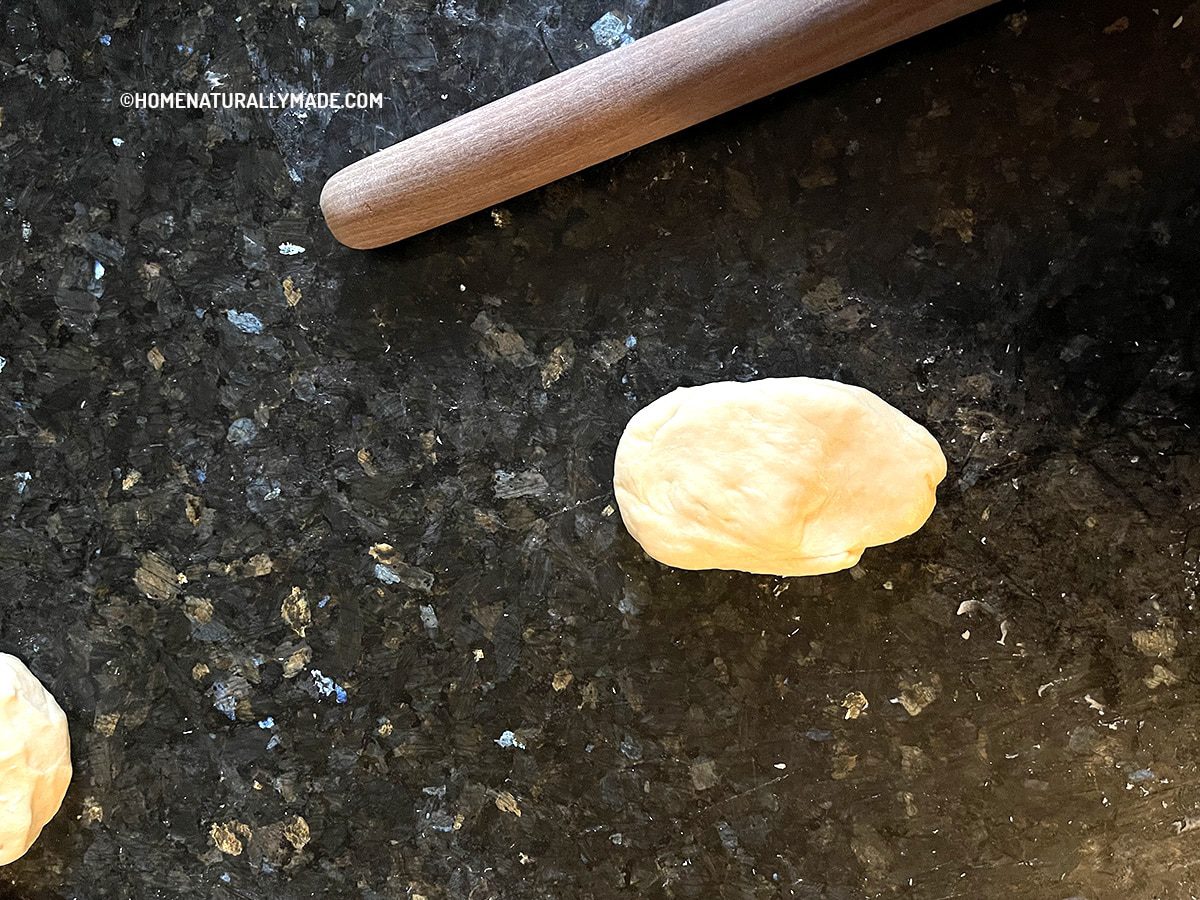
2). For each portion, knead into a ball and then press using hands into a slab.
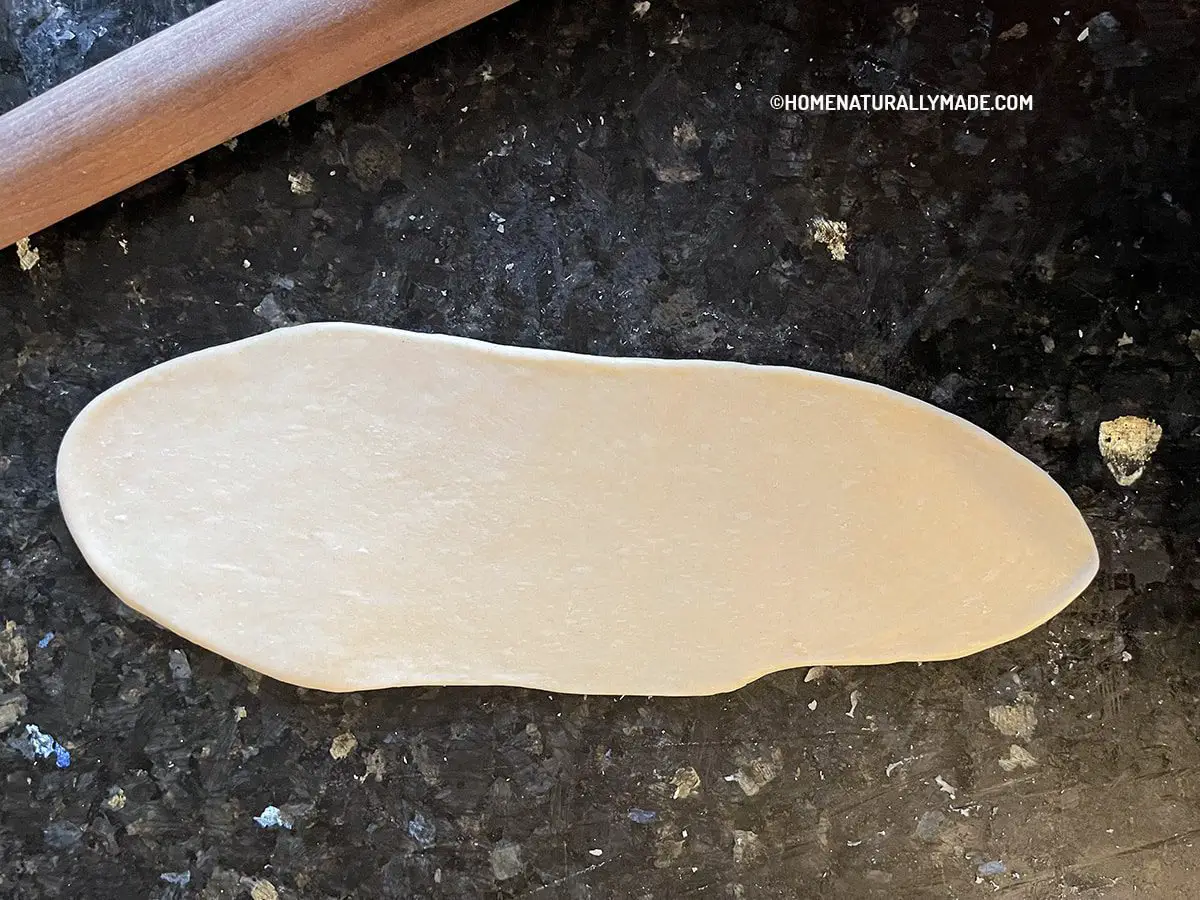
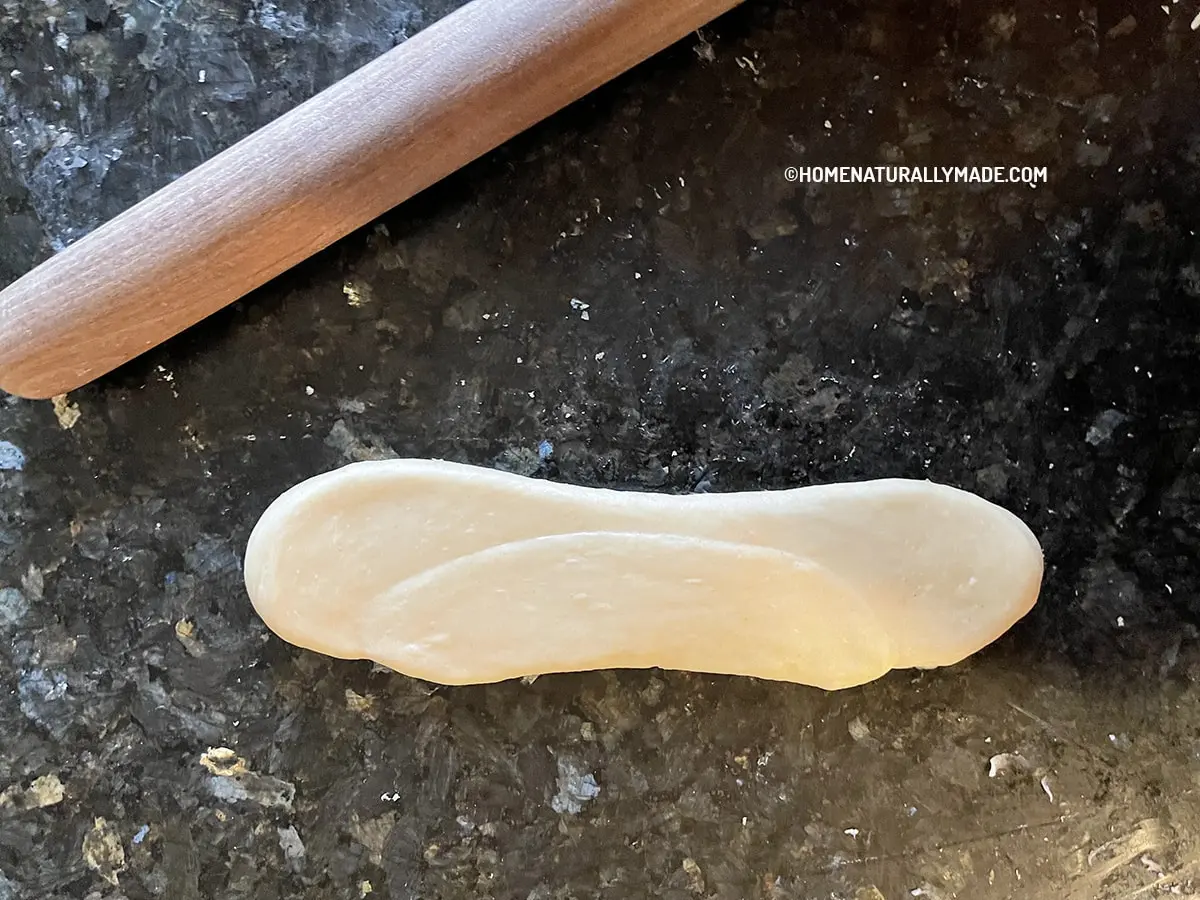
3). Using a rolling pin to roll out the slab into a thin sheet.
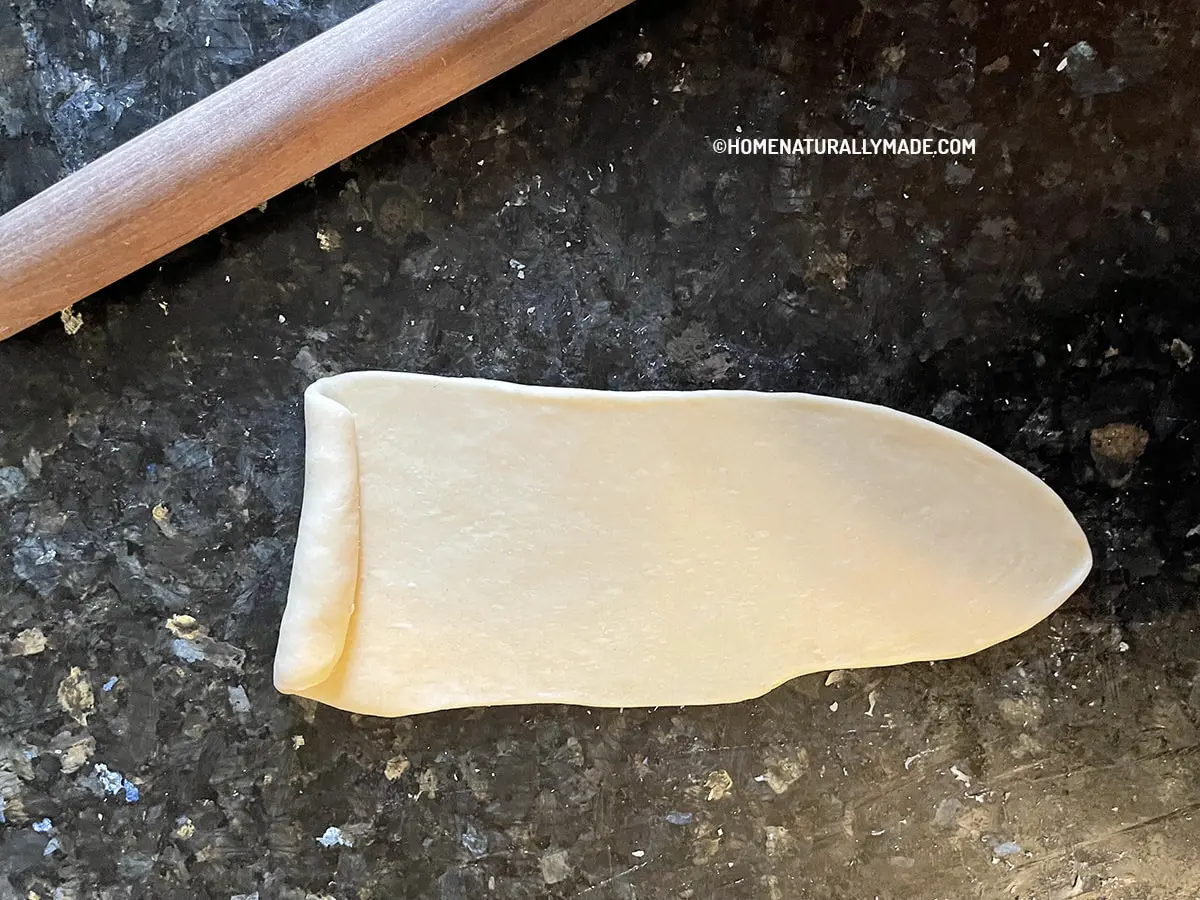
4). & 5). Starting from one end of the dough sheet, roll the sheet into a cylinder roll.
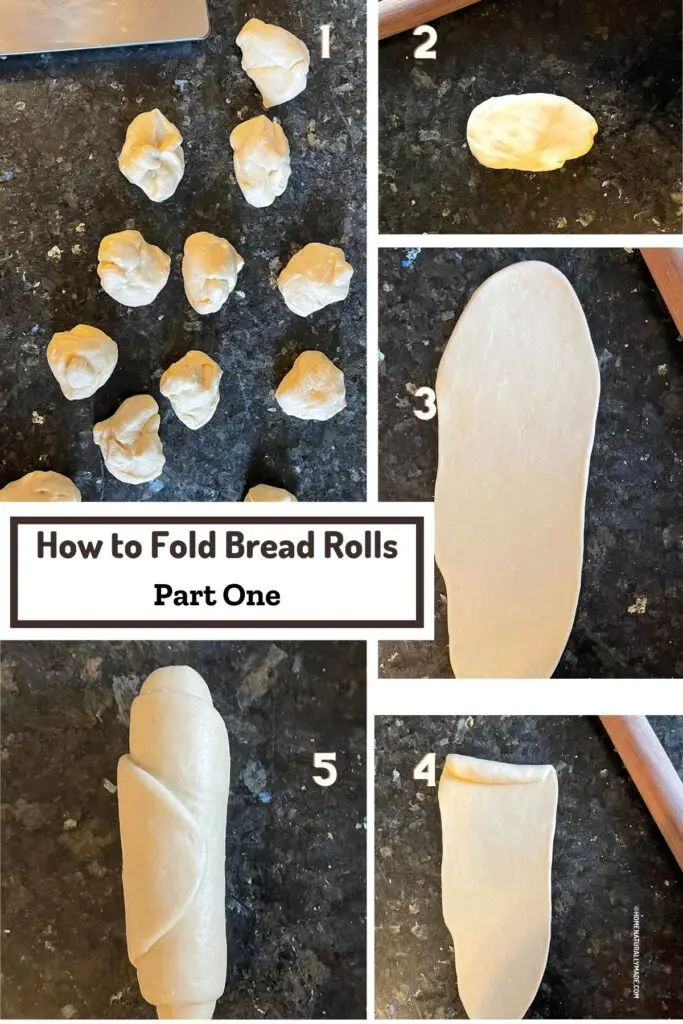
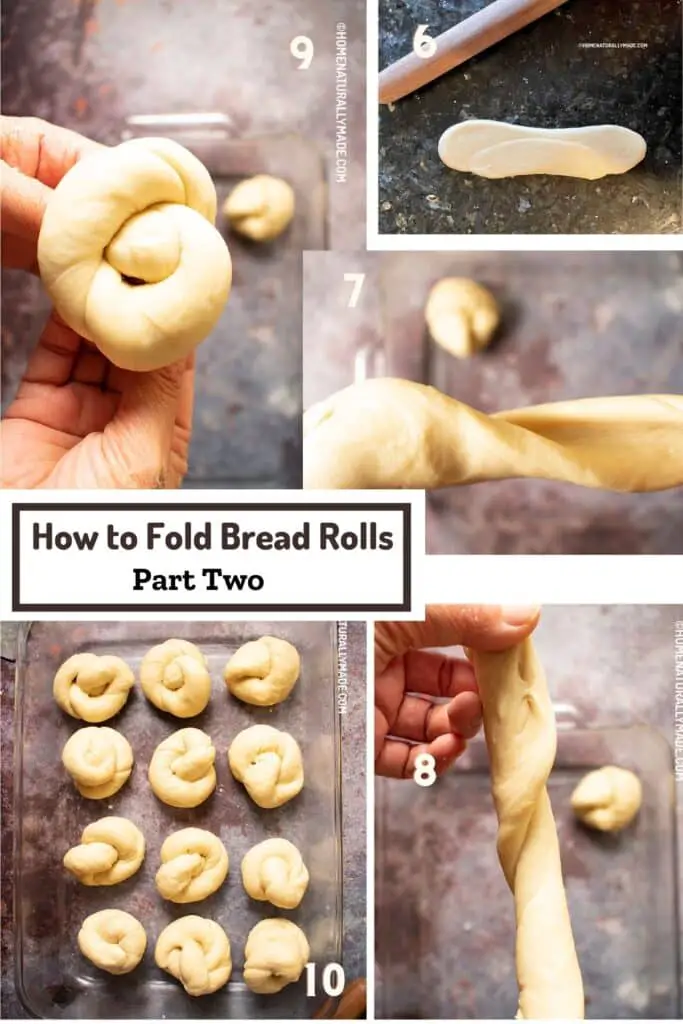
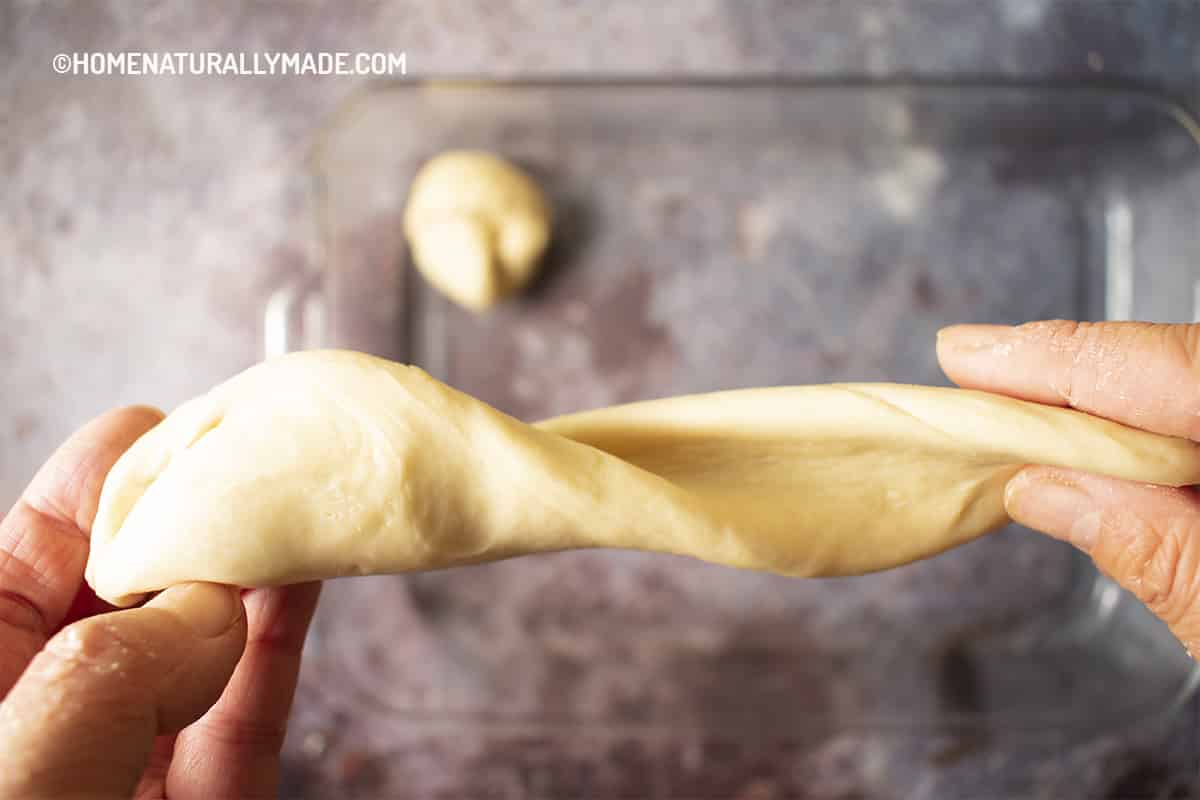
6). Using a rolling pin to flatten cylinder shaped dough long into a strip. Each hand holding on one end of the dough strip, pull on opposite direction to stretch and prolong the dough strip.
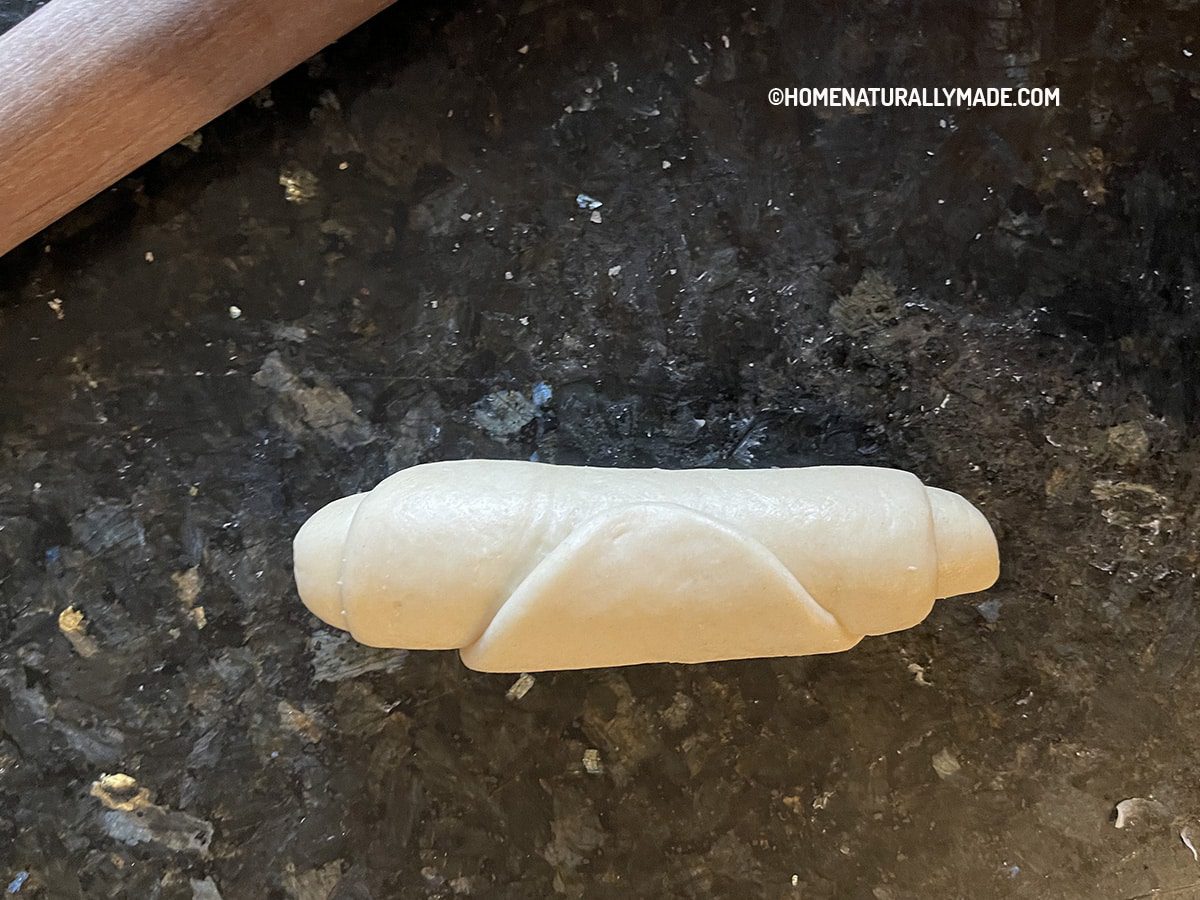
7). & 8). Twist the dough strip.
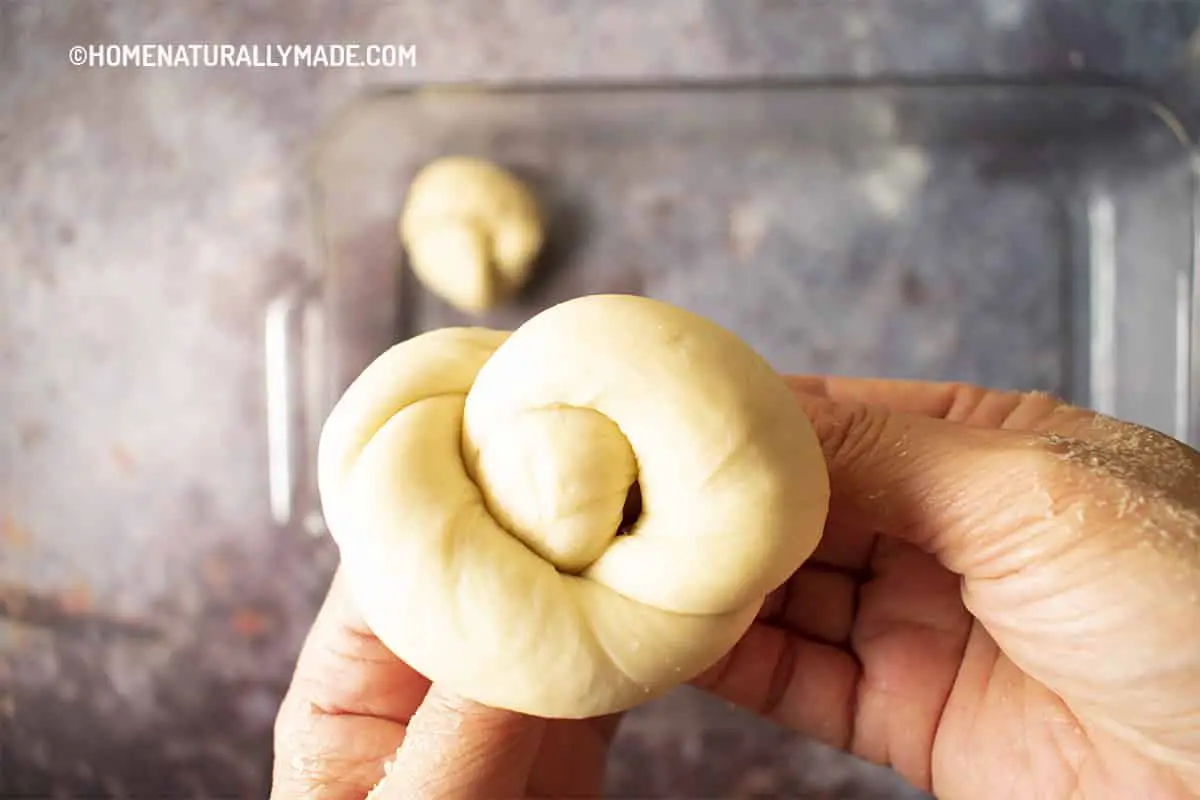
9). With the less dominant hand still holding on one end of the twisted dough strip, the other hand while still holding the dough, orbiting around the other end of the dough to make a full circle. Make sure the end position is beneath the circle, so that you can push the end upward out through the center hold.
Congratulations! You’ve just folded one bread roll. Repeat this to finish all 12 rolls.
Easy Milk Bread Rolls Using All-Purpose Flour
Home hand made Milk Bread Rolls using organic all-purpose flour is so fluffy and satisfyingly yummy. Perfect for breakfast, a side dish or a snack.
Ingredients
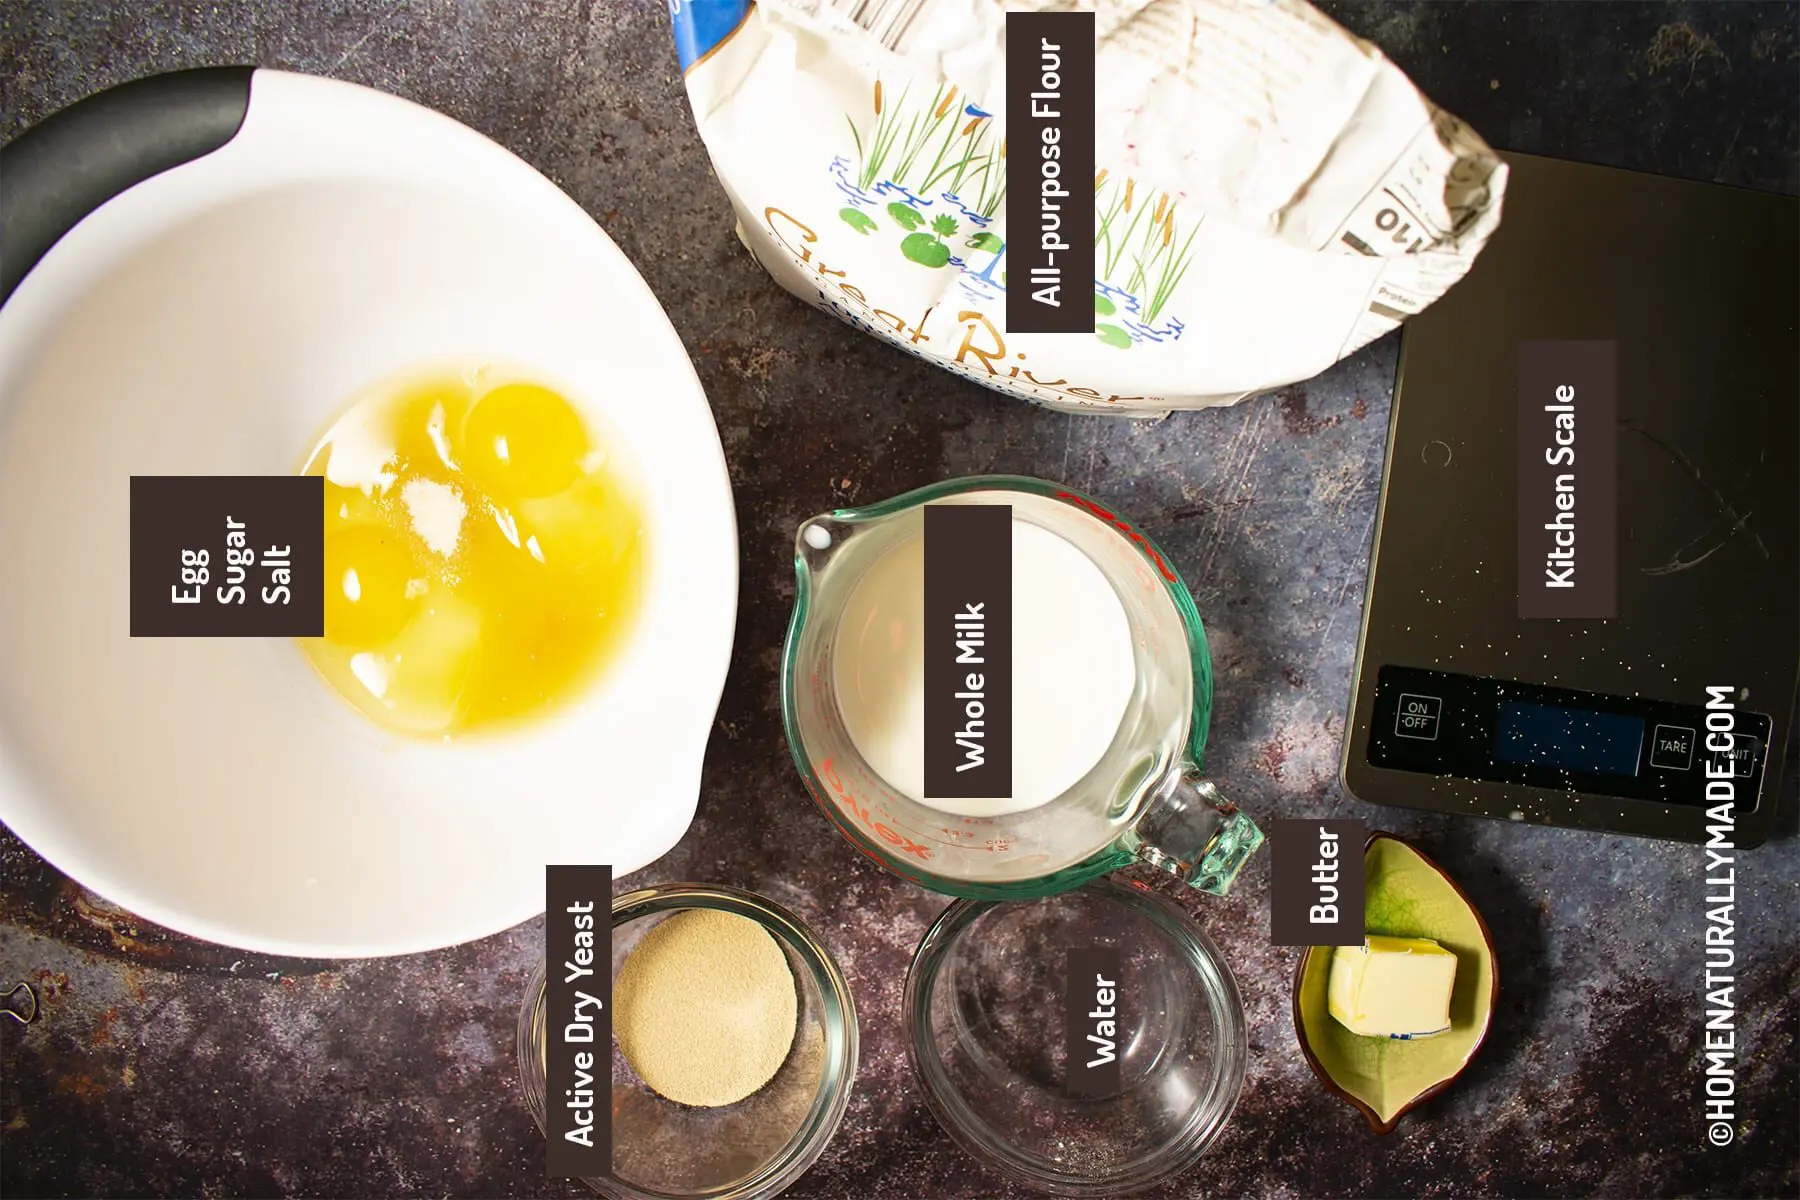
- 660 g all-purpose flour, organic preferred, about 4 cups
- 4 tsp active dry yeast
- 45 g room temperature water, about 3 tbsp
- 2 large eggs
- 50 g cane sugar, organic unrefined preferred, about 4 tbsp
- 1/2 tsp salt, Himalayan Pink Salt, or sea salt
- 300 g whole milk, about 1 1/4 cups, up to, see notes
- 25 g unsalted butter, organic preferred, about 2 tbsp
- 1/2 tsp organic coconut oil, for brushing the cooking pan
- 1 egg white, for coating the bread rolls
Instructions
Prepare a Stretchy Dough:
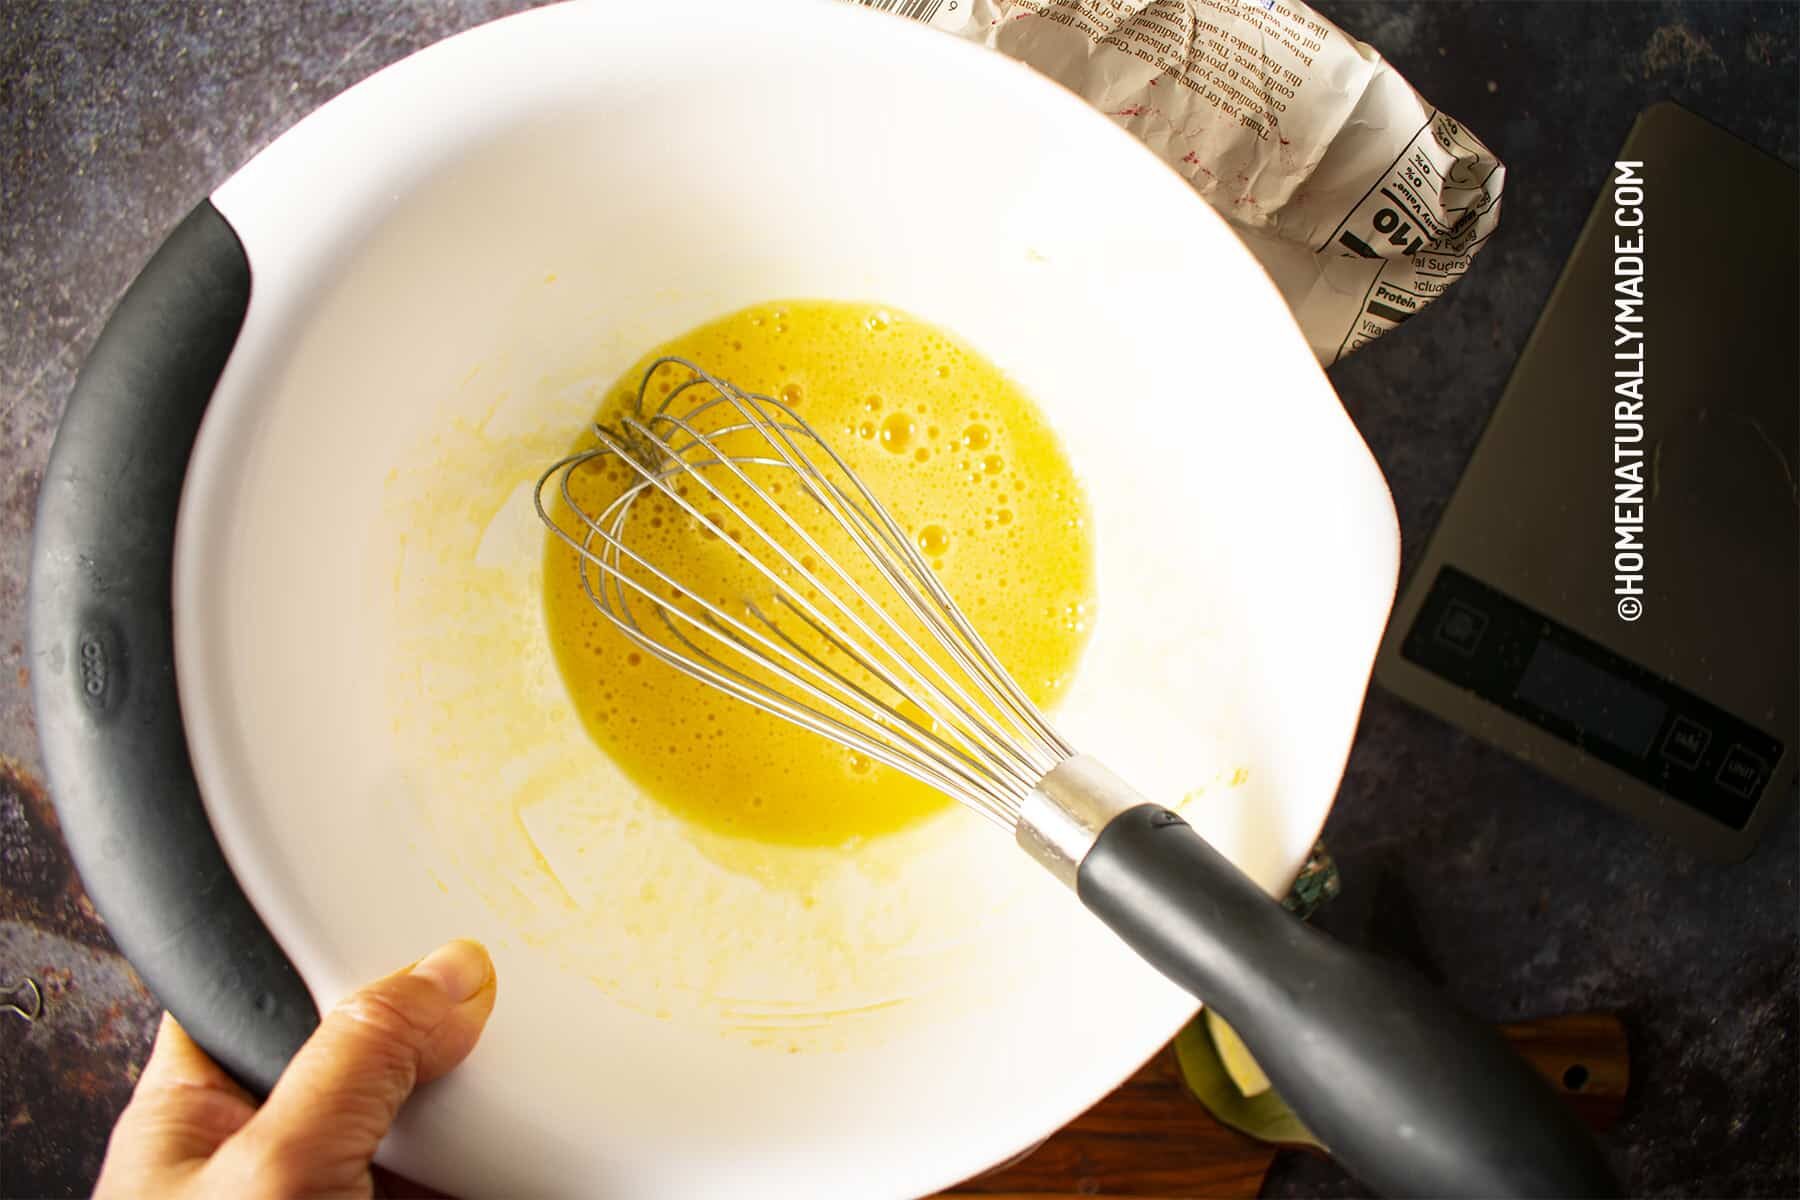
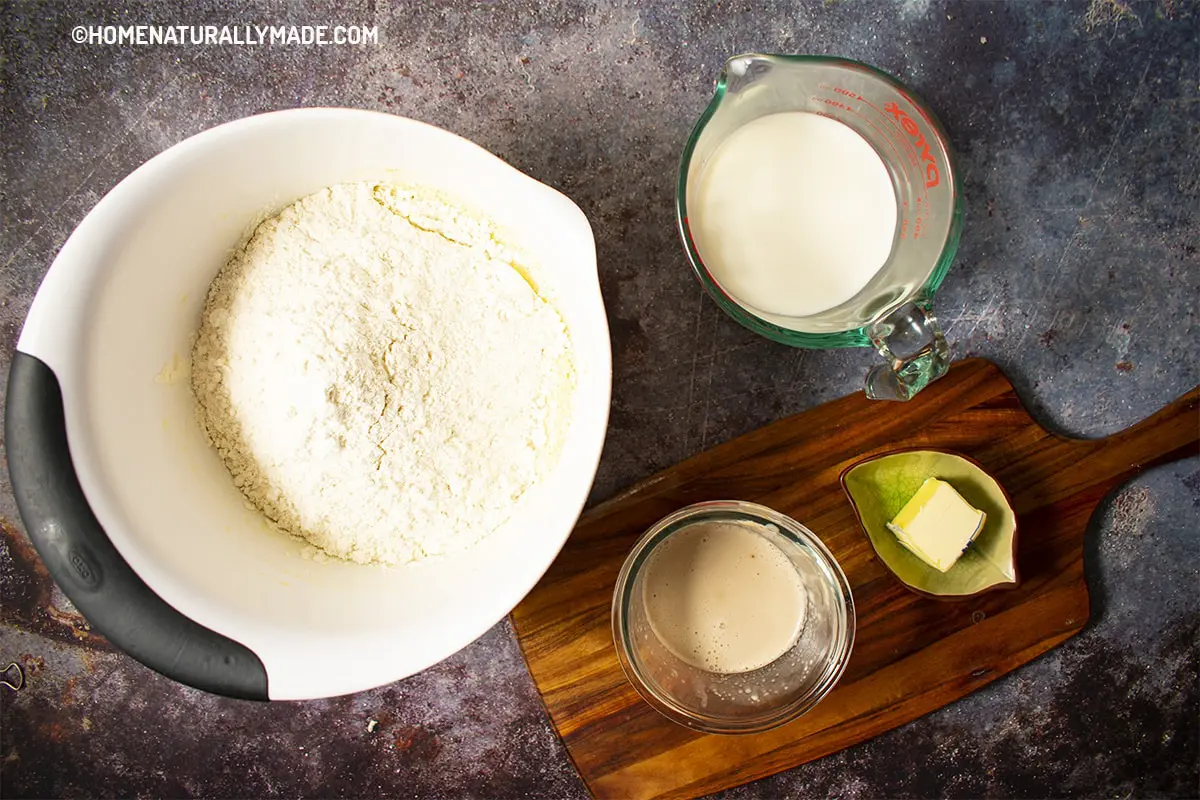
- Gather ingredients. Crack eggs into a mixing bowl, place the mixing bowl on a kitchen scale, measure out and add sugar and salt per the recipe by using the "TARE" function. See notes. Measuring milk and set aside in the measuring cup. Same for water and active dry yeast.

- Whisk vigorously using an egg whisk till egg, sugar and salt are fully blended in the mixing bowl
- Mix the active dry yeast with the water, patiently mix using chopsticks until the whole thing turn into a smooth paste.
- Place the mixing bowl back on the kitchen scale and measure out and add 660 g flour.

- Make a well in the middle. Gradually add milk from the measuring cup while folding and kneading, until forming a slightly sticky dough. Go extra slow when you have little milk left in the cup, few drops at a time. Depending your environment humidity levle, you may not need the entire 300 g milk.
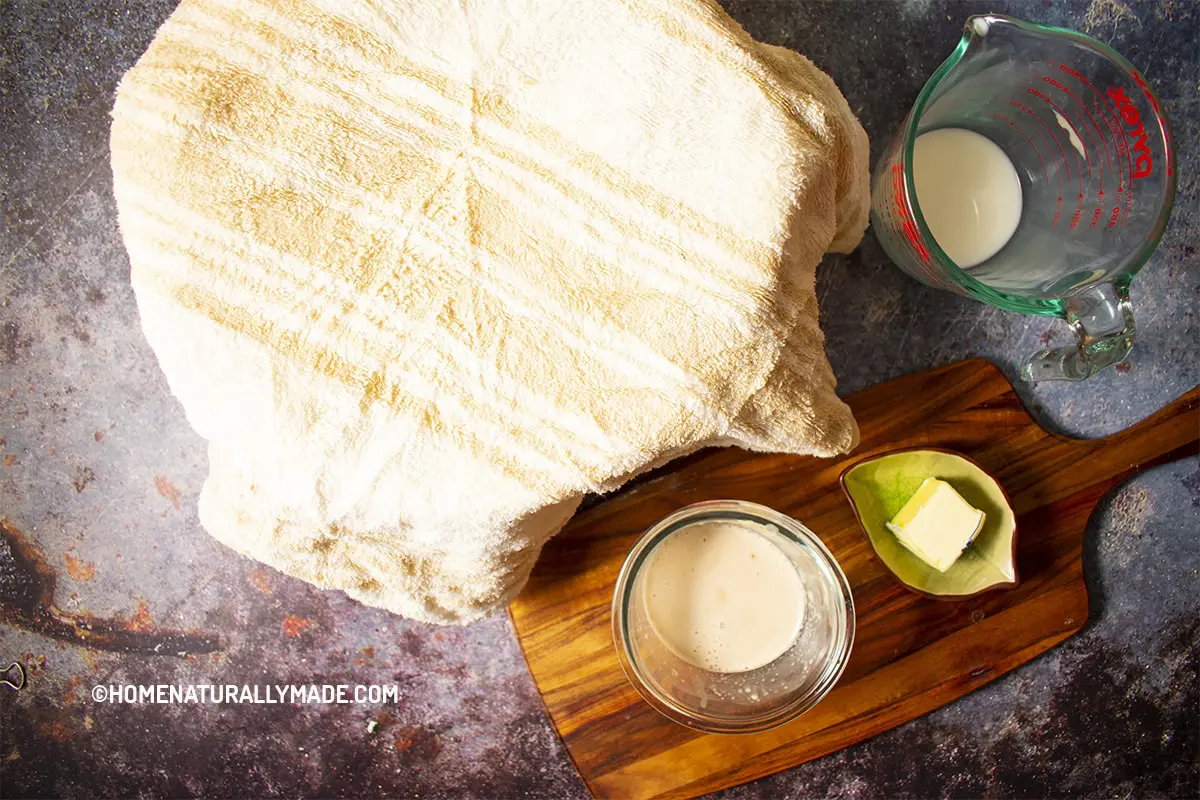
- Cover the mixing bowl with a damp kitchen towel, and let it rest at room temperature until the dough becomes extremely stretchy, about 2 hours when the surrounding environment is between about 65° F - 70° F or 18° C - 21° C. See notes.
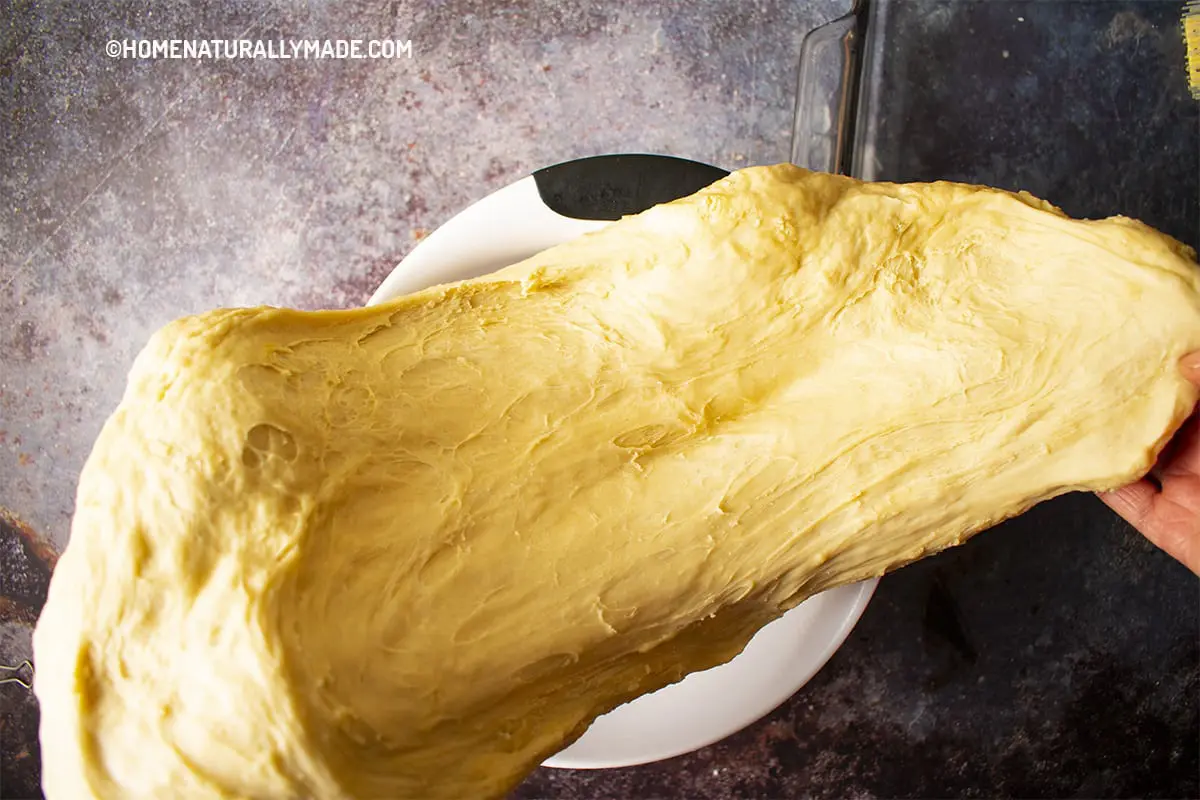
- You know the gluten in the flour is fully activated when you can stretch out the dough into a thin film and wrap around your hand like a glove. This means the dough is ready for next step.

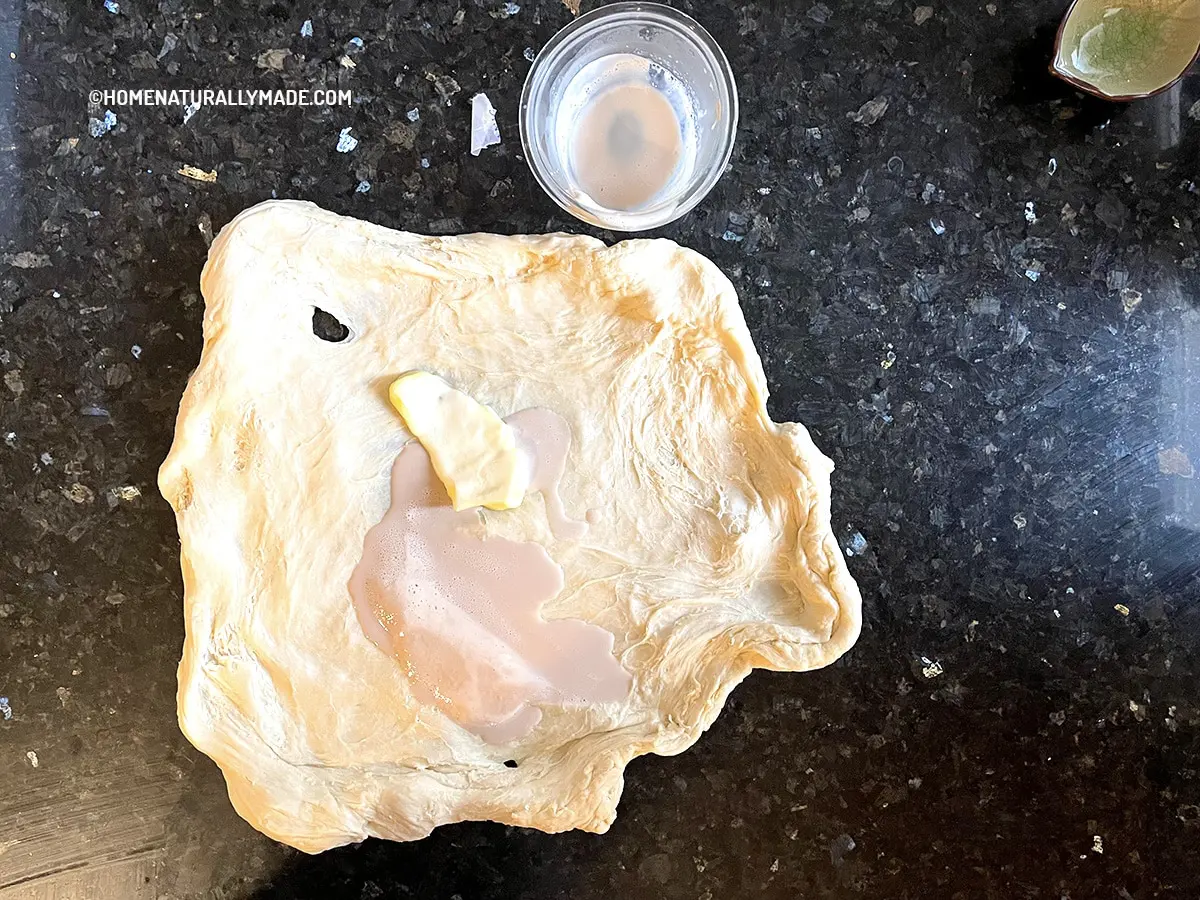
Add Active Dry Yeast Paste and Butter and Work On the Dough:
- Spread out the dough on the countertop, add active dry yeast paste and butter.

- Fold the dough to contain all the active dry yeast paste and butter, press down aiming to distribute the active yeast paste and butter across the dough.
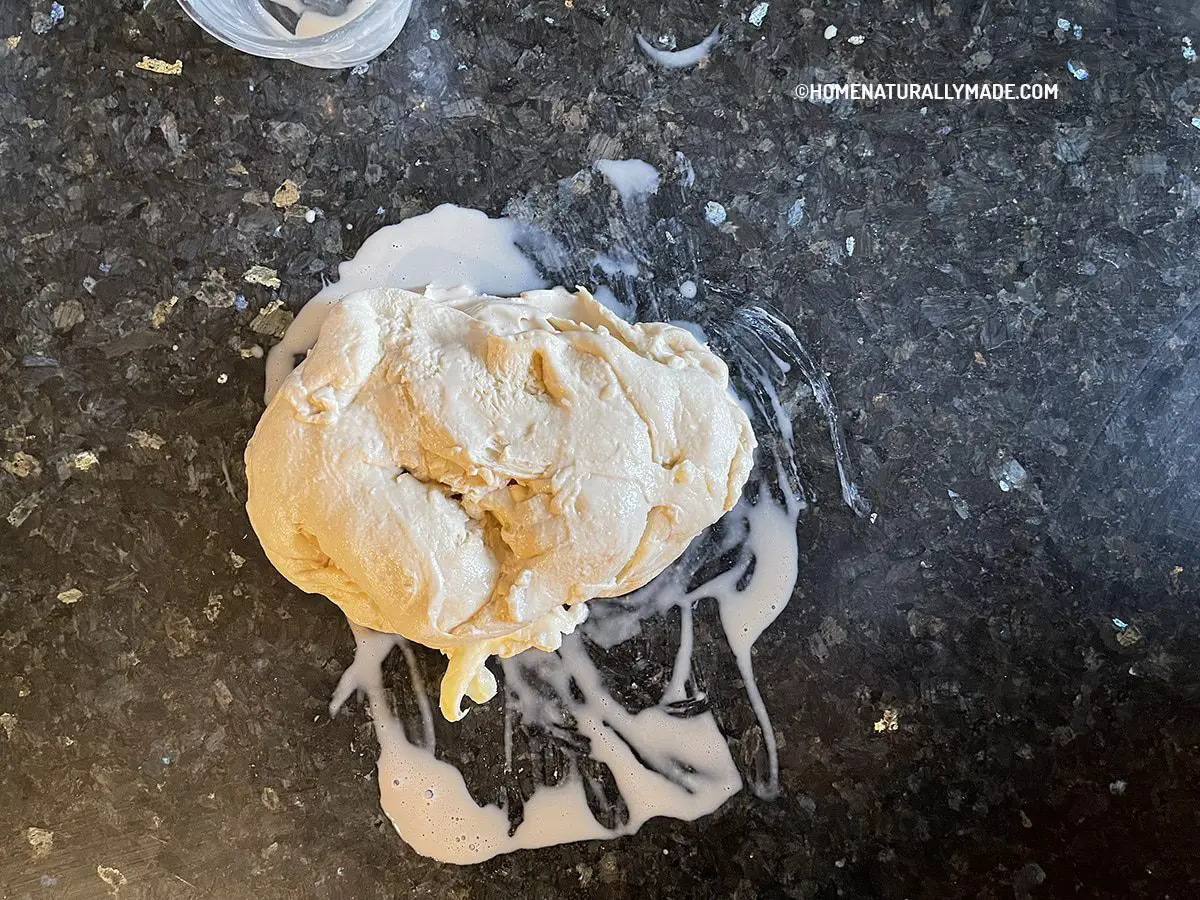
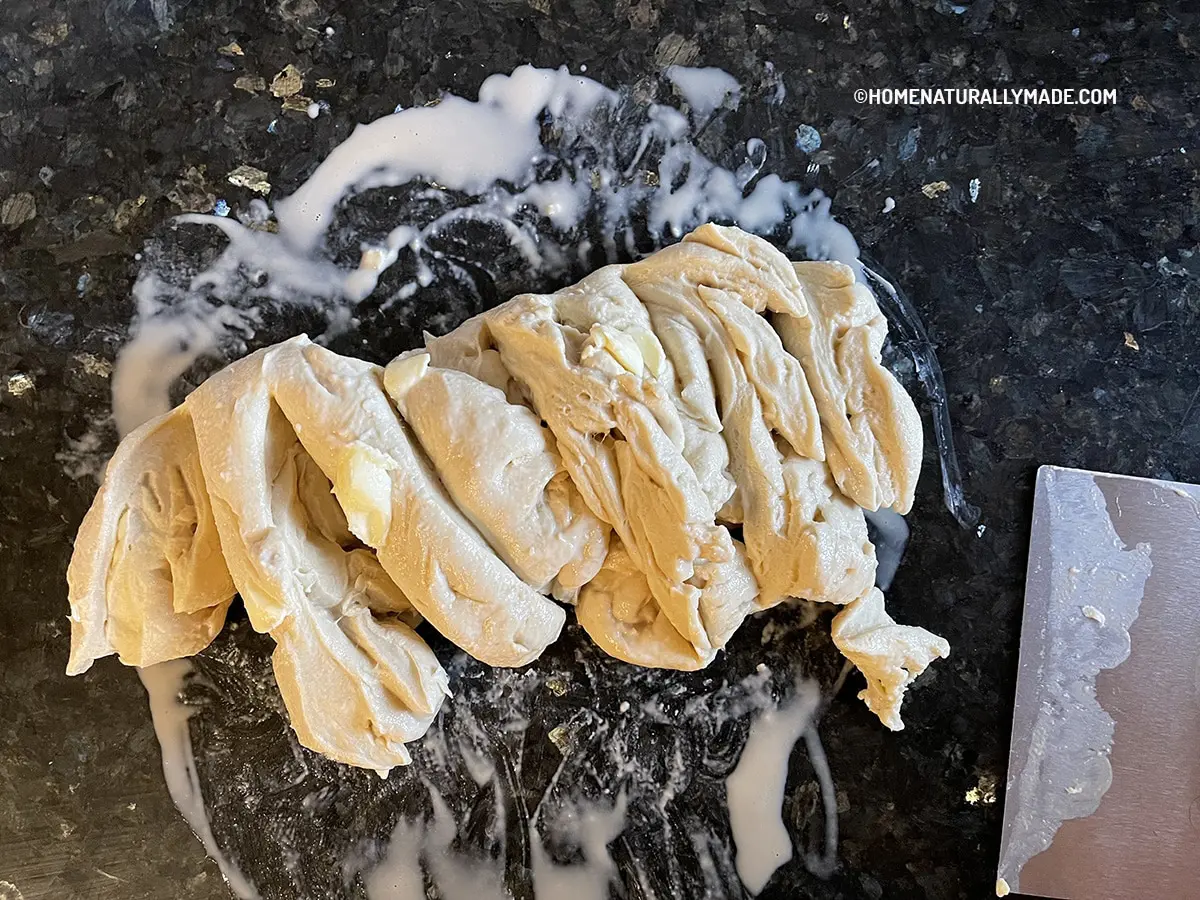
- Spread and stretch out as much as you can and then chop down on the dough into chunks using a dough cutter. It is OK if still visibly see chunks of butter and over-spilled active yeast paste.
- Press all dough chunks together and knead into a one piece.
- Repeat above two steps a few times until you do not see chunks of butter and over-spilled active yeast paste anymore. Don't worry about the sticky layer of butter/dough mixture on the countertop, which will get absorbed into the dough in the next step.
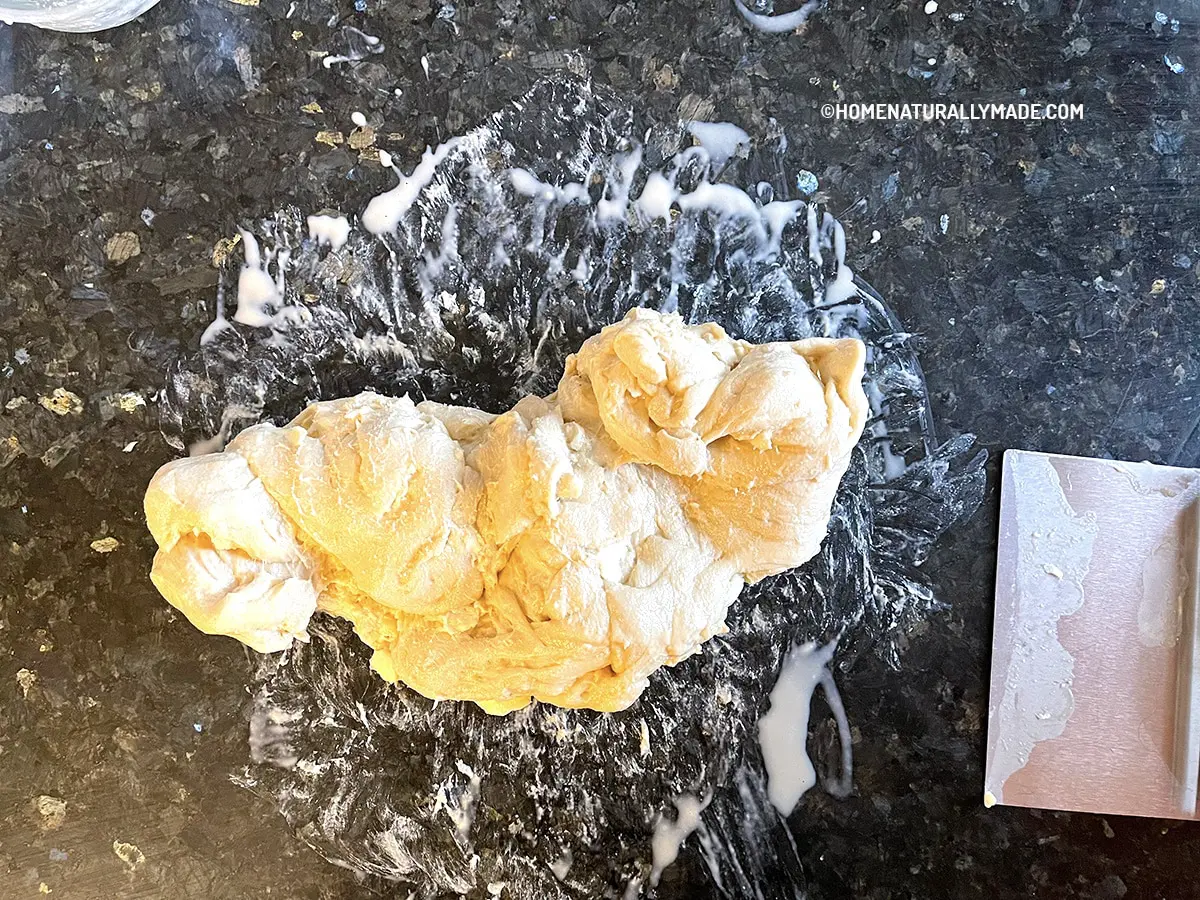
- Hold one end of the dough, and slap the dough hard on the countertop. Purposely slap into the area where there is a layer of butter/dough mixture. As you slap, the dough picks up the mixture along the way.
- The dough was initially sticky, as you keep slapping, it becomes smooth and soft.
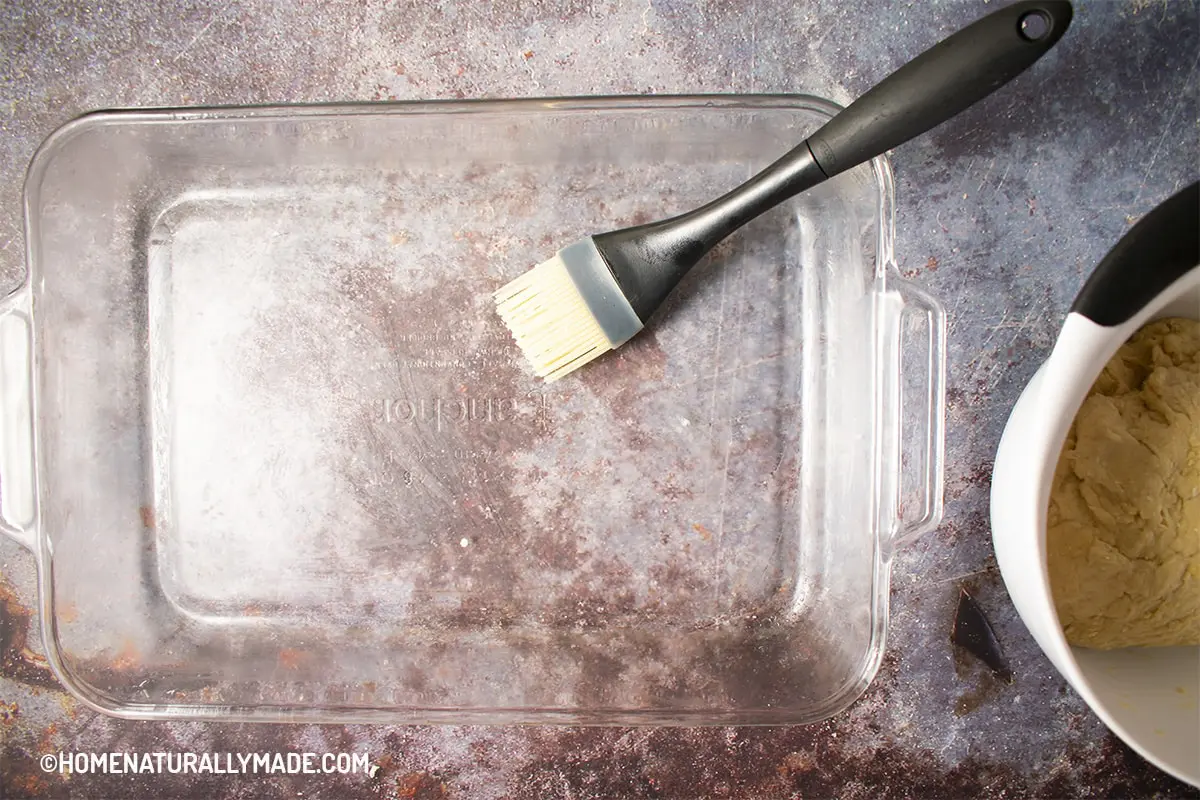
- Coat a 11-inch x 15-inch glass baking pan with a thin layer of coconut oil using a soft kitchen brush.
Fold the Bread Rolls:
- Roll the soft and fluffy dough into a long cylinder and divided the dough into 12 equal portions, each portion weighs about 96 grams.
- For each portion, knead into a ball and then press using hands into a slab.
- Using a rolling pin to roll out the slab into a thin sheet.
- Starting from one end of the dough sheet, roll the sheet into a cylinder roll.
- Using a rolling pin to flatten the cylinder shaped dough into a long strip. Each hand holding on one end of the dough strip, pull on opposite directions to stretch and prolong the dough strip.
- With each hand hold on to one end of the dough strip, twist the dough strip.
- With the less dominant hand still holding on one end of the twisted dough strip, the other hand, while still holding the dough, orbiting around the other end of the dough to make a full circle. Make sure the end position is beneath the circle, so that you can push the end upward out through the center hold.
- Congratulations! You’ve just folded one bread roll. Repeat this to finish all 12 rolls.
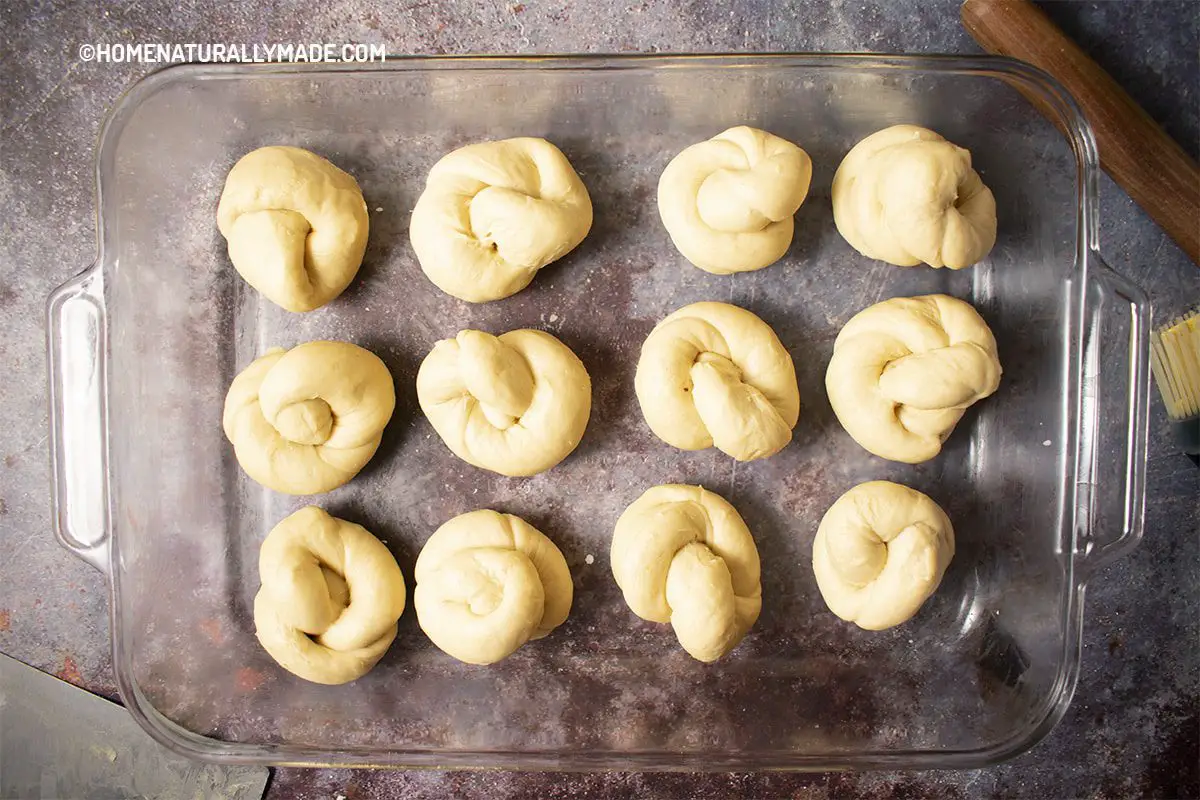
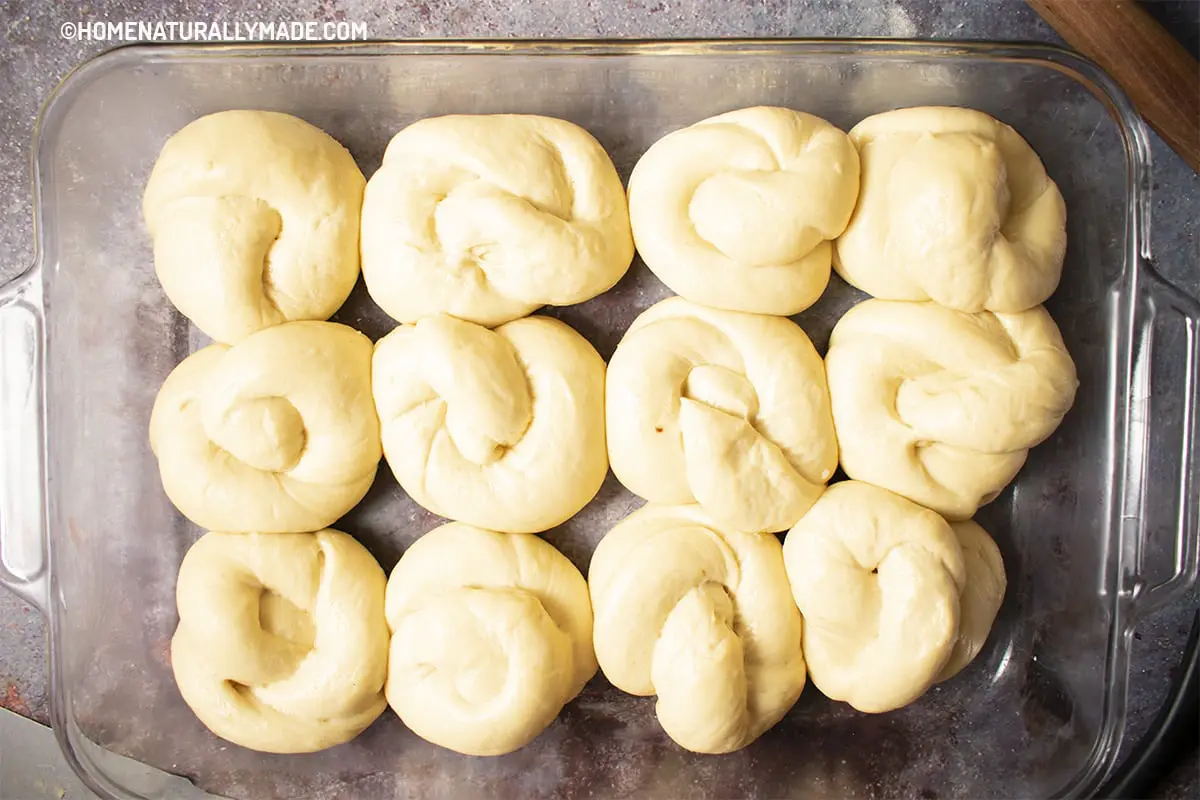
Proof and Bake the Bread Rolls
- Place the baking pan in an enclosed area such as the oven and let it rest for about 2 hours. You will need less time during summer or when the surrounding temperature is higher. The bread rolls doubles its size over the time. Make sure you do not over-proof the dough.
- Remove the properly proofed bread rolls from the oven. Turn on the oven, "bake" mode and set the temperature for 350° F.
- Use the same soft kitchen brush and gently coat the top of the bread rolls with egg white liquid. Whisk the eggwhite first and try to use conservatively so that it doesn't overly drip down onto the baking pan.
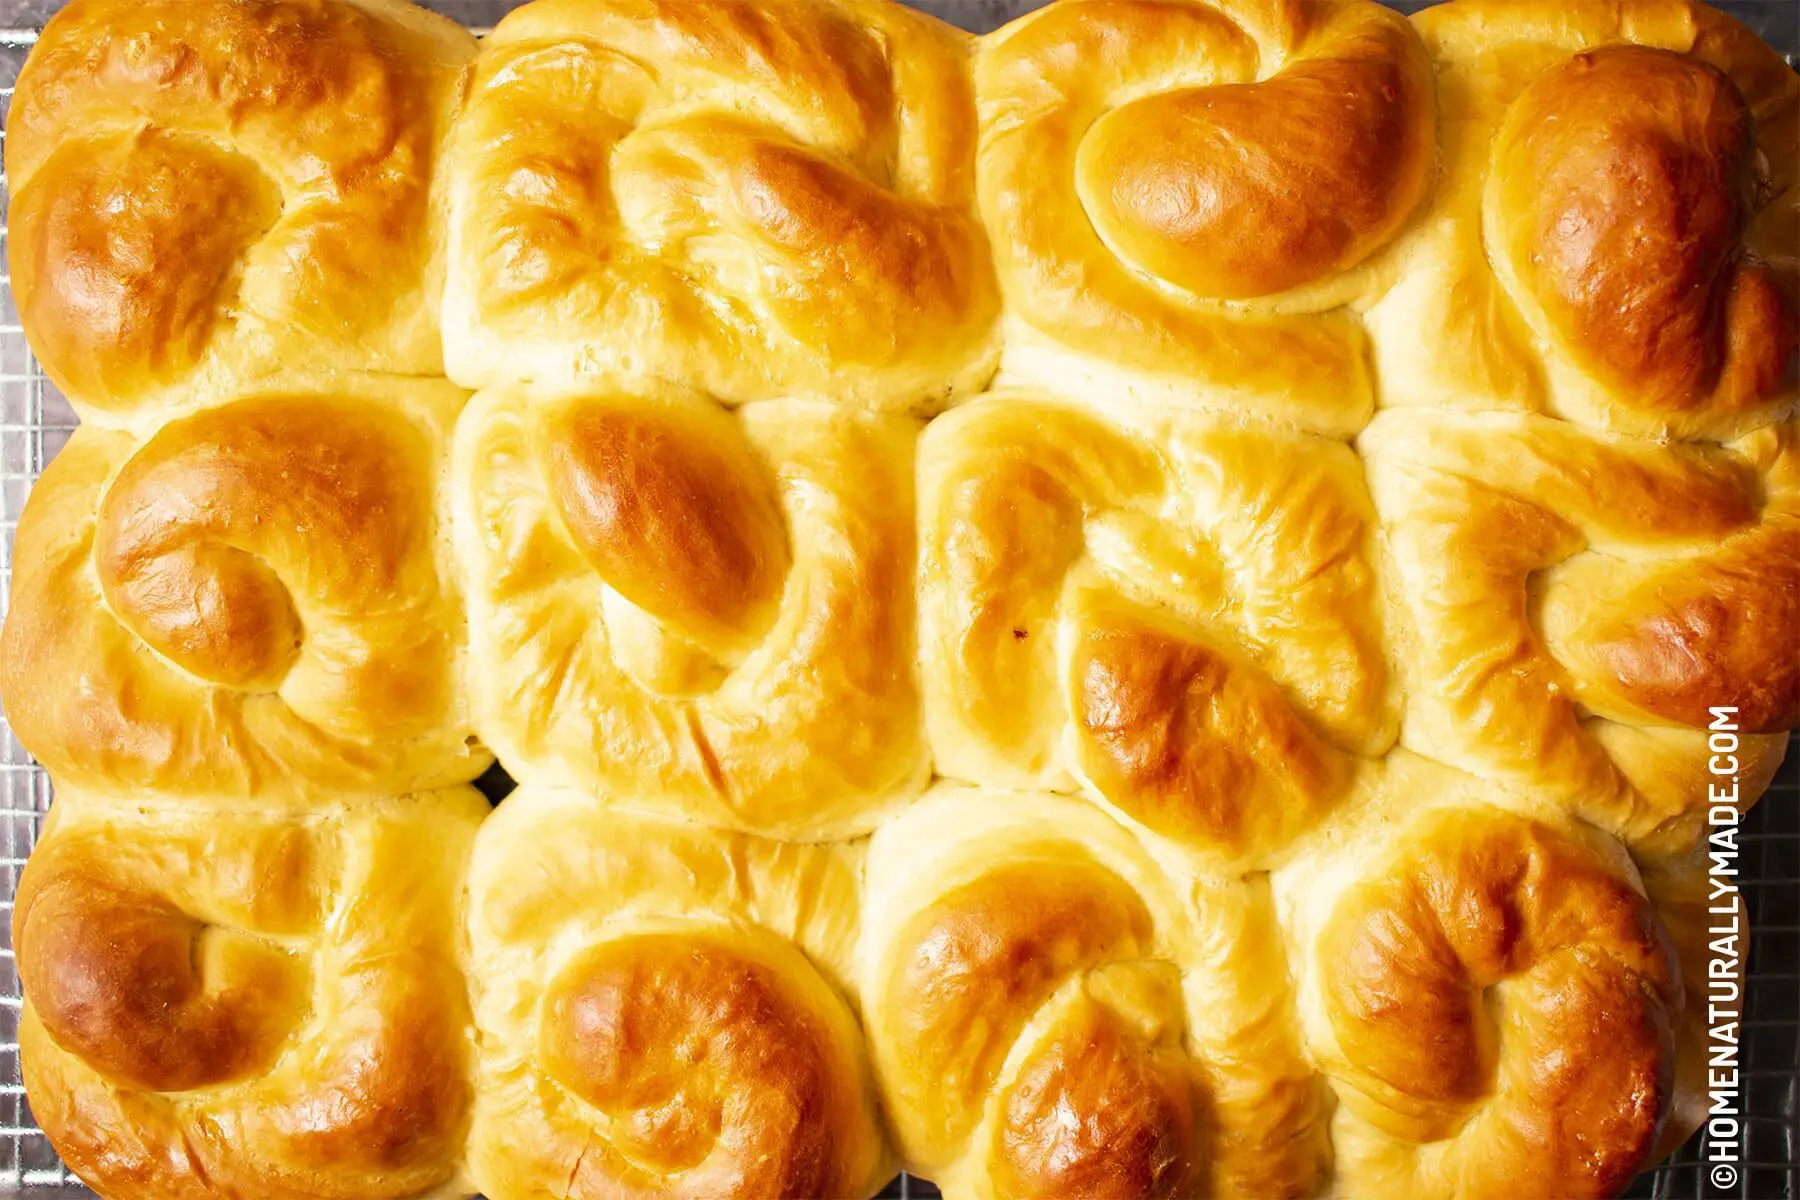
- Bake for 30 minutes. By the end of 30 minutes. Turn off the oven and let the bread rolls rest in the oven for additional 10 minutes.
- Remove the bread rolls from the oven and let them cool on a wire rack.
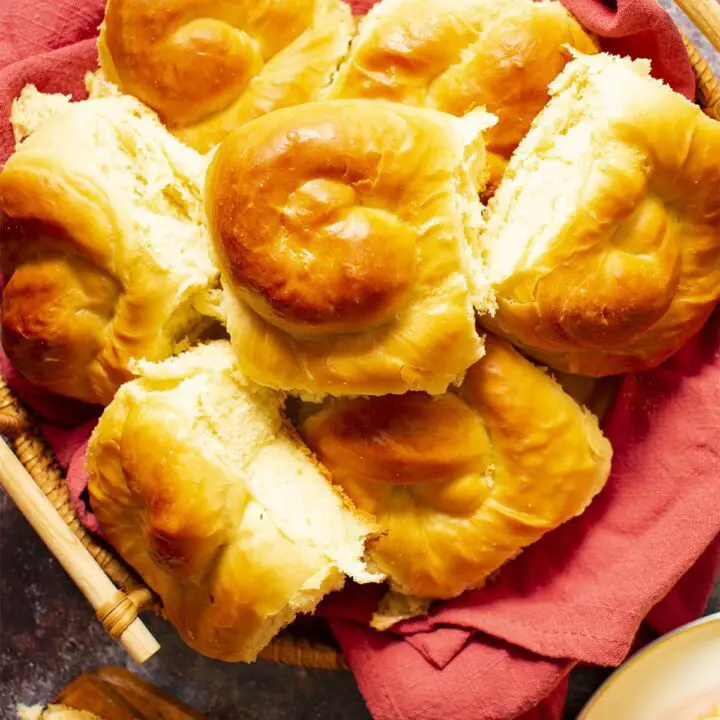
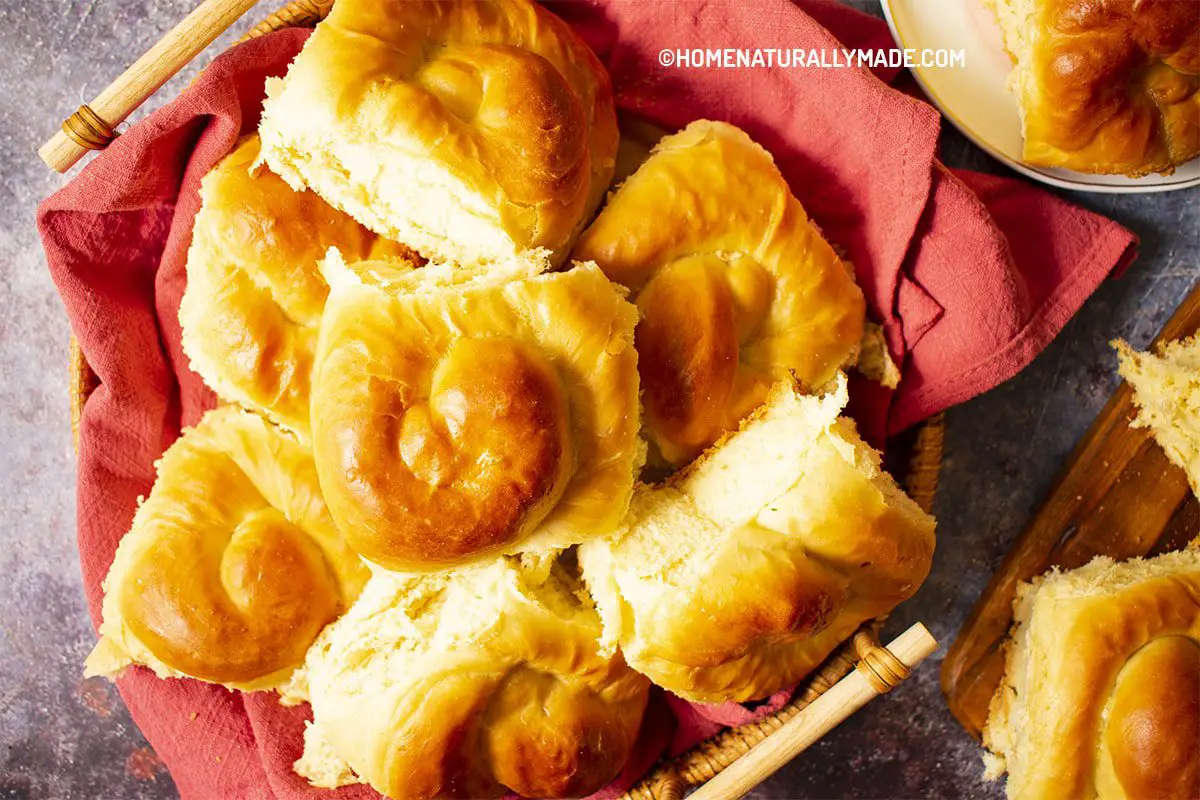
- Enjoy a super soft and yummy Milk Bread Roll!
Notes
- For resting the dough to activate the gluten inside the flour, if the temprature is way above 70 degree Fahrenheit (21 degree Celsius), such as close or above 80 degree Fahrenheit (26 degree Celsius), the dough may only need 30 minutes. On the other hand, if the temperature is way below 65 degree Fahrenheit (18 degree Celsius), the dough may need as much as 3-4 hours.
- You may need about 300 grams or {1 1/4 cups} of milk depending on the surrounding environment humidity level. Add the last 1/4 cup of milk slowly while mixing and kneading until you form a sticky dough. Keep in mind we want to form a sticky dough first.
- It is very important you make the dry active yeast paste and let it rest at room temperature while waiting on the dough to become stretchy. It is also important to take the butter out from the refrigerator from the very begging to let it get soften at room temperature.
- If the egg white dripped on the baking pan, it will make the bread rolls stick to the pan during the baking. To solve this, you can either use conversatively or place the bread rolls on a non-bleached parchment paper for baking.
Recommended Products
As an Amazon Associate, I earn a small amount of commission from the qualifying purchases.


Nutrition Information
Yield 12 Serving Size 1Amount Per Serving Calories 225Total Fat 4gSaturated Fat 2gTrans Fat 0gUnsaturated Fat 2gCholesterol 39mgSodium 106mgCarbohydrates 39gFiber 1gSugar 6gProtein 7g
Nutrition calculation is provided by Nutritionix to the best knowledge per ingredients description and isn't always accurate.