Table of Contents
I am always fond of French-style croissants, called “Yang Jiao Mian Bao {羊角面包}” in Chinese, which translates as “Goat Horn Bread”. Perhaps the shape of croissants resembles the goat horn. The layered buttery puff pastry with a semi-sweet savory flavor is simply unstoppable.
Nevertheless, they are notoriously difficult to make at home. That’s why I am beyond ecstatic to share my proven & tested recipe for homemade croissants. It is easier than you think once I break the process down.
Because making croissants requires precision and executing the plan according to the blueprint. I have sketched out the “how to make croissants at home” step-by-step diagrams. With this, along with the detailed tutorial, I can make croissants using organic wholesome ingredients any time I want! So can you.

Homemade Croissants Tips and Tricks
Almost all croissant recipes will label the difficulty level as “advanced”. True, it is a complex process involving 13 steps lasting about 5 hours. See below “Homemade Croissants Work Flow Diagram” for more details.

In addition, it is also a long process. To avoid the butter from getting too warm, you need to chill the dough in the fridge for 30 minutes between steps. Also, once you’ve done with the folding, it takes about 2 hours to rise.

Because of the lengthy process, some people suggested spreading the work to 3 days. I usually like to commit a full day to do it, starting early in the morning and being done in the afternoon.
How to Make a Perfect Dough for Croissant?
The croissant is a type of leavened puff pastry, therefore yeast is required. I have two ways of dough, one uses milk to mix the dough and uses more butter. The other uses water to mix dough and uses less butter. Both make tasty croissants. The latter is much lighter.
For yeast, you have the choice of active dry yeast or instant yeast. They usually work interchangeably. The only caveat is that for active dry yeast, you will have to dissolve the active dry yeast in room temperature water and turn it into a smooth paste first before mixing it with the flour. Whereas for instant yeast, you can mix the instant yeast powder directly with the flour.
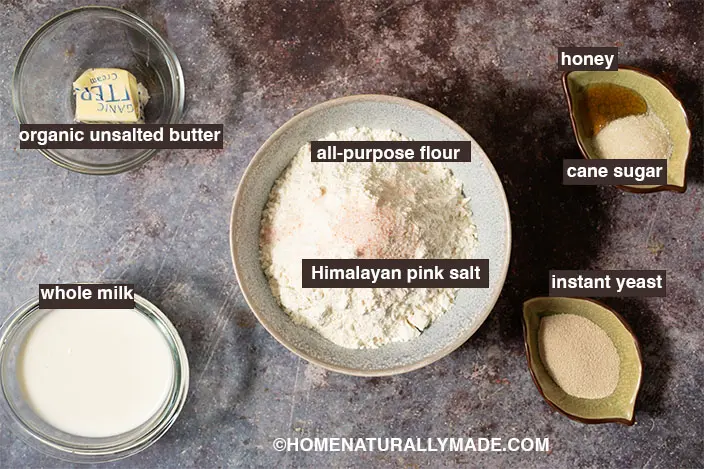
Using instant yeast would be easier for making croissants.
I like the iconic semi-sweet savory taste of croissants, therefore opt to use a tiny bit of honey, organic unrefined cane sugar, along with a pinch of salt. My favorite salt is Himalayan pink salt, which is perhaps the most natural wholesome nutritious salt on the planet.
Using a stand mixer to mix the dough is easier and more effective. In my kitchen, I use organic unbleached all-purpose flour, 2 cups are about 330 g. It matches 3/4 cup of whole milk, about 190 g.
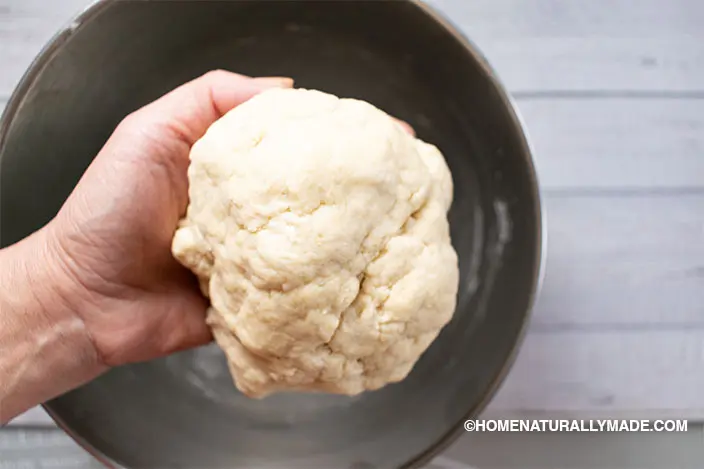
Add everything to the mixer and use a spatula to fold the liquid into the flour, and then set it to low and let it run for about 3 minutes. The dough should be very smooth and soft.
If you are using a different type of flour, I suggest adding milk gradually until you have a soft dough.
How to Encase the Butter for Homemade Croissants?
I use two ways to make butter blocks.
- The first one is to cut the butter into tiny cubes, envisioning the area of 12cm x 17cm, forming an even layer, and then pressing the layer to compact and flatten the butter.
- The second one is to soften the butter first and then cream with a splash of all-purpose flour. While it is in a creamy state, spread it out to an even layer of 12cm x 17cm area. Needless to say, this method uses a little bit less butter.
This set of stainless baking pans is especially handy for making croissants. I use the smaller one for making the butter block, and the larger one to bake croissants.
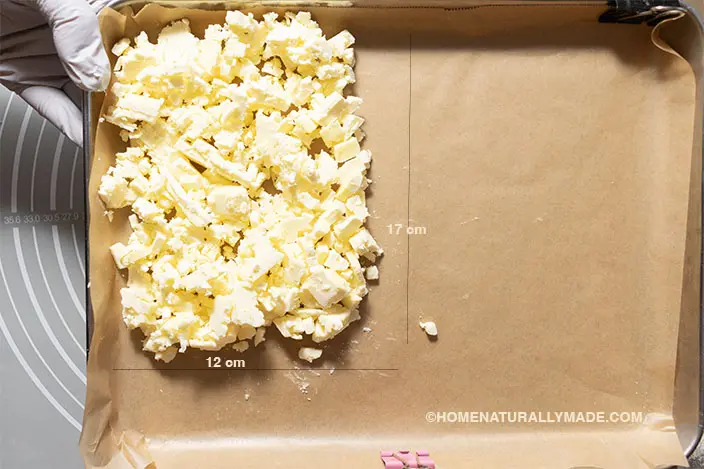
Layer the stainless pan with this heavy-duty unbleached parchment paper. Once you have the layer of butter or butter mixture, cover it with another piece of parchment paper. Using both hands to organize the corners, and using palms to firmly press down to compact the butter. Then level the butter flat by sweeping while pressing down hard using your thumbs.
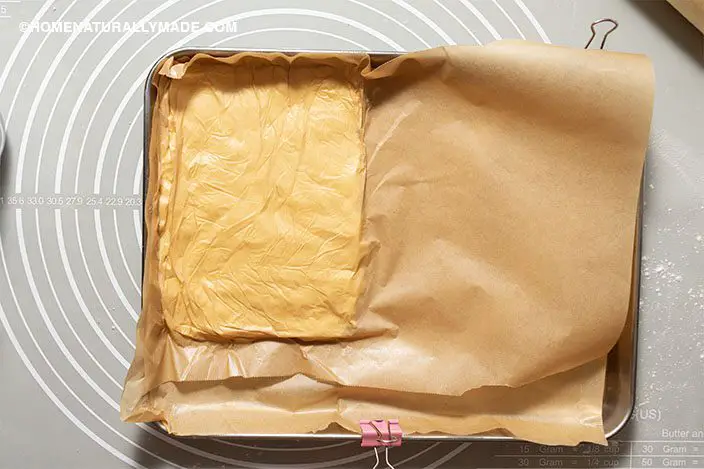
Try to make the butter block as smooth and level as possible. Take your time to press, organize the corners and sides, and then store it in the refrigerator.
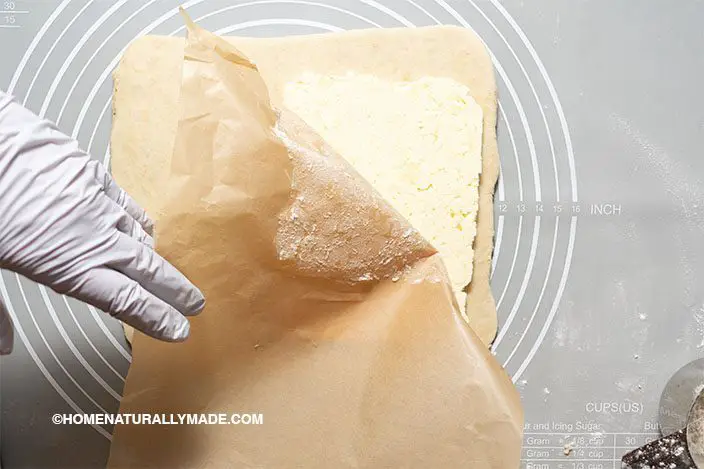
The dough should have almost doubled by now. Place it on a lightly floured dough mat.
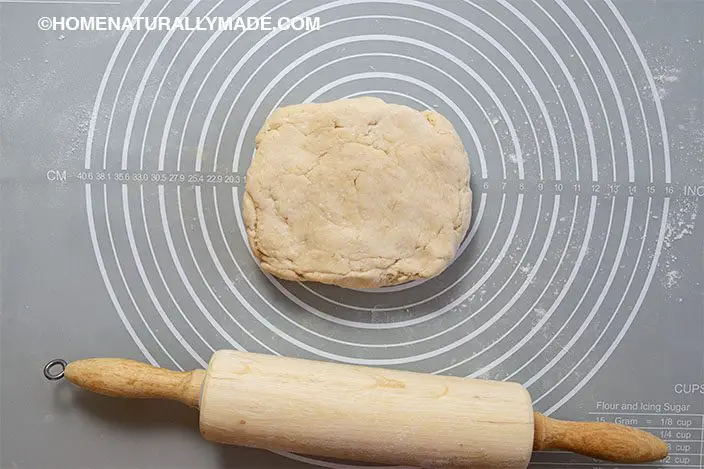
Use a heavy rolling pin to press down and gradually roll out to a rectangle. In terms of how to roll out a perfect rectangle, remember to organize the corners along the way. It also helps you start from the center and then roll out diagonally to four corners, and then roll across up and down in the center.
The goal is to roll out the dough to an approximately 25cm x 18cm {~10 x 7 inch} rectangle. See below “Homemade Croissant Diagram 1” for more details. This dough shall enclose the previously made butter block nicely. If you are not sure, just take the butter out of the refrigerator and compare the size.

Once you have the 25cm x 18cm {~10 x 7 inch} dough sheet, remove the butter block from the fridge and place it on one side, see the champagne-colored block in the above diagram. Then fold the other part of the dough sheet over to cover the butter. Last but not least, seal the edges and ensure the butter is completely sealed.
Now you shall have an approximate 12cm x 17cm {~5 x 7 inch} dough sheet with butter encased. Place this dough sheet in a ziplock bag and lay it flat in the refrigerator for 30 minutes before you proceed to fold the dough.
How to Fold the Dough for Making Homemade Croissants?
We altogether fold the dough twice, one quad-fold and one tri-fold or another quad-fold, and chill the dough for 30 minutes between each fold and afterward.

After 30 minutes, remove the dough sheet from the frige and lay it on the lightly floured dough mat. Let the short side (~ 12 cm) facing you. Using a similar technique to roll out the long side (~17 cm) to about 40 cm. See below “How to Make Croissants Diagram 2” for reference.

Find the center line, fold down the top part fold up the bottom part, and then fold over the center line. Now you shall have 4 layer-dough sheets, an approximately 12cm x 20cm rectangle. Store this dough sheet rectangle in the same ziplock bag and chill it in the fridge for 30 minutes.
After 30 minutes, remove the dough sheet from the fridge, flip the dough 90 degrees, and lay it flat on the lightly floured dough mat. Now the long side (20 cm) should face you. Using a similar technique to roll out the short side (~12 cm) to approximately 36 cm. See below “How to Make Croissants at Home Diagram 3” for your reference.

Imagine dividing the rectangle dough sheet’s long side into three equal portions. First, fold down the top 1/3, and then fold up the bottom 1/3 by overlapping each other. This is a tri-fold, also known as a letter fold. Now you have a rectangle dough sheet approximately 20cm x 12 cm.
Store the dough sheet in the same ziplock bag lay it flat in the fridge and let it chill for 30 minutes.
How to Cut the Puff Pastry Dough Sheet for Homemade Croissants?
This recipe makes 1.5 dozen (18) small European-style croissants. Each croissant uses an equilateral triangle dough sheet with a base of about 8 cm and a height of about 15 cm. See below “How to Make Croissant at Home 4” Diagram for more details.

Cut the dough sheet according to the yellow line in the diagram. Use a stainless dough cutter via an up-and-down chopping motion. Do not drag the dough sheet. It will be helpful to roll out the dough sheet on a floured dough mat.
- I usually first measure and mark the short side (30cm) of two center points and then connect the center line.
- Secondly, I then mark the 8cm, 16cm, 24cm, and 32 com points on both long sides (40cm).
- Lastly, I connect the two diagonal points and then cut accordingly.
How to Fold Homemade Croissants?
Make a small cut on the center of the equilateral triangle base. With the left hand (or less dominant hand) gently hold the triangle center to the dough mat, use the right hand (or dominant hand) to gently pull the dough sheet to stretch out the triangle bottom part just a little bit.
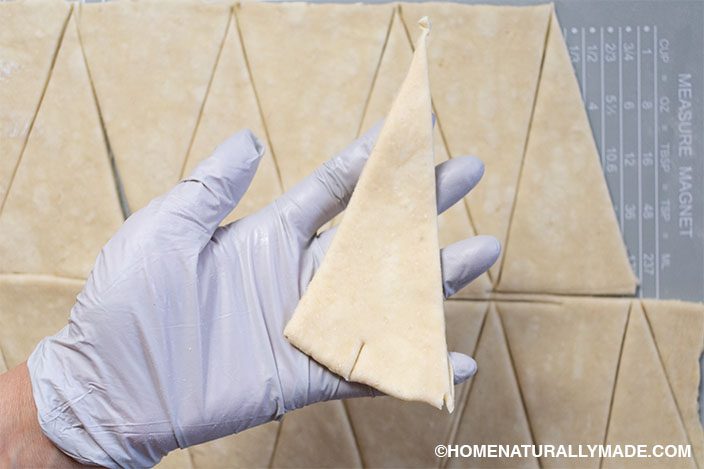
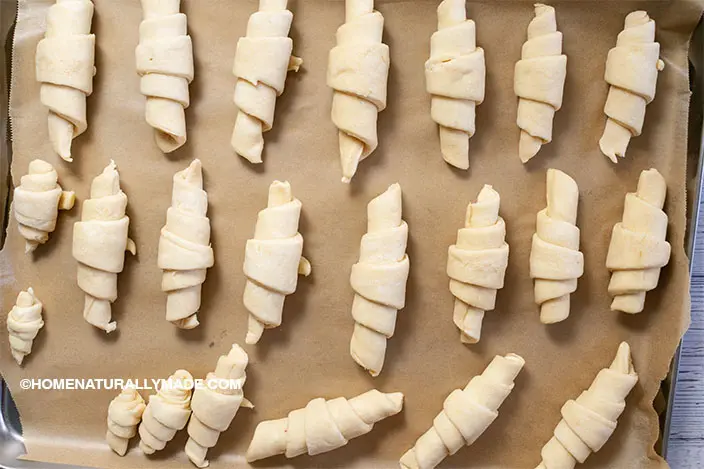
Then starting from the base, tightly roll up and place the roll on the parchment-lined baking pan. The end of the dough sheet should face down. The small cut on the base makes it easier to roll it tight. It also helps form this cute crescent shape.
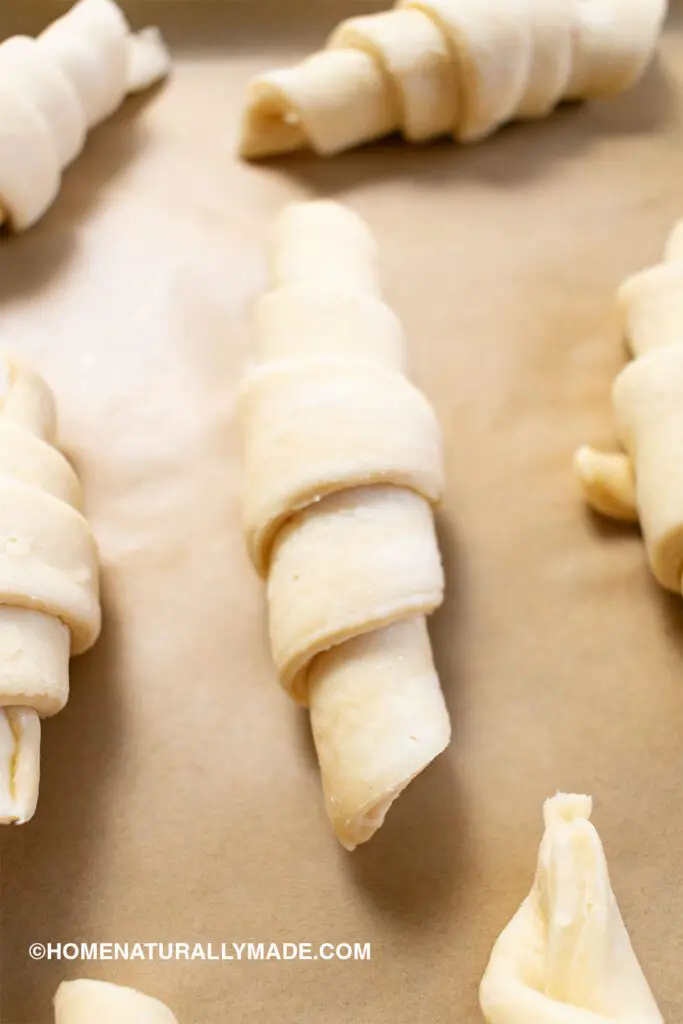
How to Bake Homemade Croissants?
After you’ve done with all the croissants, place the baking pan in a closed area, such as the oven to let it rise until it doubles its size. This usually takes about 2 hours.
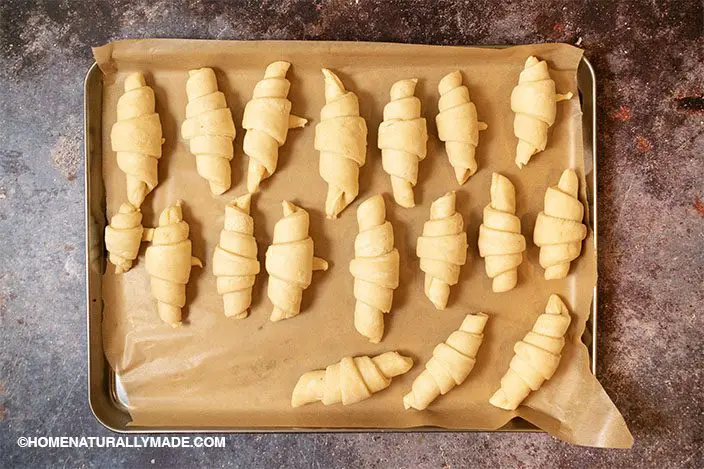
Remove the baking pan from the oven. Turn on the oven to bake and set to 400 F (205 C) degrees. While waiting for the oven, make the egg wash.
Add one large egg yolk and 1/2 tbsp milk to a small bowl, and whisk to blend. I usually use a pair of chopsticks to do so. Using only egg yolk instead of the whole egg gives the croissant a more pigmented golden/yellow color. Use an egg separator to separate egg yolk from egg white.

Use a pastry brush to gently dip the egg wash and apply to the croissants. Dab a small amount of egg wash at a time to avoid dripping. Feel free to repeat to have multiple coatings.
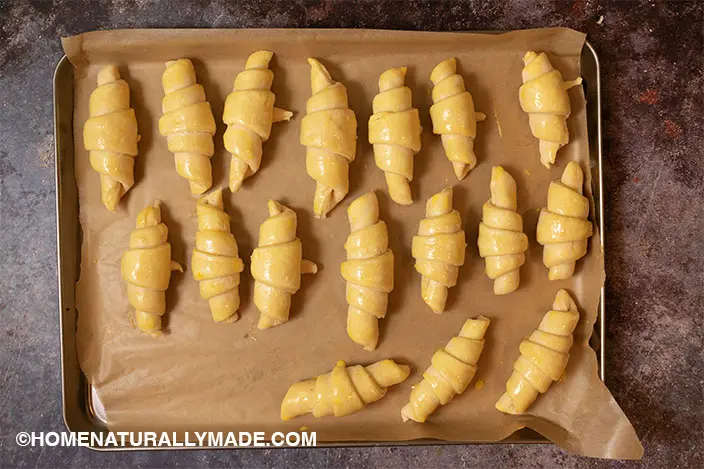
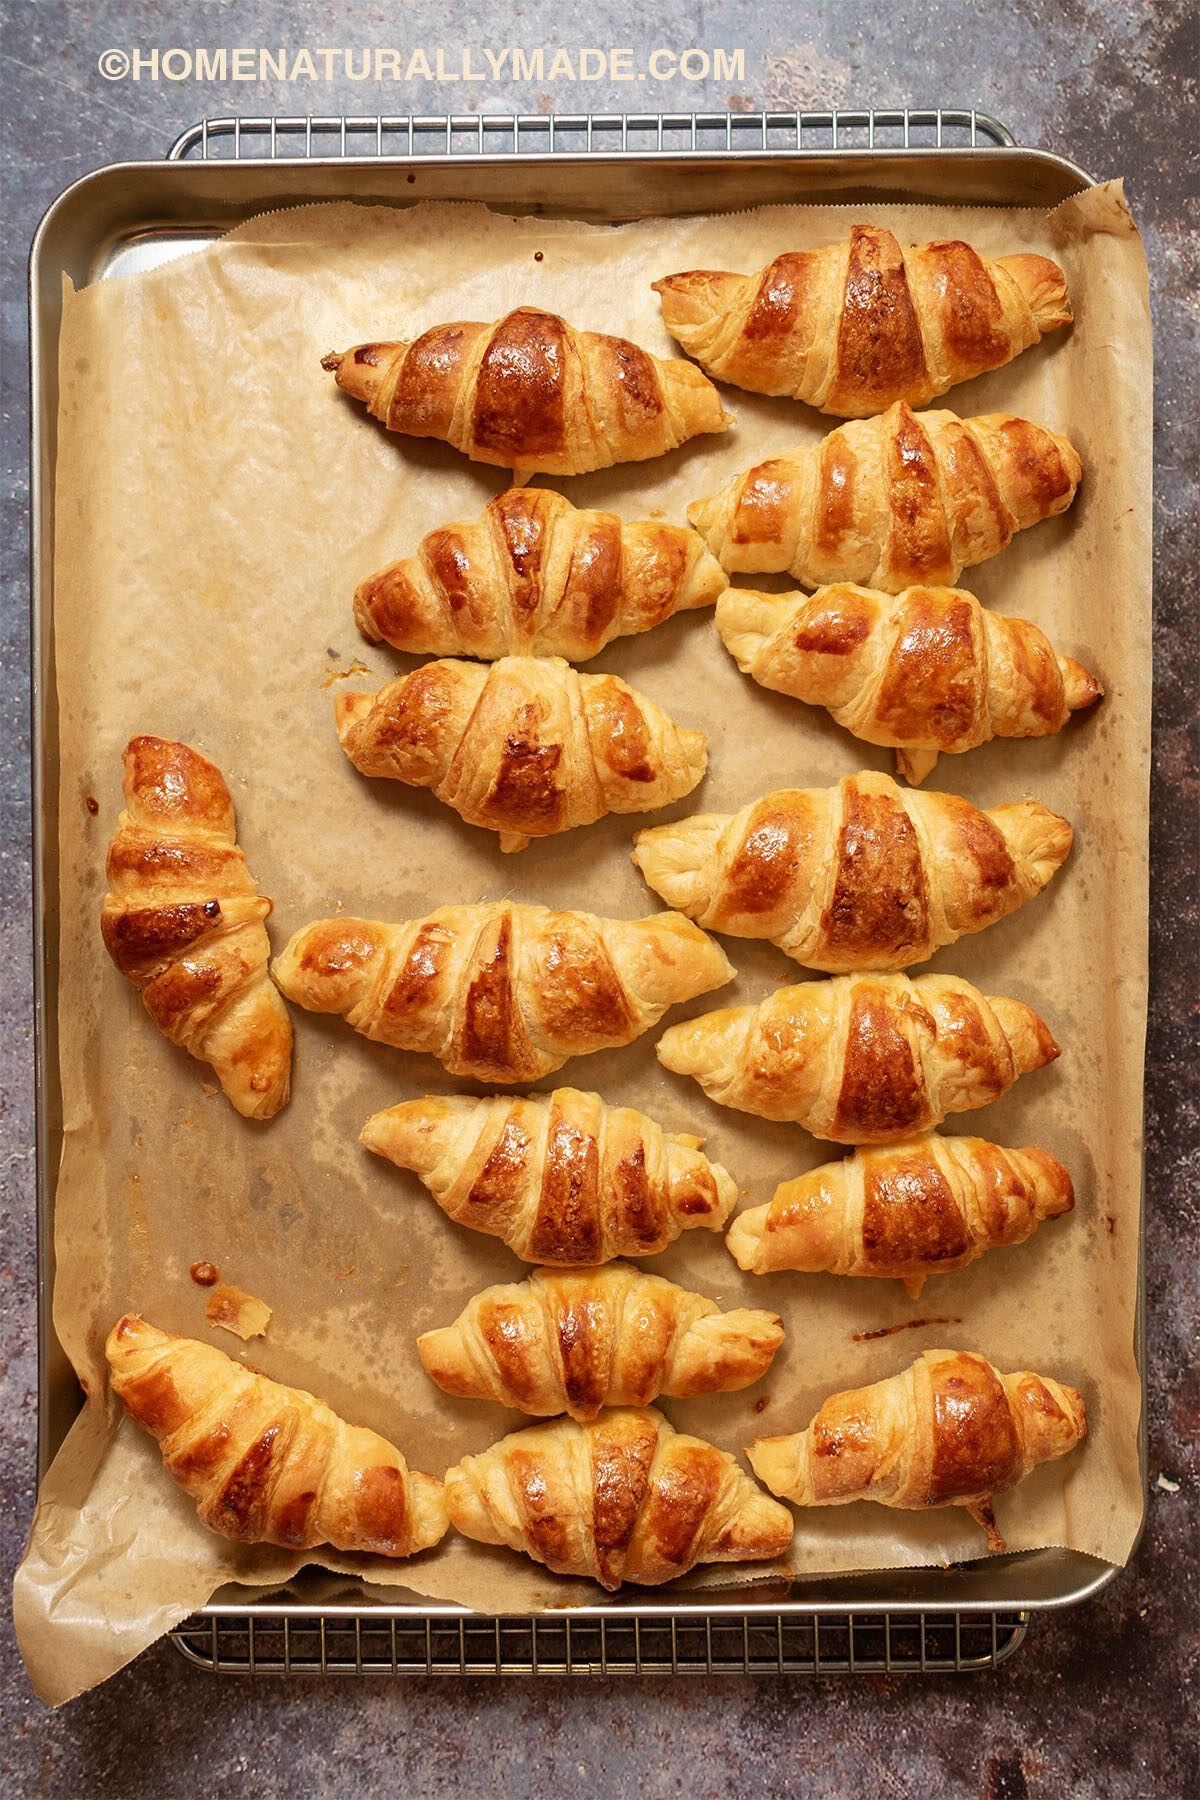
By now the oven should be ready. Place the pan in the middle rack, bake for 10 minutes at 400 F (205 C), and then reduce the temperature to 350 F (177 C) and bake for 20 minutes.
All done! Remove the pan from the oven, let it cool on the wired rack for about 20 minutes, and enjoy!
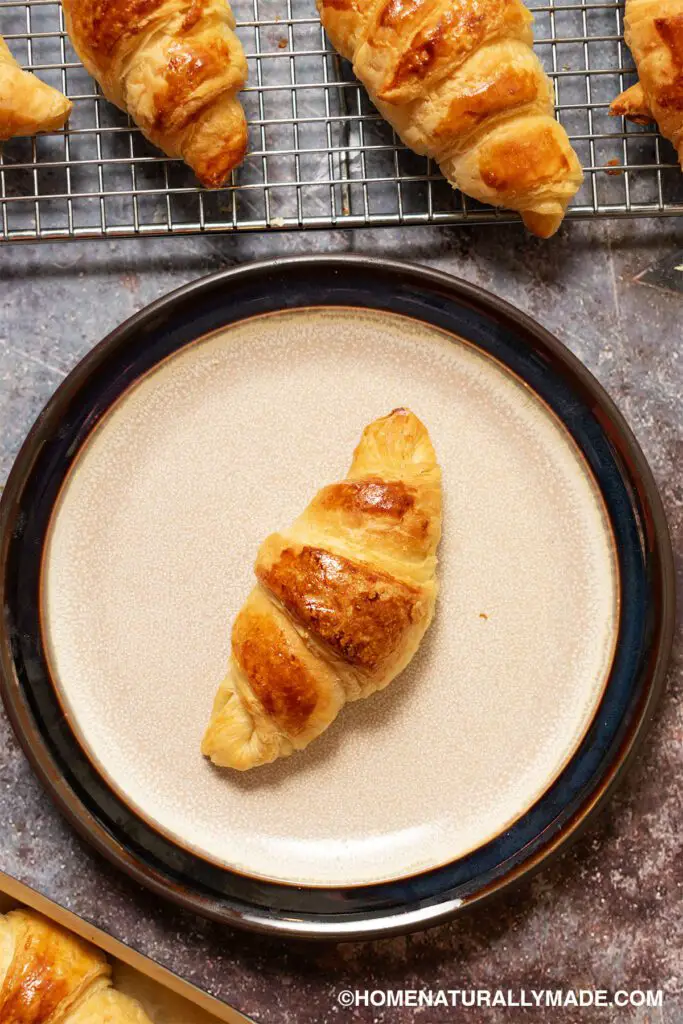

Homemade Croissants {Two Styles}
I am beyond ecstatic to share my proven & tested recipe for homemade croissants, two styles. One uses milk-based dough and more butter, and the other uses water-based dough and less butter. The former tastes more like European style, rich and satisfying; and the latter is more like American style, light and yummy.
Ingredients
Style 1- Croissants Using Milk-Based Dough and More Butter
- 330 g {2 cups} of all purpose flour, organic unbleached, 330 g
- 12 tbsp unsalted butter, organic {2 tbsp for the dough, 10 tbsp for making butter block}
- 220 g (a little under a cup) whole milk
- 12 g cane sugar, organic unrefined
- 5 g honey
- 2 tsp instant yeast
- 1/2 tsp salt, such as Himalayan pink salt
Style 2 - Croissants Using Water Based Dough and Less Butter
- 330 g {2 cup} of all purpose flour, organic unbleached
- 220 g water {a little under 1 cup}
- 1/2 tsp Himalayan pink salt
- 2 tsp instant yeast
- 25 g {2 tbsp} cane sugar
- 8 tbsp unsalted butter, organic
- 30 g {1/6 cup} all purpose flour, organic unbleached preferred
For Egg Wash:
- 1 large egg yolk
- 1/2 tbsp milk, whole milk
Instructions
Reference below the "How to Make Croissants at Home" diagram and familiarize yourself with the croissants-making process.

Make the Dough:
- 1 hour prior, put the 10 tbsp organic unsalted butter in the freezer to chill if you plan to make Style 1 Croissants, or leave 8 tbsp (1 bar) on the countertop for Style 2 Croissants.
- Gather ingredients for the dough: For milk-based use 2 cups of all-purpose flour, 2 tbsp butter (softened), 3/4 cup milk, 12 g cane sugar, 5 g honey, 2 tsp instant yeast, and 1/2 tsp salt. For water-based use 2 cups of all-purpose flour, 1 cup water, 25 g cane sugar, 2 tsp instant yeast, and 1/2 tsp salt.

- Add everything to a stand mixer bowl, using a kitchen scale to help measure the amount. Use a silicone spatula to fold the flour into the wet ingredients. Attach the mixer with the dough hook and turn the stand mixer to low, let it run for about 3 minutes, or till it forms a soft dough. If you are using a different type of flour, then add milk gradually.

- Cover the dough with a damp towel and let it rise and almost double its size. This takes 30 minutes to 1 hour, depending on the room temperature.
Make the Butter Block for Style 1 Milk-Based Croissant - More Butter
- Remove the butter from the freezer and cut and slice into small cubes.
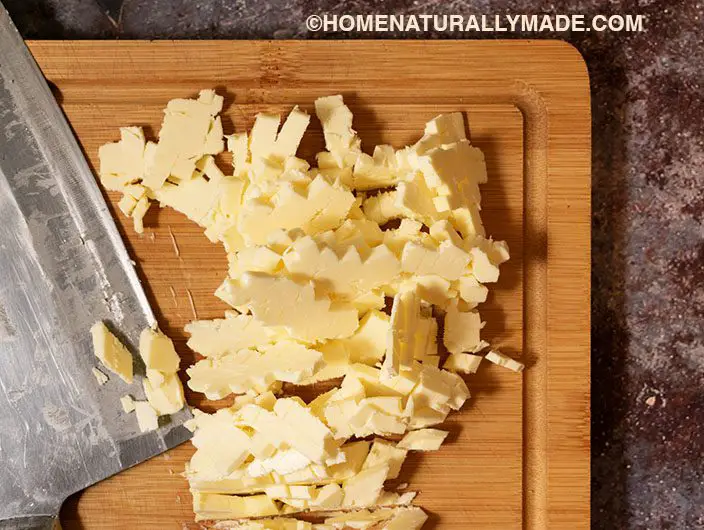
- Line the small stainless steel baking pan with the unbleached parchment paper. Eyeball the area of 12cm x 17cm, and then pile it with an even layer of tiny butter cubes.

- Cover the butter with another piece of parchment paper, and then use both palms to press down to compact the butter. Remember to organize the corners and sides along the way to maintain a 12cm x 17cm rectangle shape. Also, level the butter by sweeping while pressing down using your thumbs.

- Place the baking pan in the fridge to chill.
Make the Butter Block for Style 2 Water-Based Croissant - Less Butter
- Add the softened butter to a glass mixing bowl, along with 30 g flour, and whisk to cream. If the butter is not softened enough, then add it to the microwave for 20 seconds.
- Line the small stainless steel baking pan with the unbleached parchment paper. Eyeball the area of 12cmx17cm, and then spread the butter/flour mixture into an even layer.
- Cover it with another piece of parchment paper, and then use your hands to press and flatten to compact the block. Remember to organize the corners and sides along the way to maintain a 12cm x 17cm rectangle shape. Try to level it on the surface.
- Place the baking pan in the fridge to chill.
Encase The Croissant Dough:
- Once the dough has almost doubled its size, place it on a lightly floured dough mat.

- Use a heavy rolling pin to press down and gradually roll out to a rectangle of 25cm x 18cm. See the below Diagram for your reference. In terms of how to roll out a perfect rectangle, remember to organize the corners along the way. It also helps you start from the center and then roll out diagonally to four corners, and then roll across up and down in the center.

- Once you have the 25cm x 18cm dough sheet, remove the butter block from the fridge and place it on one side, see the champagne-colored block in the above diagram. Then fold the other part of the dough sheet over to cover the butter. Last but not least, seal the edges and ensure the butter is completely sealed. Now you shall have an approximate 12cm x 17cm dough sheet with butter encased. Place this dough sheet in a ziplock bag and lay it flat in the refrigerator for 30 minutes before you proceed to fold the dough.

Fold the Croissant Dough:
- We altogether fold the dough twice, one quad-fold and one tri-fold, and chill the dough for 30 minutes between each fold and afterward.

- After 30 minutes, remove the dough sheet from the fridge and lay it on the lightly floured dough mat. Let the short side (~ 12 cm) facing you. Using a similar technique to roll out the long side (~17 cm) to about 40 cm. See below “How to Make Croissants Diagram 2” for reference.

- Find the center line, fold down the top part fold up the bottom part, and then fold over the center line. Now you shall have 4 layer-dough sheets, an approximately 12cm x 20cm rectangle. Store this dough sheet rectangle in the same ziplock bag and chill it in the fridge for 30 minutes.

- After 30 minutes, remove the dough sheet from the fridge, flip the dough 90 degrees, and lay it on the lightly floured dough mat. Now the long side (20 cm) should face you. Using a similar technique to roll out the short side (~12 cm) to approximately 36 cm. See below “How to Make Croissants at Home Diagram 3” for your reference.

- Imagine dividing the rectangle dough sheet's long side into three equal portions. First, fold down the top 1/3, and then fold up the bottom 1/3 by overlapping each other. This is a tri-fold, also known as a letter fold. Now you have a rectangle dough sheet approximately 20cm x 12 cm. Store the dough sheet in the same ziplock bag lay it flat in the fridge and let it chill for 30 minutes.

Cut the Croissant Dough Sheet and Fold the Croissants:
- This recipe makes 1.5 dozen (18) regular-sized croissants plus 4 haves. Perfect to bake in the larger stainless baking pan. Line the baking pan with a heavy-duty parchment paper.
- Each croissant uses an equilateral triangle dough sheet with a base of about 8 cm and a height of about 15 cm. See below “How to Make Croissant at Home 4” Diagram for more details.

- Gradually roll out the dough sheet from 20cm x 12 cm to 40cm x 30cm using a gentle but firm technique, and make sure not to let the butter leak out of the dough.
- Use a dough cutter to measure and mark the short side (30cm) of two center points and then connect the center line. Then measure and mark the 8cm, 16cm, 24cm, and 32 com points on both long sides (40cm). Lastly, I connect the two diagonal points and then cut accordingly per the yellow lines in the Diagram.

- Each of the equilateral triangles in the diagram makes one croissant. For the halves, you can either assemble them into 2 croissants or make a mini croissant out of the half croissant sheet. If you make mini, place them in the lower rack during the baking as they take less time to bake due to their smaller sizes.

- Pick up one triangle dough sheet, and make a small cut on the center of the equilateral triangle base. With the left hand (or less dominant hand) gently hold the triangle center to the dough mat, use the right hand (or dominant hand) to gently pull the dough sheet to stretch out the triangle bottom part just a little bit. Not only this gesture helps rolling, it also facilitates the cooking and ultimately makes the croissants taste better as inner part of the croissants become more airy.

- Starting from the base, tightly roll up and place the roll on the parchment-lined baking pan. The end of the dough sheet should face down. The small cut on the base makes it easier to roll it tight. It also helps form this cute crescent shape.
- Repeat this until you've done with all croissants.
Proof and Bake the Croissants:
- Place the baking pan in the closed oven and let it proof to rise for 2 hours, or till it almost doubles its size.

- While waiting, make an egg wash. Separate egg yolk and egg white and place the egg yolk in a small bowl. Add 1/2 tbsp milk and use a pair of chop sticks to whisk to blend & combine. Set it a side.

- At the end of 2 hours, or till the croissants have doubled their size, remove the baking pan from the oven. Turn the oven on to 400 F (205 C) to preheat the oven.
- While waiting, use a soft pastry brush to dab the egg wash and gently brush over the croissants. Do not try to get too much egg wash at a time. Rather, two multile rounds of thin layers.

- By now the oven should be ready. Place the pan in the middle rack, bake 10 minutes at 400 F (205 C), and then reduce the temperature to 350 F (177 C) and bake for 20 minutes.
- All done! Remove the pan from the oven, let it cool on the wired rack for about 20 minutes and enjoy!
Notes
- I recommend using two types of rolling pins, the classic pin for easier pressing down the dough, and the extra-long wooden rolling pin to roll out the final dough sheet. The 17.7 inches (45cm) extra-long solid wood rolling pin is perfect for rolling out a consistent thickness dough sheet which is 30m x 40 cm.
Recommended Products
As an Amazon Associate, I earn a small amount of commission from the qualifying purchases.
-
 Organic Cane Sugar
 -
 17.7 Inches Wood Rolling Pin
 -
 Classic Wood Rolling Pin, 17.75-Inch, Natural
 -
 Kitchen Scale
 -
 Stainless Steel Dough Cutter
 -
 Non-slip Silicone Dough Mat Extra Large
 -
 KitchenAid Stand Mixer
 -
 Organic Unbleached All Purpose Flour
 -
 Organic Unbleached All Purpose Organic
 -
 Fleischmann's Instant Yeast
 -
 Heavy Duty Unbleached Parchment Paper Roll
 -
 Pure Stainless Steel baking Pan Tray Professional, Non Toxic & Healthy
Nutrition Information
Yield 18 Serving Size 1Amount Per Serving Calories 169Total Fat 8.2gSaturated Fat 5.5gTrans Fat 0gUnsaturated Fat 2.7gCholesterol 20mgSodium 132mgCarbohydrates 18.7gFiber 2.9gSugar 1.3gProtein 6.7g
