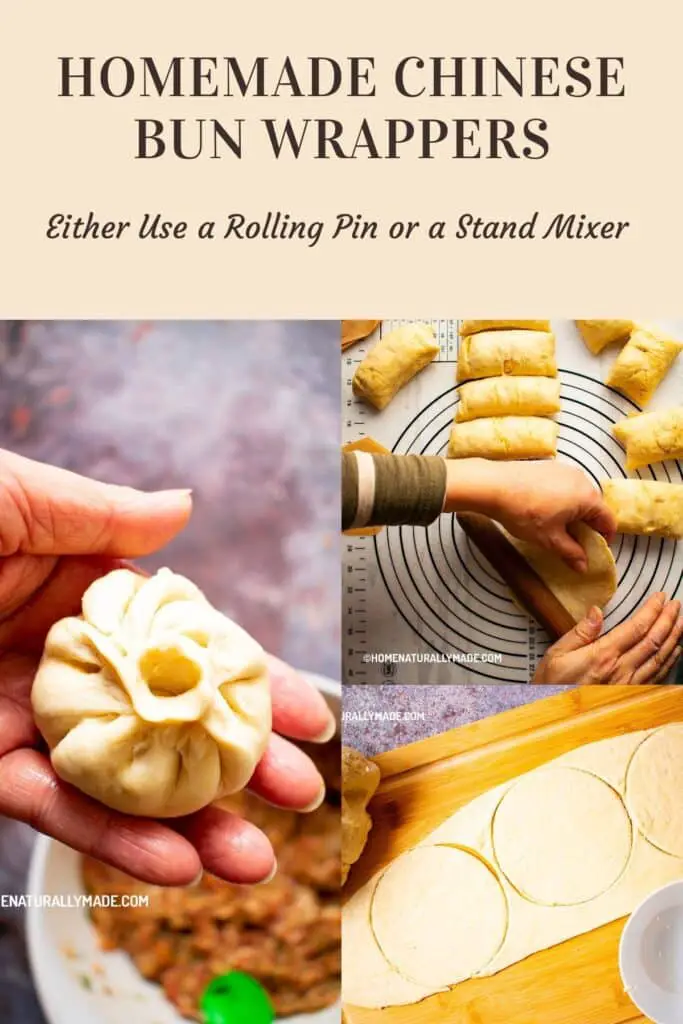
Table of Contents
Homemade Chinese Bun Wrappers for fluffy and yummy Chinese Buns are super easy, as long as you know a few tricks and tips. You can either do it traditionally, i.e. use a rolling pin to roll the wrapper one at a time, or do it modernly, i.e. use a stand mixer or pasta machine. I am going to show you both ways via a step-by-step tutorial.
First thing first is to make a fluffy yeast dough for Homemade Chinese Bun Wrappers
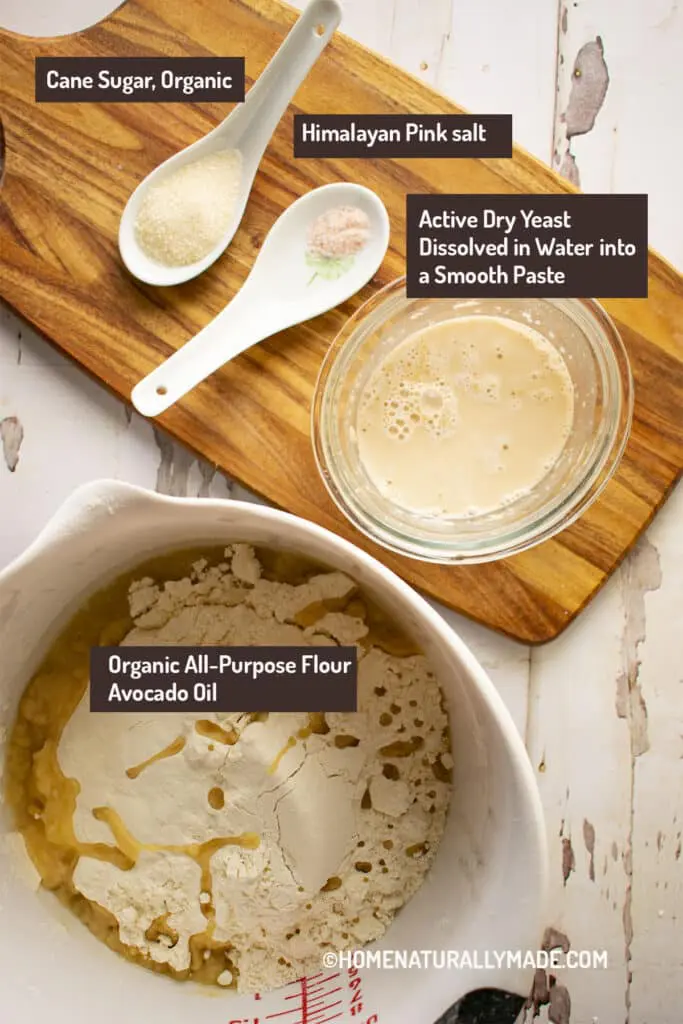
It takes about 1 hour to proof the yeast dough for soft and yummy Chinese buns. I use the common active dry yeast. Remember to dissolve the dry yeast into water and then stir and mix until the whole thing turns into a smooth paste. This is one of the essential tips for spongy yummy buns. Never add active dry yeast powder directly into the flour.
Read here for more.
How to make Chinese Bun Wrappers using a rolling pin?
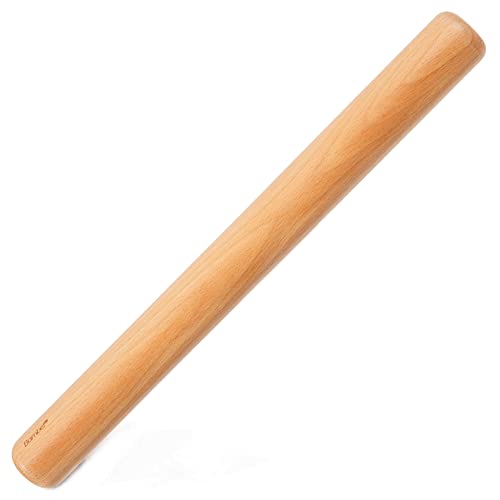
First, you will need the right tool, Chinese rolling pin to roll Chinese Bun Wrappers
Get a Chinese rolling pin, which shaped like a straight, thin long cylinder, if possible. It is petite, as we mean to roll using one hand, the dominant hand, while the less dominant hand holding and rotating the wrapper.
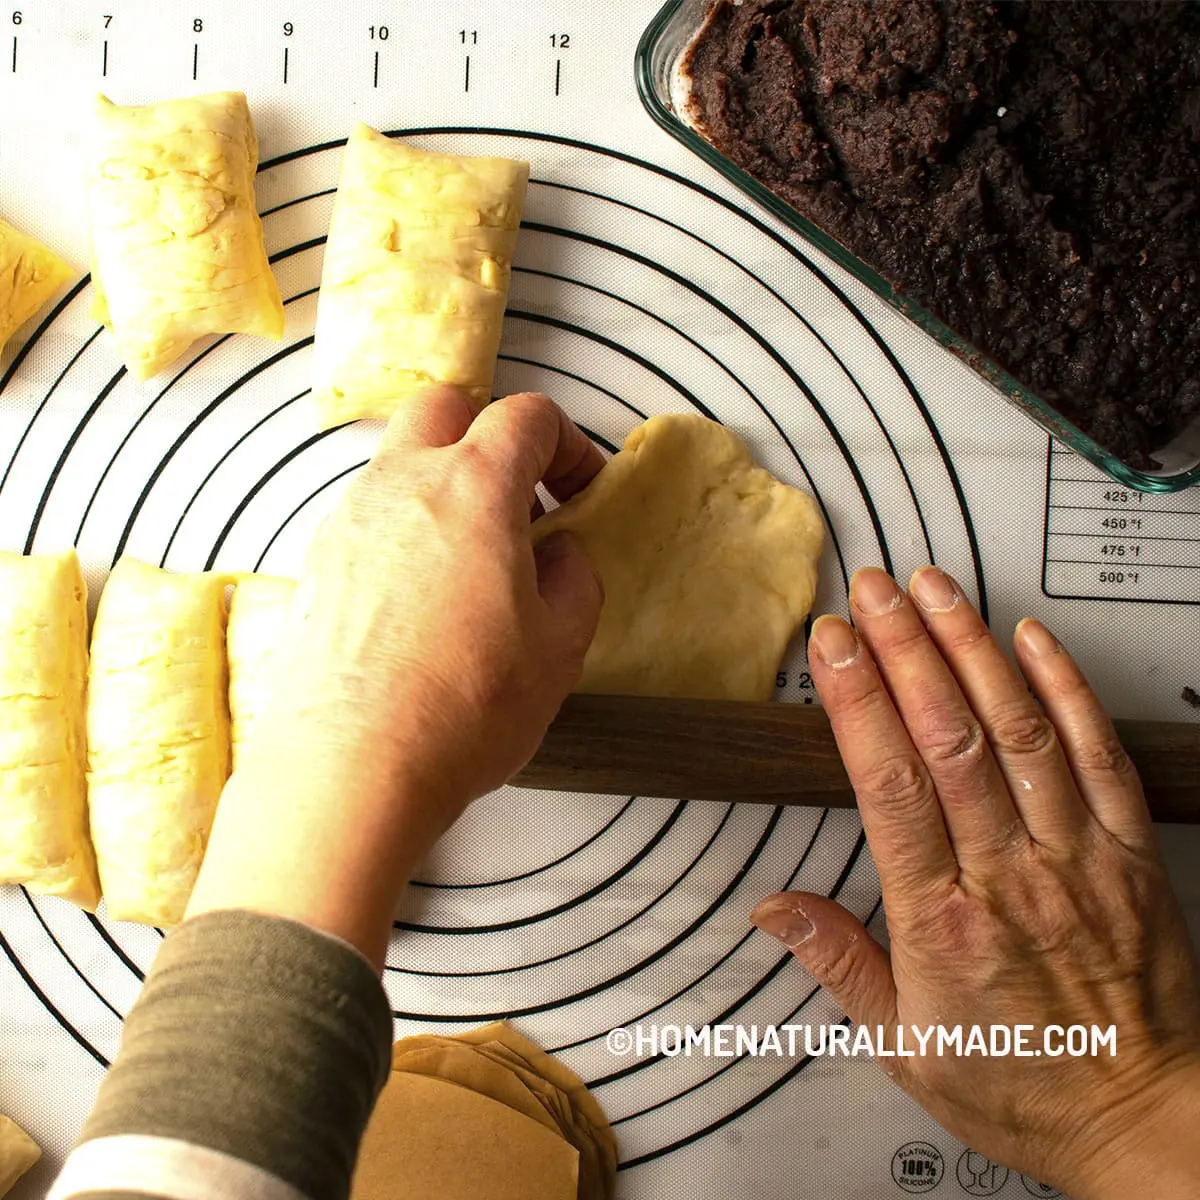
First Step is to divide the yeast dough into equal portions for homemade dun wrappers
For this yeast dough recipe, you can make about 20 buns, which is perfect to steam at once using this double deck bamboo steamer set. Each 12-inch bamboo steamer can hold about 10 buns.
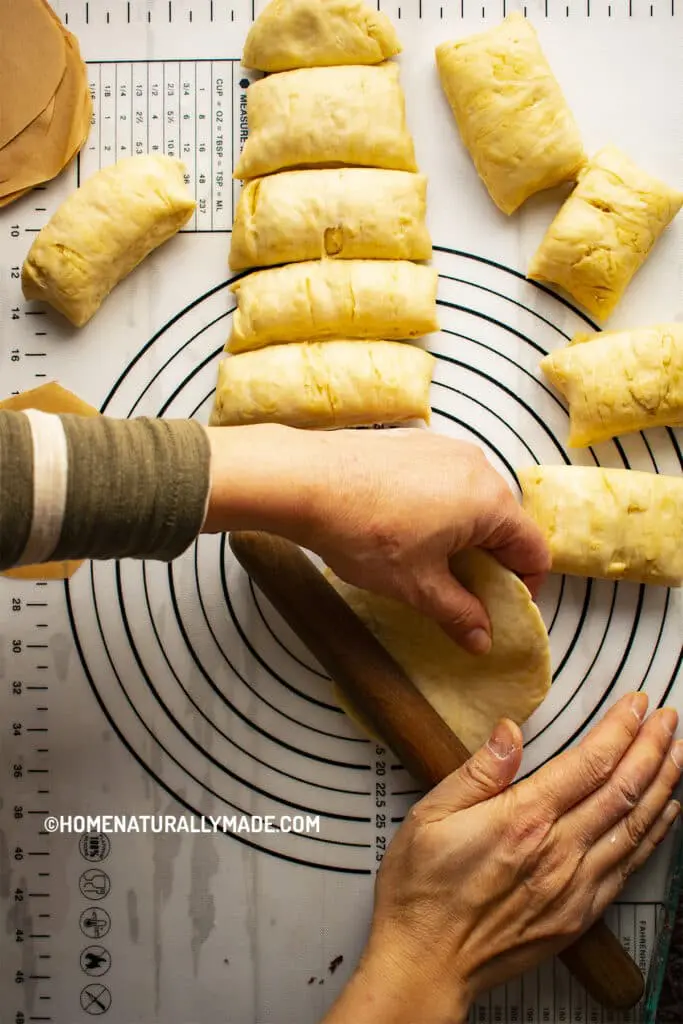
Roll the dough into a long cylinder and then cut into 20 equal portions using a dough cutter. Each portion weights around 50 grams. Place the portions into a large glass baking pan and cover with a clean, damp kitchen towel.
Second is to fold and knead the dough toward the center into a round thick disk
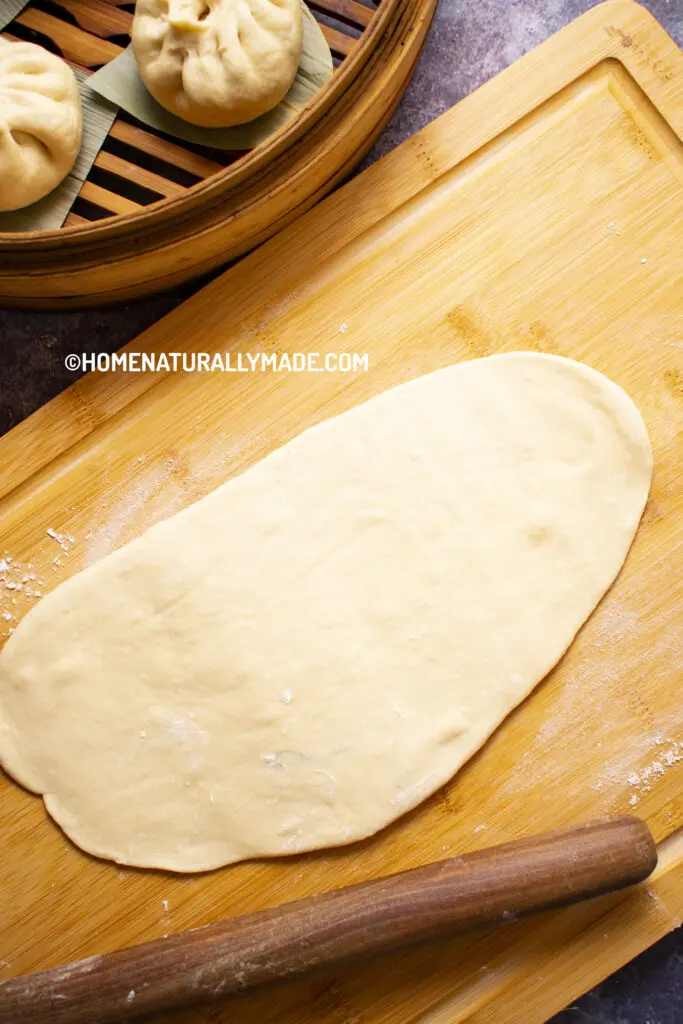
Take out a portion of the dough at a time. Knead and press the dough using the part of the palm where the thumb connecting to the wrist. Fold and knead the dough toward the center and press down into a round disk.

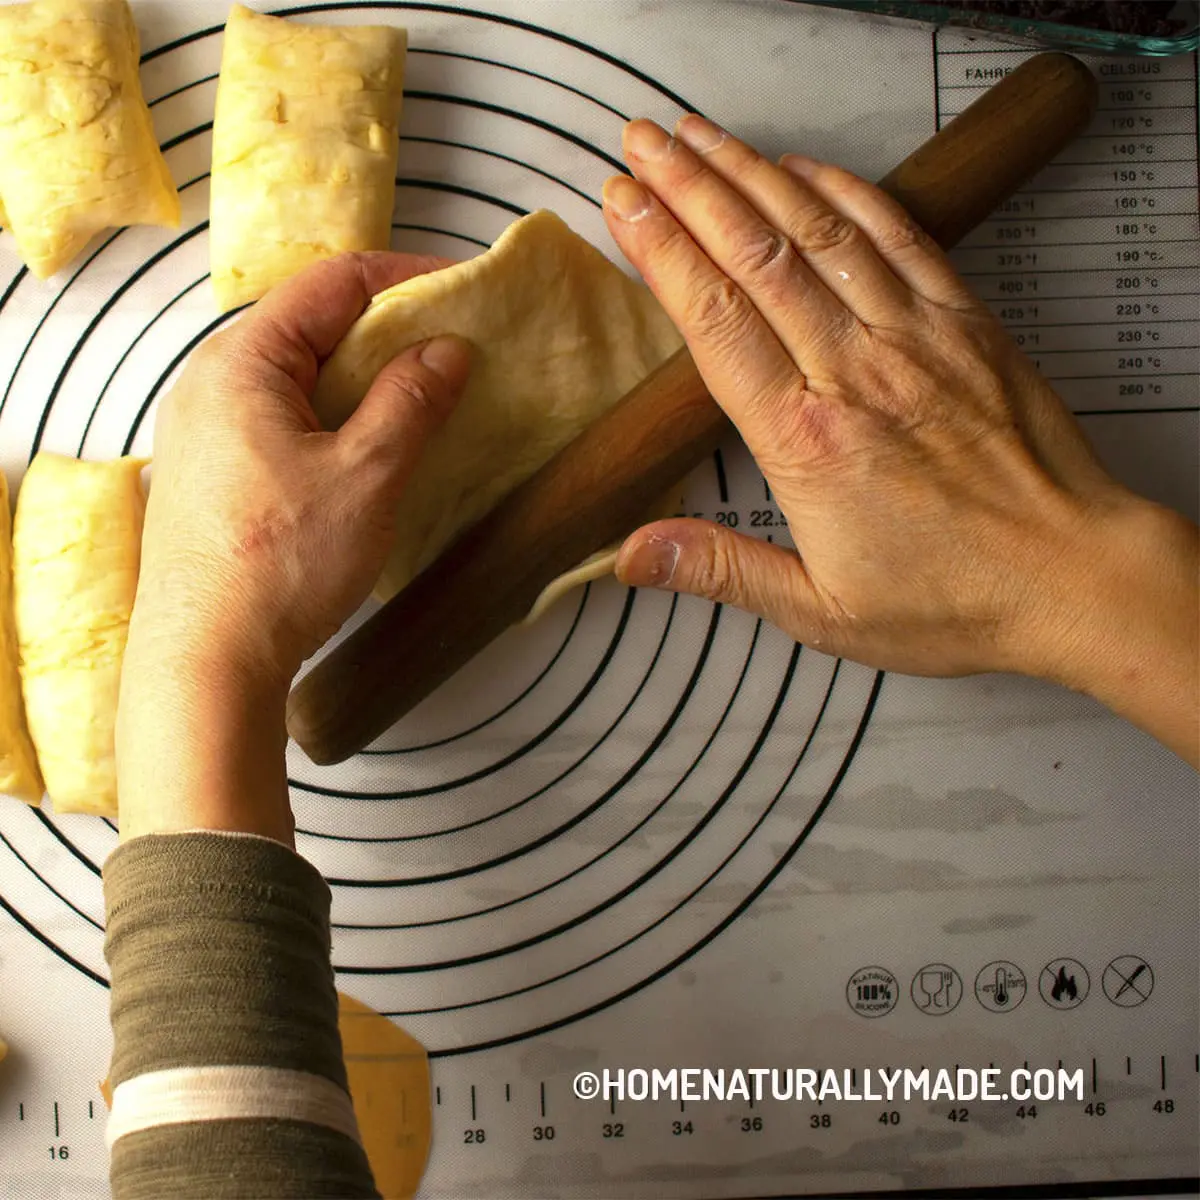
Third is to hold the dough disk loosely using the less dominant hand, while the dominant hand rolls the rolling pin
While my left hand (the less dominant hand for right-handed people) cradles or loosely held the outer left edge of the dough disk, my right hand rolls the rolling pin on the opposite side of the dough.
Start from the outer edge and then roll toward the center.

Next is for the less dominant hand to rotate while the dominant hand rolling back and forth
Roll the rolling pin back and forth halfway from the edge toward the center while the left hand rotates the dough disk counterclockwise until the dough disk completes the full circle.

For beginners, you can do it in a dissected way instead of a continuous series of actions. You can roll, and then pause and rotate the disk, and then roll the portion you just rotated, then pause and rotate the disk again, so on and forth, until you have completed the full circle.
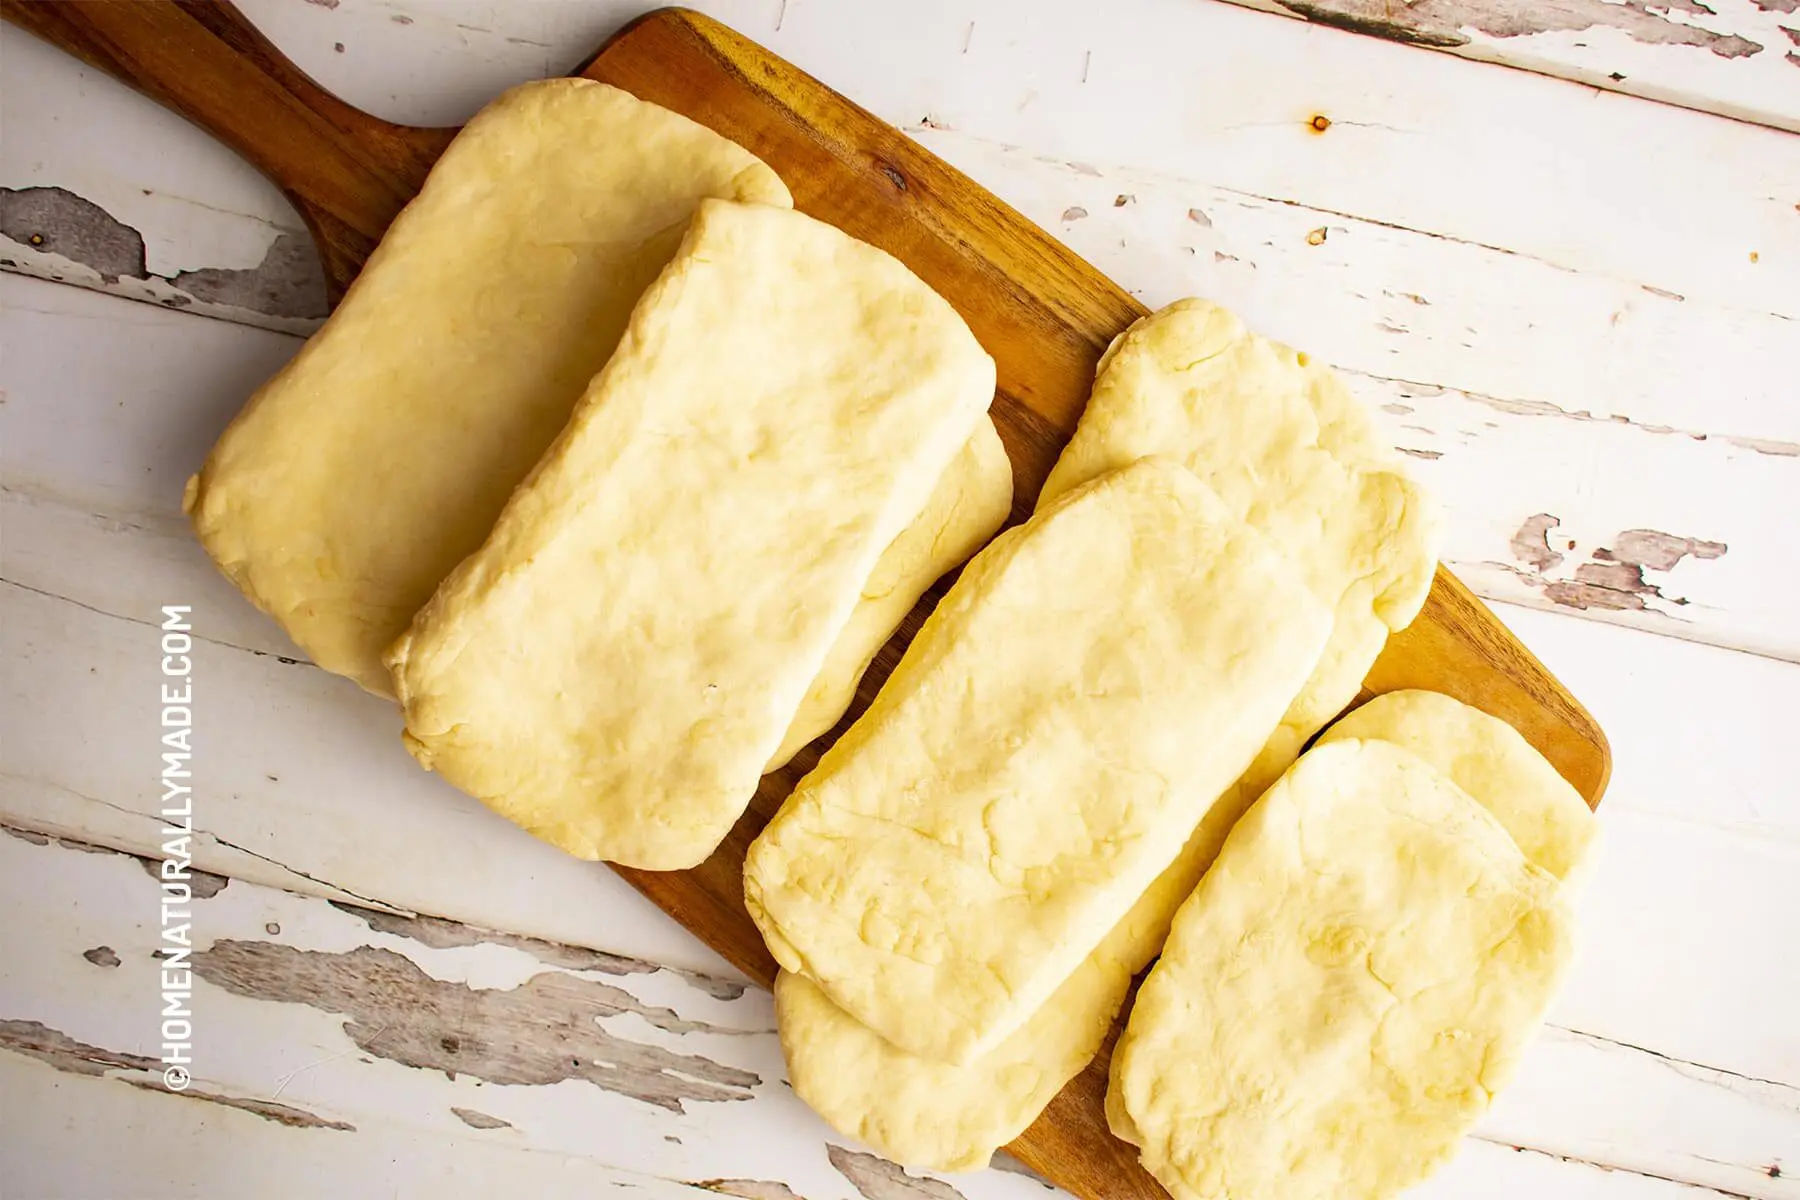
That’s it. You’ve just rolled a bun wrapper.
Why it is ideal to have a bun wrapper with thinner edge but thicker center?
Since you roll the rolling pin halfway through the dough and leave the center of the dough disk untouched, naturally the middle center of the dough is thicker than the edge.
This is actually exactly what we want. An optimal wrapper is a one that has thinner edge and thicker center. A thin edge makes it easier to seal the bun without excessive dough on the area where we seal the bun. It also helps the taste, as we do not have to deal with a big lump of dough to reach the delicious fillings. A thicker center helps hold the fillings better.
How to make Chinese Bun Wrappers using a Stand Mixer or Pasta Machine?
Since I owe a Kitchen Aid Stand Mixer, I use its noodle attachment to make noodles and dumpling wrappers from scratch at home.
Sometime I also use a similar method of making dumpling wrappers to produce bun wrappers:
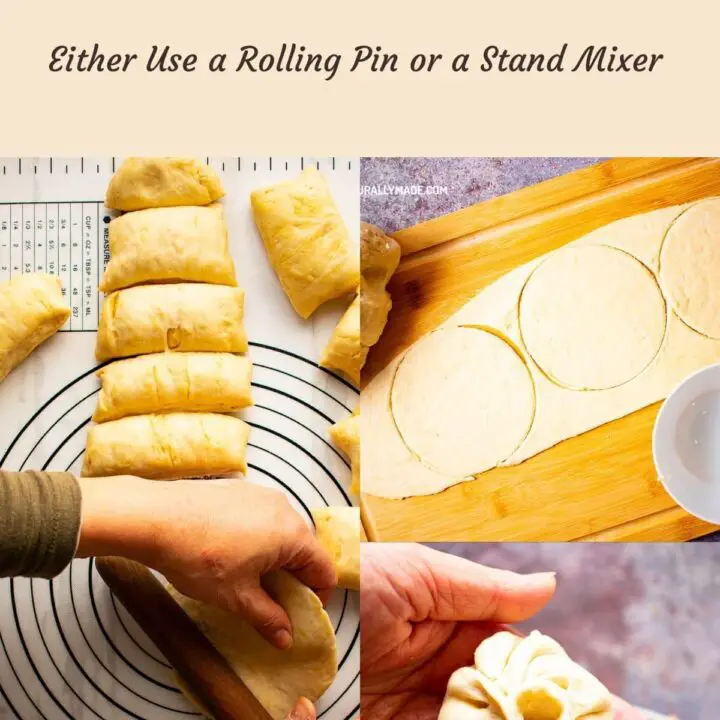
- Divide the dough into equal portions and organize each portion into a rectangular dough slab.
- For each portion of the dough, use the pasta roller to roll into dough sheet
- Place a 4.5 inch diameter small bowl on the dough sheet and use a knife to trace and then cut through

Pros and Cons of using a Stand Mixer to make Bun Wrappers
The pros are that it is more efficient. It also makes it easier to ensure all wrappers have the same size. However, the downside is that the thickness is equal, unlike the ideal thicker center and thinner edge kind of wrapper.
Tips & Tricks of using a Stand Mixer to make perfect Bun Wrappers each time
When you compare making a wrapper using the Stand Mixer for dumplings vs. buns, while the general approach is similar, there are a few things to keep in mind that are unique to buns’ wrappers.
First, use a rolling pin to roll over the dough slab once first
Since we are using a proofed yeast dough, remember to use a rolling pin to roll over the dough slab once to remove trapped air before feeding the dough slab into the Stand Mixer roller.
Second, use setting 1 of the Stand Mixer for the sheet thickness
For buns, we use the thickest setting 1. By the way, for northern China dumplings Jiao Zi, I use setting 4; for Shanghai Soup Dumplings, I use setting 5. The higher the number, the thinner the sheet.
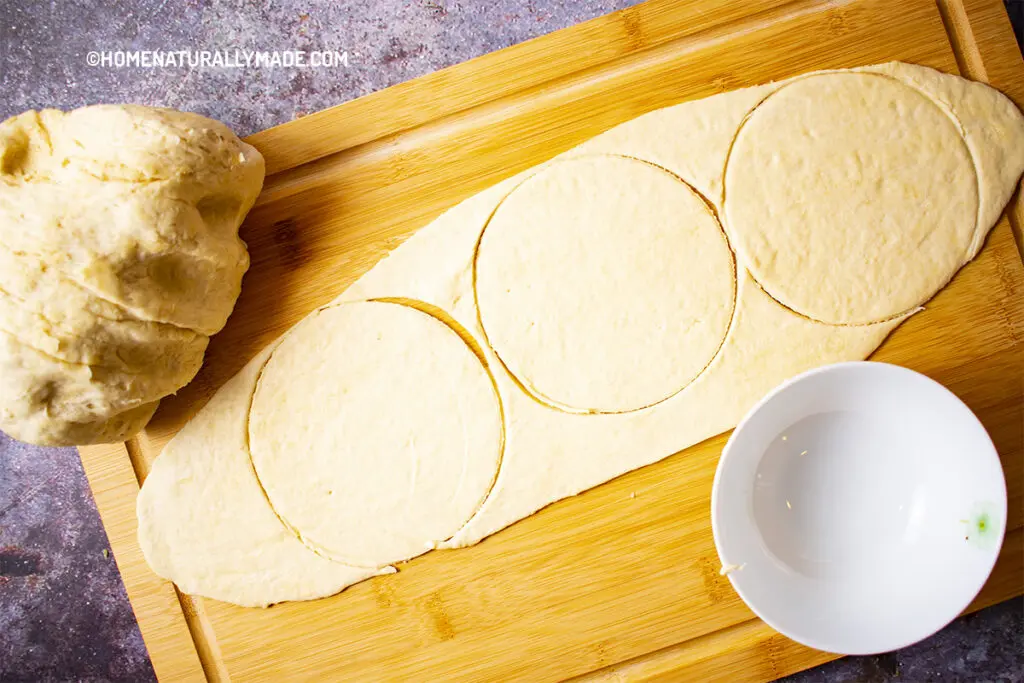
Third, need an about 4.5-inch diameter cookie cutter or a small bowl
For the dumplings wrappers, I use a 3.5-inch diameter cookie cutter that works great for an average size dumpling. For the Buns, you will need a 4.5-inch diameter cookie cutter to make a wrapper the size of a typical Huai Yang style bun.
I have this small bowl that has an opening of about 4.5-inch diameter. Simply place the bowl upside down on the dough sheet over the cutting board or granite countertop and use a small knife to trace around the bowl and cut a 4.5-inch diameter round wrapper.
Homemade Chinese Bun Wrappers {Two Flavors and Two Ways of Making}
Homemade Chinese bun wrappers are surprisingly easy to make once you know a few key tips and tricks. You can prepare them the traditional way—using a rolling pin to shape each wrapper by hand—or take a more modern approach with a stand mixer or pasta machine. The dough can be made with either water or milk, depending on the type of bun you want to create. Both methods yield soft, fluffy, and delicious wrappers perfect for your favorite Chinese buns.
Materials
For Water-based Dough:
- 660 g all-purpose flour, about 4 cups, unbleached organic, see notes
- 350 g water, approximate, see notes
- 4 tsp, about 12 g dry active yeast or instant yeast
- 1 tbsp cane sugar, about 15 g, organic unrefined preferred
- 1/4 tsp Himalayan pink salt
- 25 g avocado oil
For Milk-based Dough:
- 660 g all-purpose flour, about 4 cups, unbleached organic preferred
- 170 g water
- 170 g whole milk
- 4 tsp, about 12 g dry active yeast or instant yeast
- 1 tbsp cane sugar, about 15 g, organic unrefined preferred
- 1/4 tsp Himalayan pink salt
- 25 g avocado oil
Tools
- Chinese Rolling Pin
- Kitchen Aid Stand Mixer with Pasta Maker attachment
- Manual Pasta Machine
Instructions
Prepare A Fluffy Dough for Chinese Buns:
Read here for a detailed tutorial. 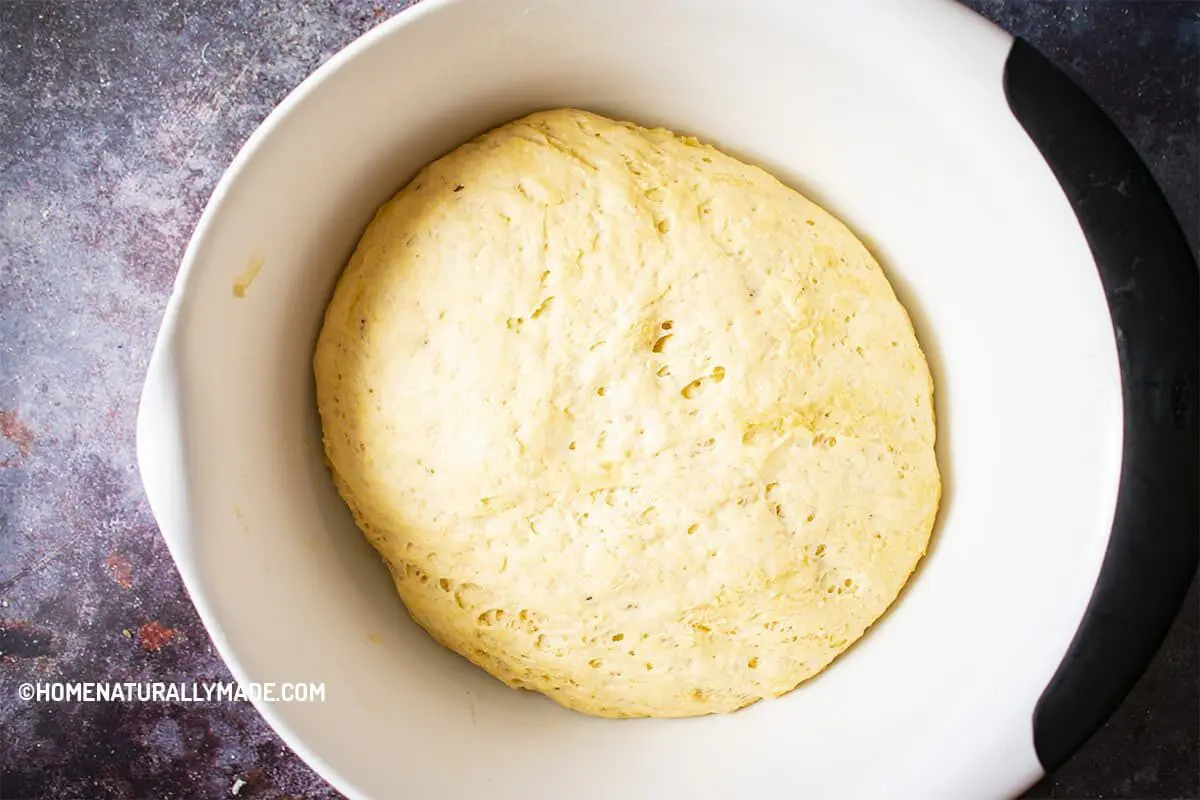
Homemade Bun Wrappers using a Chinese Rolling Pin:
- Roll the dough into a long cylinder and then cut into 20 equal portions using a dough cutter. Each portion weights around 50 grams. Place the portions into a large glass baking pan and cover with a clean, damp kitchen towel.

- Take out a portion of the dough at a time. Knead and press the dough using the part of the palm where the thumb connecting to the wrist. Fold and knead the dough toward the center and press down into a round disk.
- While my left hand (the less dominant hand for right-handed people) cradles or loosely held the outer left edge of the dough disk, my right hand rolls the rolling pin on the opposite side of the dough. Start from the outer edge and then roll toward the center.

- Roll the rolling pin back and forth halfway from the edge toward the center while the left hand rotates the dough disk counterclockwise until the dough disk completes the full circle.
- For beginners, you can do it in a dissected way instead of a continuous series of actions. You can roll, and then pause and rotate the disk, and then roll the portion you just rotated, then pause and rotate the disk again, so on and forth, until you have completed the full circle.

Homemade Bun Wrappers using KitchenAid Stand Mixer or Pasta Machine:
- Divide the dough into equal portions and organize each portion into a rectangular dough slab. Place them into a large glass dish and cover with a damp kitchen towel.

- Take one portion at a time. Use a rolling pin to roll over the dough once to get rid of the trapped gas and then use setting 1 (the thickest) to roll the dough into a sheet.

- Place a 4.5 inch diameter small bowl on the dough sheet and use a knife to trace and cut through.

Notes
- It is ideal to have a bun wrapper with thinner edge but thicker center. A thin edge makes it easier to seal the bun without excessive dough on the area where we seal the bun. A thicker center helps hold the fillings better.
- Pros and Cons of using a Stand Mixer to make Bun Wrappers - the pros are that it is more efficient. It also makes it easier to ensure all wrappers have the same size. However, the downside is that the thickness is equal, unlike the ideal thicker center and thinner edge kind of wrapper.
Recommended Ingredients:
Organic all-purpose flour, active dry yeast, organic unrefined cane sugar,Himalayan pink salt, Avocado oil.
Recommended Tools & Gadgets:
Chinese rolling pin, KitchenAid Stand Mixer, Stand Mixer Pasta Making Attachment,Manual Pasta Machine.
Recommended Products
As an Amazon Associate, I earn a small amount of commission from the qualifying purchases.