
Table of Contents
Sourdough is one of the oldest bread-making method around, using wild yeast to drive a slow, natural fermentation process.
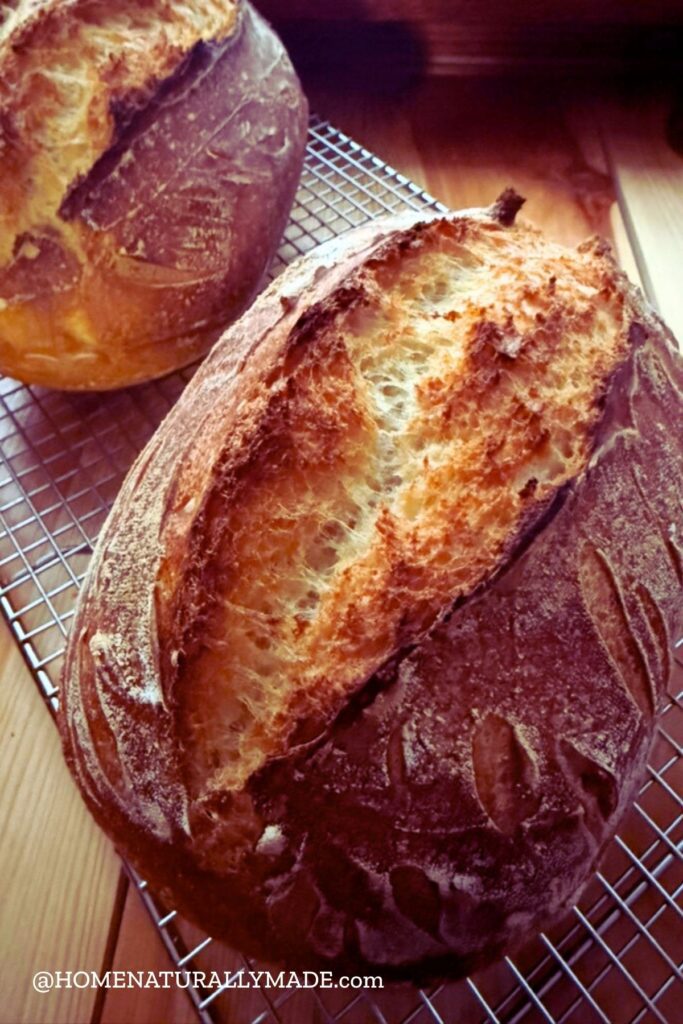
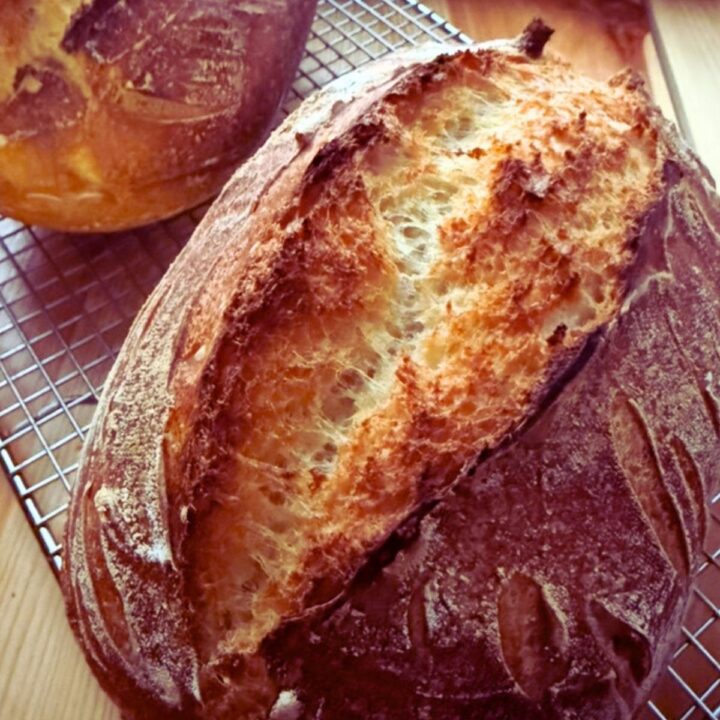
It has always felt a little mysterious to me. How can flour, water, and salt turn into something so beautiful? The crispy crust. The soft, airy crumb. The deep, natural flavor. It feels like magic — but it’s really just science doing its work with the help of time. With a little patience, science and time transform simple ingredients into wholesome, clean bread. And that is what I love most about sourdough.
I had been wanting to make sourdough bread for a while. Finally, around Christmas 2025, I decided to give it a try. To my surprise, the process was much easier than I expected. I genuinely enjoyed learning the science behind it while finding ways to streamline and optimize the entire process – from making and feeding a starter, to develop an active starter for baking, to the final proofing and baking stages.
Ready to try it? here’s my tested and proved easy home method.
What Makes Sourdough So Special?
Sourdough is an ancient bread-making tradition that relies on wild yeast for a slow, natural fermentation process. Before commercial yeast existed, people relied on natural fermentation.
You create a starter to produce natural wild yeast. Then you use that starter to leaven your dough.
Natural yeast works much slower than commercial yeast does. Because of that, sourdough rises gradually over one to two days or more. This slow fermentation develops deeper flavor, better texture, and improved digestibility.
Time truly makes the difference.
How to Make Your Own Starter (Beginner-Friendly)
Day 1
- Mix 50g flour + 50g water (room temperature).
- Stir well.
- Cover with a wet towel
- Leave on the counter at room temperature (70–75°F ideal).
You may see little activity at first — that’s normal.
Days 2–5 (sometimes up to 7)
Each day:
- Discard about half.
- Feed with 50g flour + 50g water.
- Stir and leave on the counter.
By Day 3–5, you should see:
- Bubbles throughout
- Slight rise and fall
- A mild tangy smell
When your starter doubles in 4–6 hours after feeding, congratulations – you’ve successfully made your own sourdough starter. If you are not ready to bake right away, simply store it in the refrigerator in a glass jar.
How to Feed Your Sourdough Starter
One important aspect of maintaining a sourdough starter is keeping the wild yeast active, which means feeding it regularly. Weekly feeding is ideal. Monthly feeding is a stretch, but still manageable. I wouldn’t go longer than a month without feeding it.
For weekly feeding, use 1:1:1 ratio for Starter: Four: Water.
If the starter is in the refrigerator for over a month without feeding, don’t throw it out yet. Let’s try using 1:2:2 ratio for Starter: Four: Water to see if you can revitalize it. You may need to feed twice before it becomes active for baking.
Day 1
- Take starter out of fridge.
- Discard most of it, especially the grayish liquid on top, and keep about 2 tablespoons of the healthy portion.
- Feed 1:2:2 ratio (example: 20g starter + 40g water + 40g flour).
- Leave on countertop at room temp.
- Let it rise fully and fall slightly.
If it doubles within 4–6 hours, that’s a good sign. You may just have revitalized it.
Day 1 Evening
Feed it again (same ratio). Leave it at room temp overnight.
Day 2 Morning
You can use the starter to make sourdough, or store the starter in the refrigerator.
Why Most Recipes Calling For Discarding During Starter Feeding?
If you value food as much as I do, you may be wondering: Why most recipes say you have to discard part of the starter?
The answer comes down to science and balance. Sourdough thrives on proper feeding ratios. Discarding keeps the amount of starter in proportion to the fresh flour and water you add. This ensures the yeast has enough food to stay healthy and active.
If you never discard, two things happen:
- The starter grows larger and larger.
- The yeast won’t have enough fresh food to stay strong.
Very quickly, you’ll end up with an enormous jar of starter — and a weaker culture. Discarding isn’t wasteful. It’s simply maintaining balance.
However, in reality you do not have to discard if you can coordinate your bread/bun making schedule and the starter feeding schedule.
How to Fit Sourdough Starter Feeding into Your Baking Routine?
We established that weekly feeding is ideal to keep the wild yeast active and strong. It is easier and better to align your feeding and baking schedule – In other words, making bread or buns each week.
I tested and proved that a 3-day schedule works most effortlessly. Below illustration is to make 2 loaves at the same time, which is also more productive.
- Day 1: Take the jar containing the starter out of the fridge. Do the feeding and making an Active Starter (parallel processes) and then place both back to the refrigerator.
- Making an Active Starter for baking – in large mixing bowl, mix 200g Starter + 200g Flour + 200g Water (1:1:1 ratio)
- Feeding – Weigh the remainder of the mixture in another mixing bowl, then add equal amount (weight) of four and water.
- Day 2: Mix the Dough and do the bulk fermentation. Once it doubles the size (4-6 hours), divide the dough into two equal portions. Transfer each portion to a rice-flour lined banneton and refrigerate overnight.
- Day 3: Bake
The Optimal Inoculation Rate
The inoculation rate is the ratio of flour used to feed the starter to the total flour called for in the recipe. The ideal range is about 20%-30%. For example, if you feed your starter with 145g of flour and your recipe calls for 525g flour total, the inoculation rate is 145 ÷ 525 = 27% – right in ideal range of 20-30% for a well-paced fermentation. For stiffer dough such as Chinese Mantou (buns), use 30%.
Sourdough Bread Made Easy at Home
Sourdough is one of the oldest bread-making method around, using wild yeast to drive a slow, natural fermentation process. Learn to make it easy at home - from making and feeding a starter, to develop an active starter for baking, to teh final proofing and baking stages. This recipe makes 2 loaves of soughdough bread.
Ingredients
- 200g starter from the refrigerator, along with 200g all-purpose flour and 200g water to make an active starter
- 660 g all-purpose flour, organic unbleached preferred
- 330g water, may not need the entirety
- 1 3/4 tsp salt, such as Himalayan pink salt
- optional - dried cranberries, rasins + 1 tsp cinnamon
Instructions
Make Your Own Starter
Day 1
- Mix 50g flour + 50g water (room temperature). Stir well. Cover with a wet towel
- Leave on the counter at room temperature (70–75°F ideal). You may see little activity at first — that’s normal.
Days 2–5 (sometimes up to 7)
- Each day: Discard about half. Feed with 50g flour + 50g water. Stir and leave on the counter.
- By Day 3–5, you should see: Bubbles throughout. Slight rise and fall. A mild tangy smell.
- When your starter doubles in 4–6 hours after feeding, congratulations – you’ve successfully made your own sourdough starter. If you are not ready to bake right away, simply store it in the refrigerator in a glass jar.
Feed Your Sourdough Starter
- For weekly feeding, use 1:1:1 ratio for Starter: Four: Water.
- If the starter is in the refrigerator for over a month without feeding, don’t throw it out yet. Let’s try using 1:2:2 ratio for Starter: Four: Water to see if you can revitalize it. You may need to feed twice before it becomes active for baking.
Day 1 - Take starter out of fridge. Discard most of it, especially the grayish liquid on top, and keep about 2 tablespoons of the healthy portion. Feed 1:2:2 ratio (example: 20g starter + 40g water + 40g flour). Leave on countertop at room temp. Let it rise fully and fall slightly. If it doubles within 4–6 hours, that’s a good sign. You may just have revitalized it.
Day 1 Evening- Feed it again (same ratio). Leave it at room temp overnight.
Day 2 Morning - You can use the starter to make sourdough, or store the starter in the refrigerator.
Fit Sourdough Starter Feeding into Baking Routine
Day 1: Take the jar containing the starter out of the fridge. Proceed with the parallel processes of the Feed and Make an Active Starter:
- Making an Active Starter for baking – in a large clean bowl, mix 200g Starter + 200g Flour + 200g Water (1:1:1 ratio). Use a pair of bamboo chopsticks to combine. Cover the bowl with a damp kitchen towl.
- Feeding – Place and weigh the remainder of the wild yeast mixture In another clean bowl, add equal weight of flour and water respectively. Use a pair of bamboo chopsticks to combine. Use a silicone spatula to place the mixture to a clean wide mouth clean jar.
- Place both the bowl and glass jar back to the refrigerator.
Day 2 Morning: Mix the Dough and Bulk Fermentation
- Take the bowl from the refrigerator and place on a kitchen scale. Add 660 g flour and 1 3/4 tsp salt to the bowl.
- Weigh and add about 350 g water to a small bowl. Add the bulk of water to the large mixing bowl, use a silicone spatula to fold the flour into the starter/water.
- Gradually add the remaining water to the mixing bowla and combine, until it reaches the consistency. For make traditional sourdough bread, it uses wet dough. The dough is stickier, and is not a smooth dough. For making Chinese buns or French Bread, you will be aiming for smooth dough.
- Cover it with a wet kitchen towel and let the dough rest on the countertop or in a closed space such as inside the oven for bulk fermentation.
- Bulk fermentation may take 4-6 hours. The room temperature plays an important role. When it is around 70 F, it takes 4-6 hours. The time will go much shorter or longer when the temperature is hotter or cooler. For instance, during winter time, when it is around 65F, the dough make take 6-8 hours to rise. Stretch and fold the dough every hour or so.
- When the dough has grown noticeably- typically 50-75% increase in volume, or the top may look slightly domed rather than flat, you are ready to shape the dough.
Day 2 Afternoon: Shape, Cold Proof
- Divide the dough into two equal portions. Transfer each portion to a rice-flour lined banneton
- Refrigerate overnight for cold proof.
Day 3 Score and Bake
- You can do this whenever you are ready on Day 3.
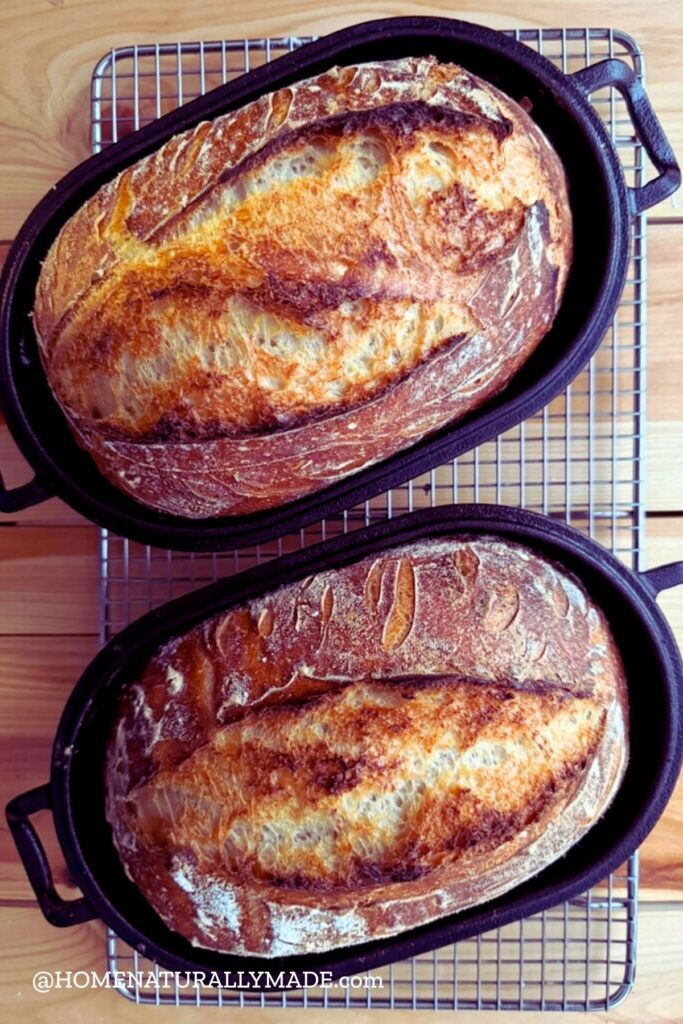
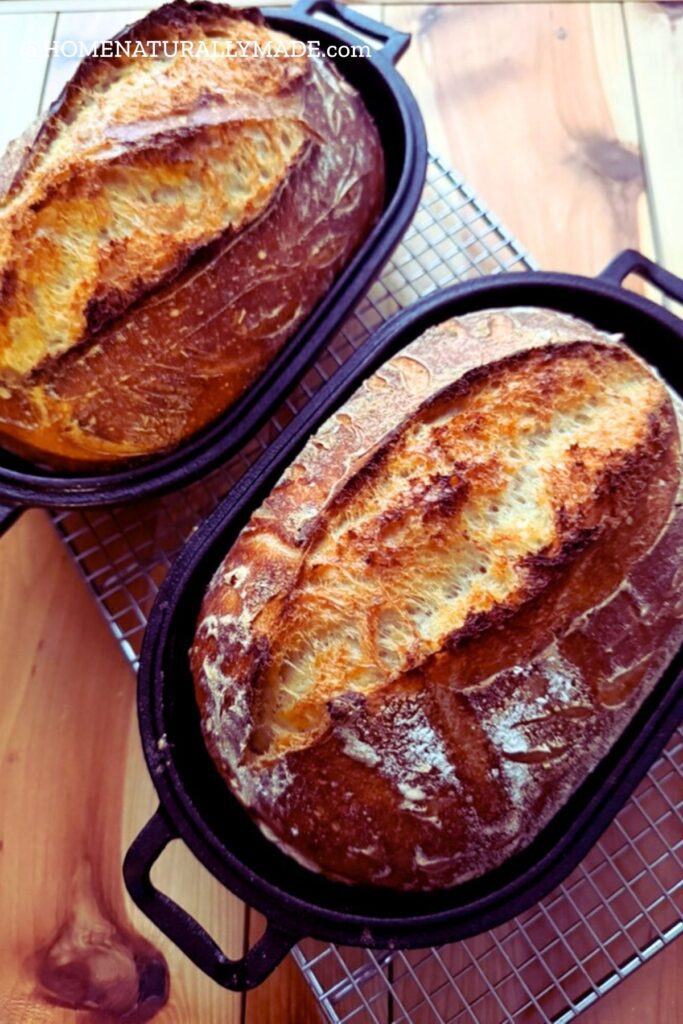
- Preheat the oven at 500F, put the rack in the middle, preheat the loaf dutch oven along with the lid in the oven. Get your bread scoring blade ready to go.
- When the oven reaches 500F, take the dough out from the refrigerator, remove the dutch oven from the oven and place on a wire rack.
- Carefully flip the banneton and transfer the dough to your palm and immediately place it into the hot dutch oven.
- Immediately use the blade to cut a deep line vertically across the middle of the dough, and then cut some decorative shallow lines on both sides.
- Put the lid on and bake at 500F for 25 minutes.
- Reduce the temperature to 450F, open the oven door, remove the dutch oven lid, let the steam escape, close the oven door and continue to bake for 20 minutes, or till the bread starts to brown.
- Turn off the oven. Remove the dutch oven from the oven and cool on the wire rack. After a few minutes, when it is OK to remove the bread, remove the bread from the dutch oven and let it cool on the wire rack.
Notes
- This is my tested and proved effortless home sourdough bread making recipe. I found out it works out well by having the starter cold proof overnight in the refrigerator. It helps the structure of the bread, resulting in fluffy/snappy bite.
Nutrition Information
Yield 24 Serving Size 1Amount Per Serving Calories 100Total Fat 0gSaturated Fat 0gUnsaturated Fat 0gSodium 163mgCarbohydrates 21gFiber 1gSugar 0gProtein 3g
Nutrition information is automatically generated by Create Cards and is provided as an estimate. Because many of my recipes use whole and minimally processed ingredients, the values may not always be exact.