
Table of Contents
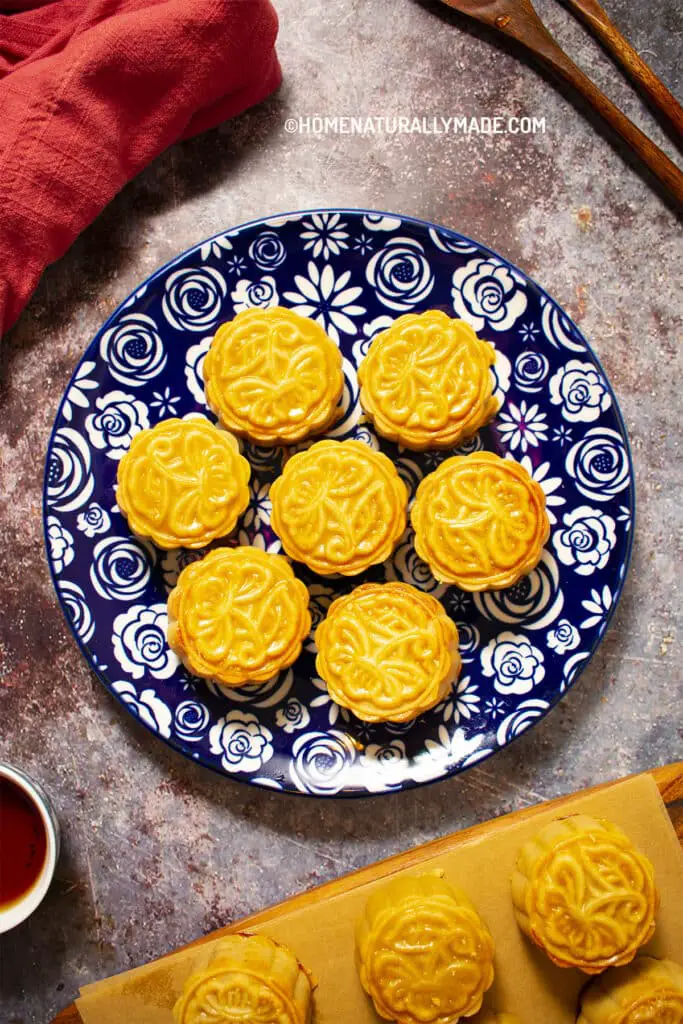
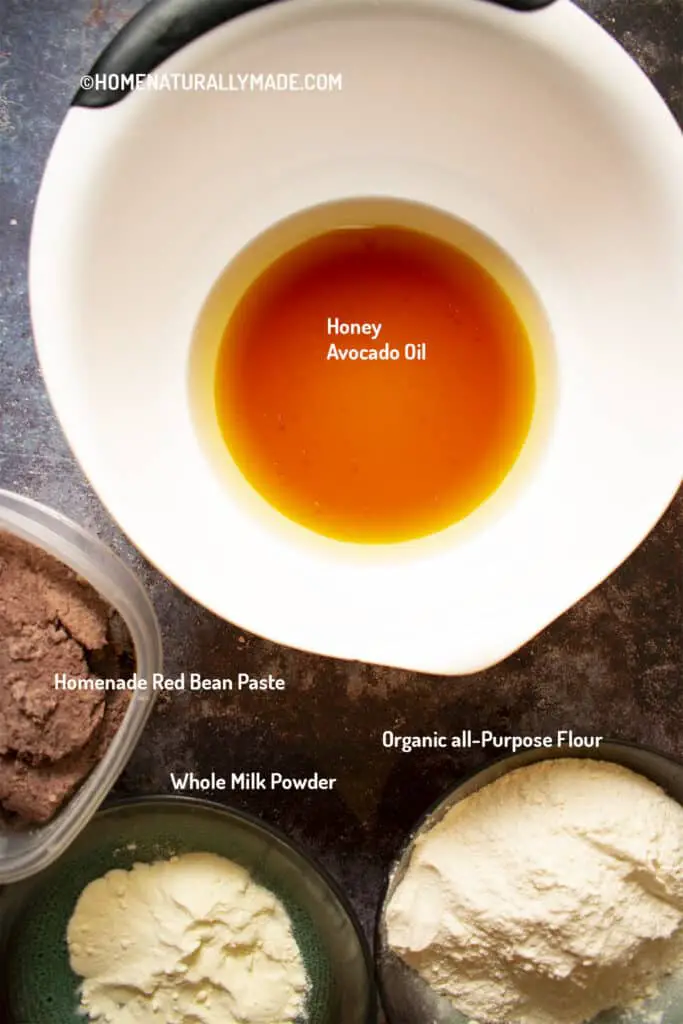
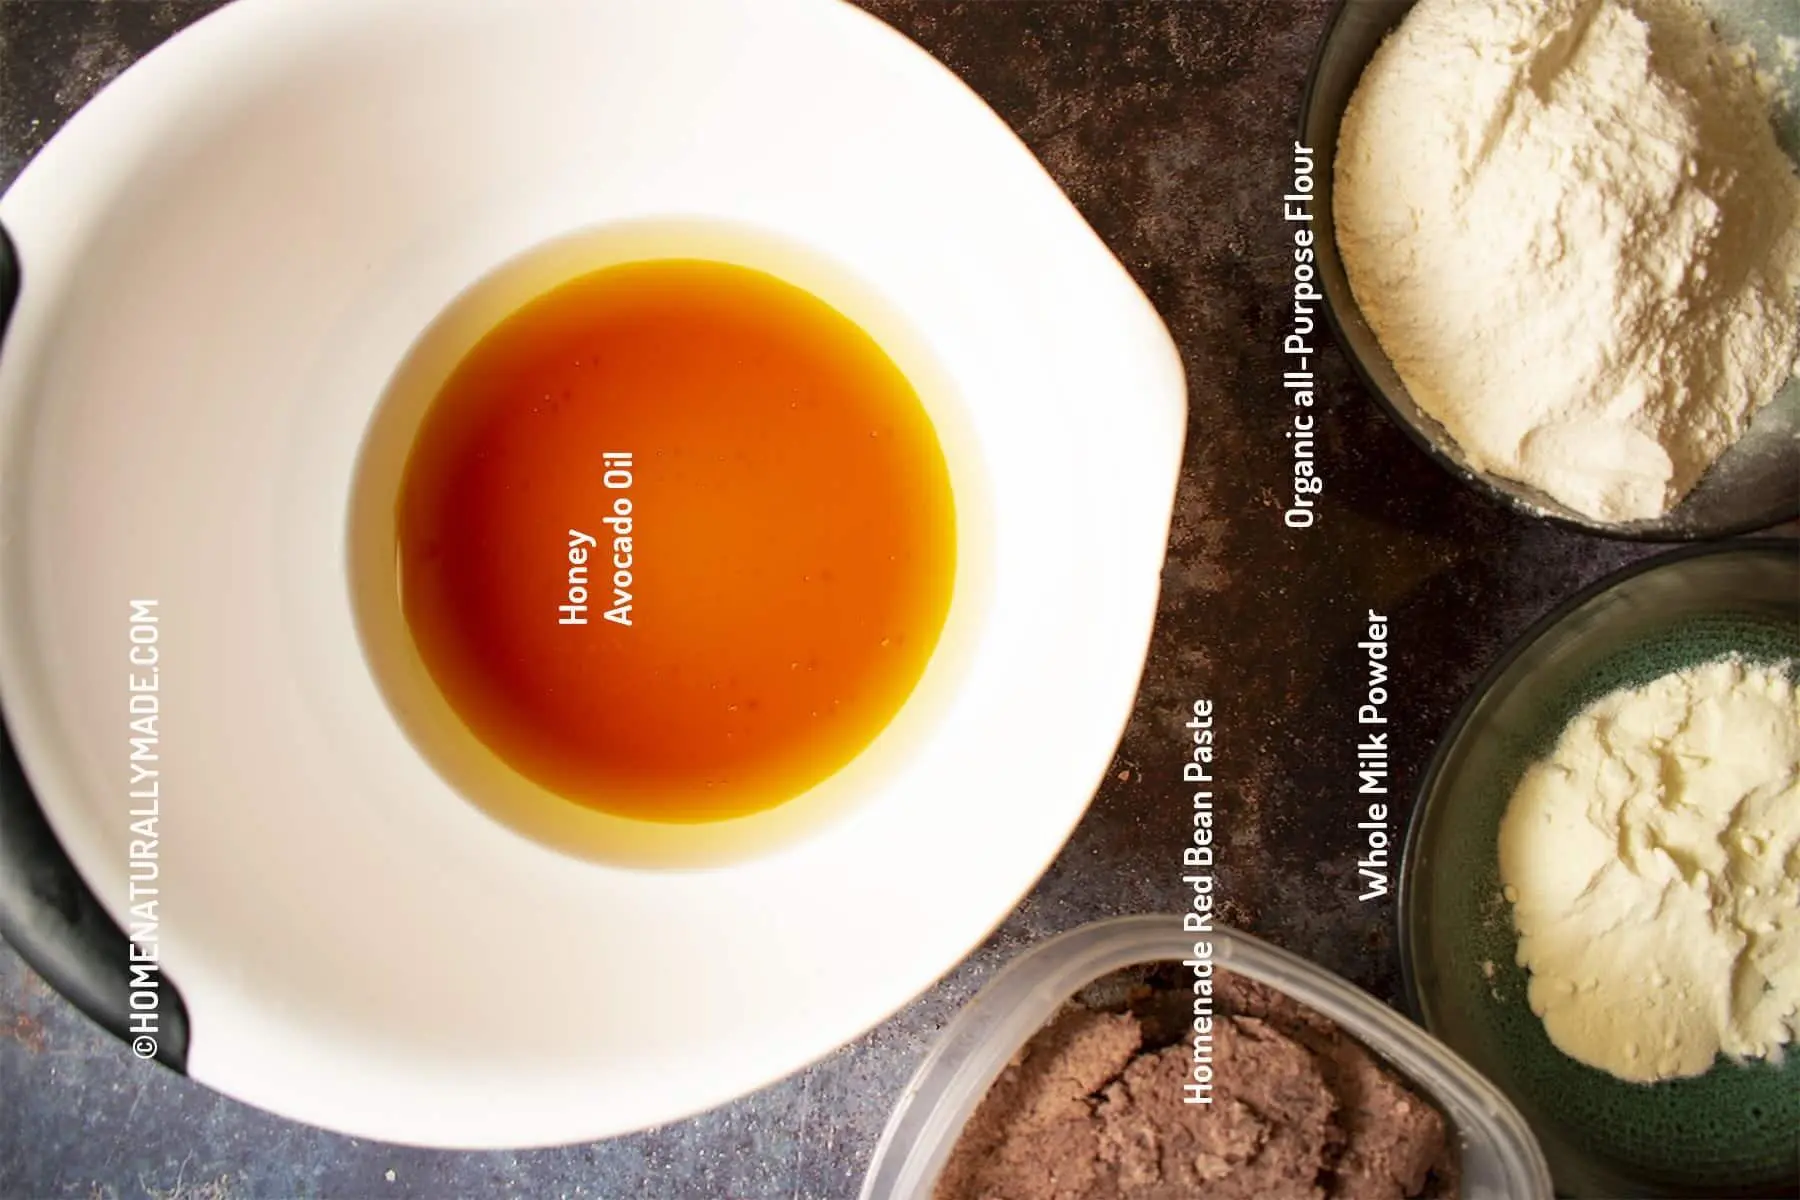
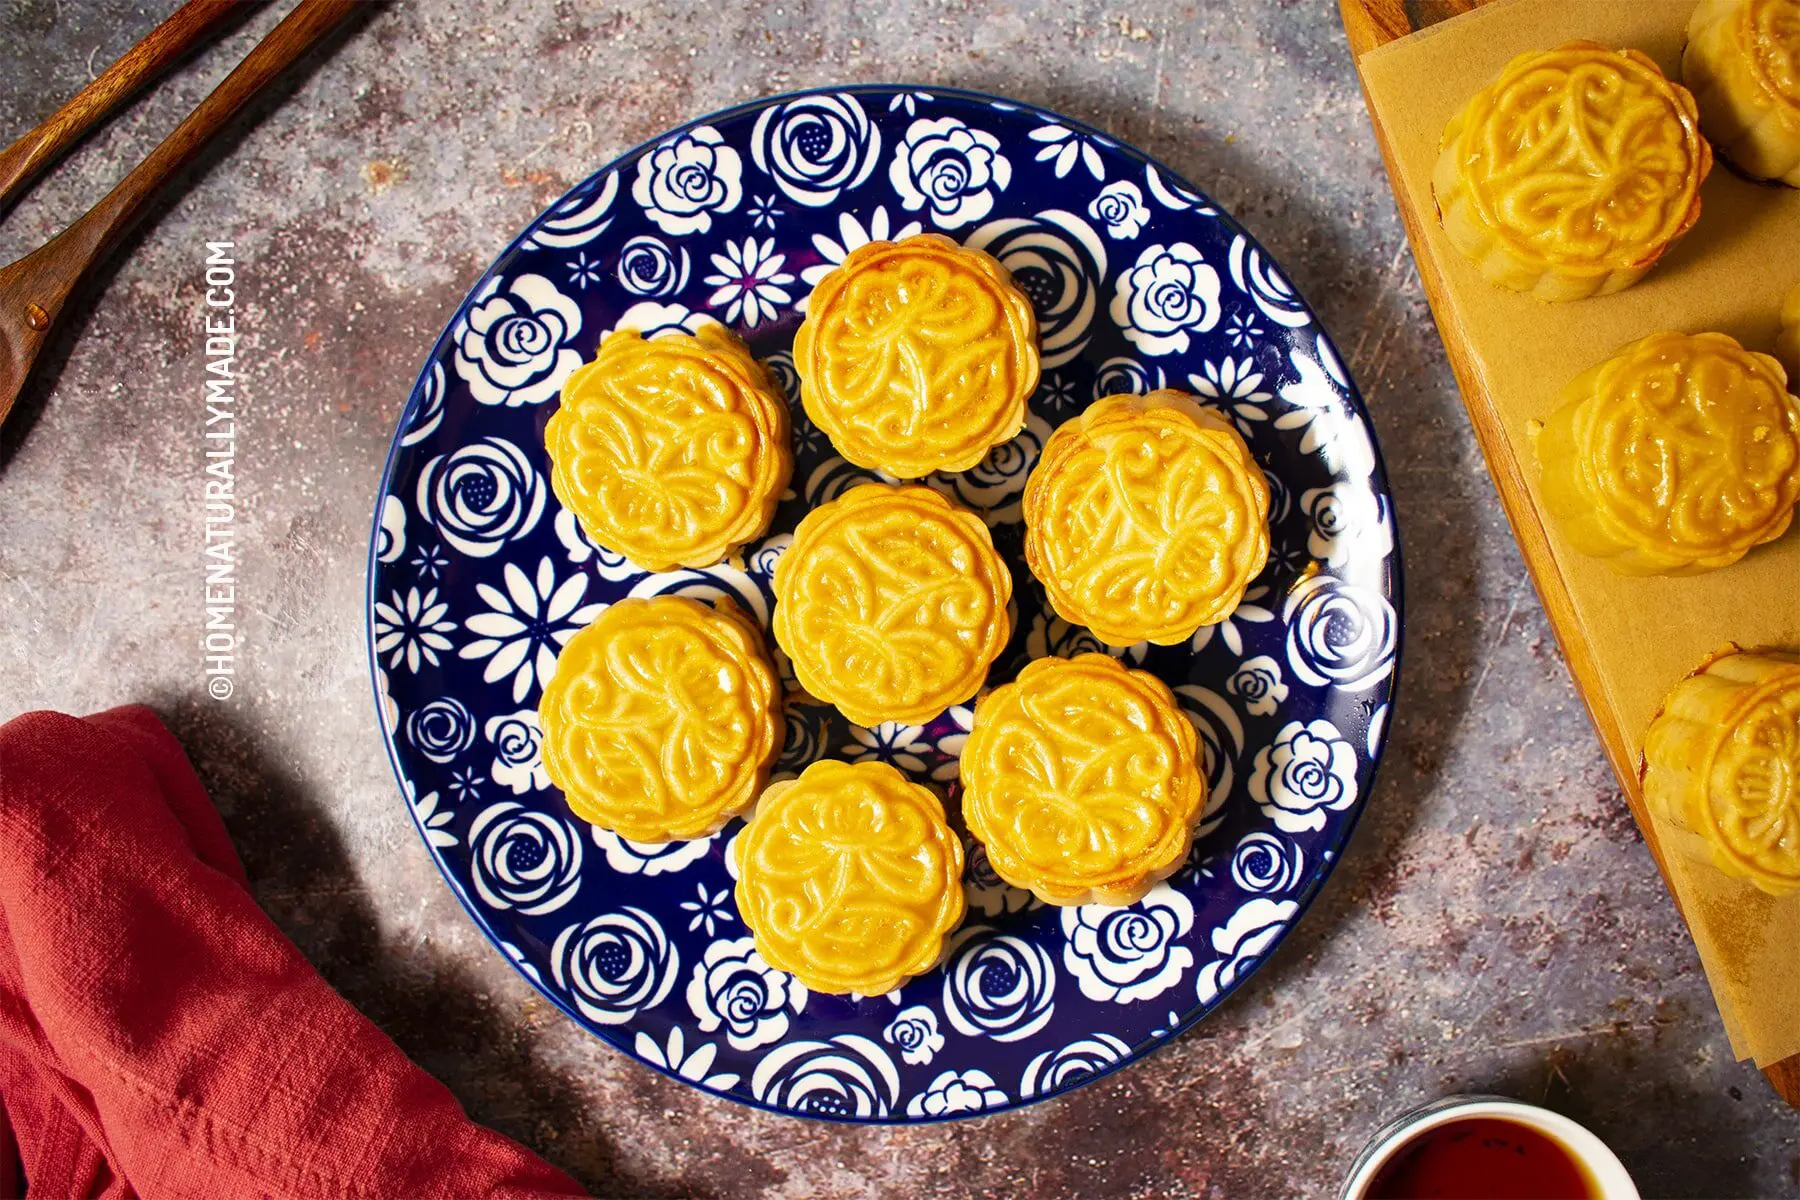
Homemade Cantonese Mooncake {Guang Shi Yue Bing 广式月饼} is so yummy and healthy. The crust is coming from merely four amazing ingredients. They are honey, avocado oil, organic all purpose flour and a bit of whole milk powder. As for the fillings, my favorite one is homemade red bean paste out of three ingredients, namely adzuki beansadzuki beans {Chi Xiao Dou 赤小豆}, organic coconut oil and organic cane sugar . They are so naturally delicious, and easy to make as long as you master a few tips and tricks. A must-have during Chinese Mid-Autumn Festival celebration.
Continue to read to learn all you need to know to make Cantonese Mooncake like a pro at home.
About Chinese Mid-Autumn Festival and Mooncake {Yue Bing}
Like Qing Tuan {Green Sweet Rice Dumplings with Red Bean Paste Filling} is for Qing Ming Festival, or Tomb Sweeping Day, Mooncake is for Chinese Mid-Autumn Festival.
Ancient Chinese divided the year into 24 intervals, or seasons, per earth’s rotational position in relation to the sun. This is the foundation of Chinese Lunar Calendar which starts with Li Chun {立春 or the onset of Spring}. Mid-Autumn Festival falls on the August 15th per Lunar Calendar. For 2021, it corresponds to Gregorian Calendar September 21st.
Each 15th of the Lunar Calendar month is a full moon day. However, lunar August 15th is supposed to have the brightest and fullest moon of the year. Traditionally, it is a time to celebrate a good harvest. Mooncake is the featuring food of the feast.
Across China, various areas have developed unique versions of mooncake over the time. The Cantonese Mooncake, which I am making today, has gained widespread popularity during modern day time.
How to make Cantonese Mooncake from scratch perfectly?
First thing first is to prepare the filling in advance
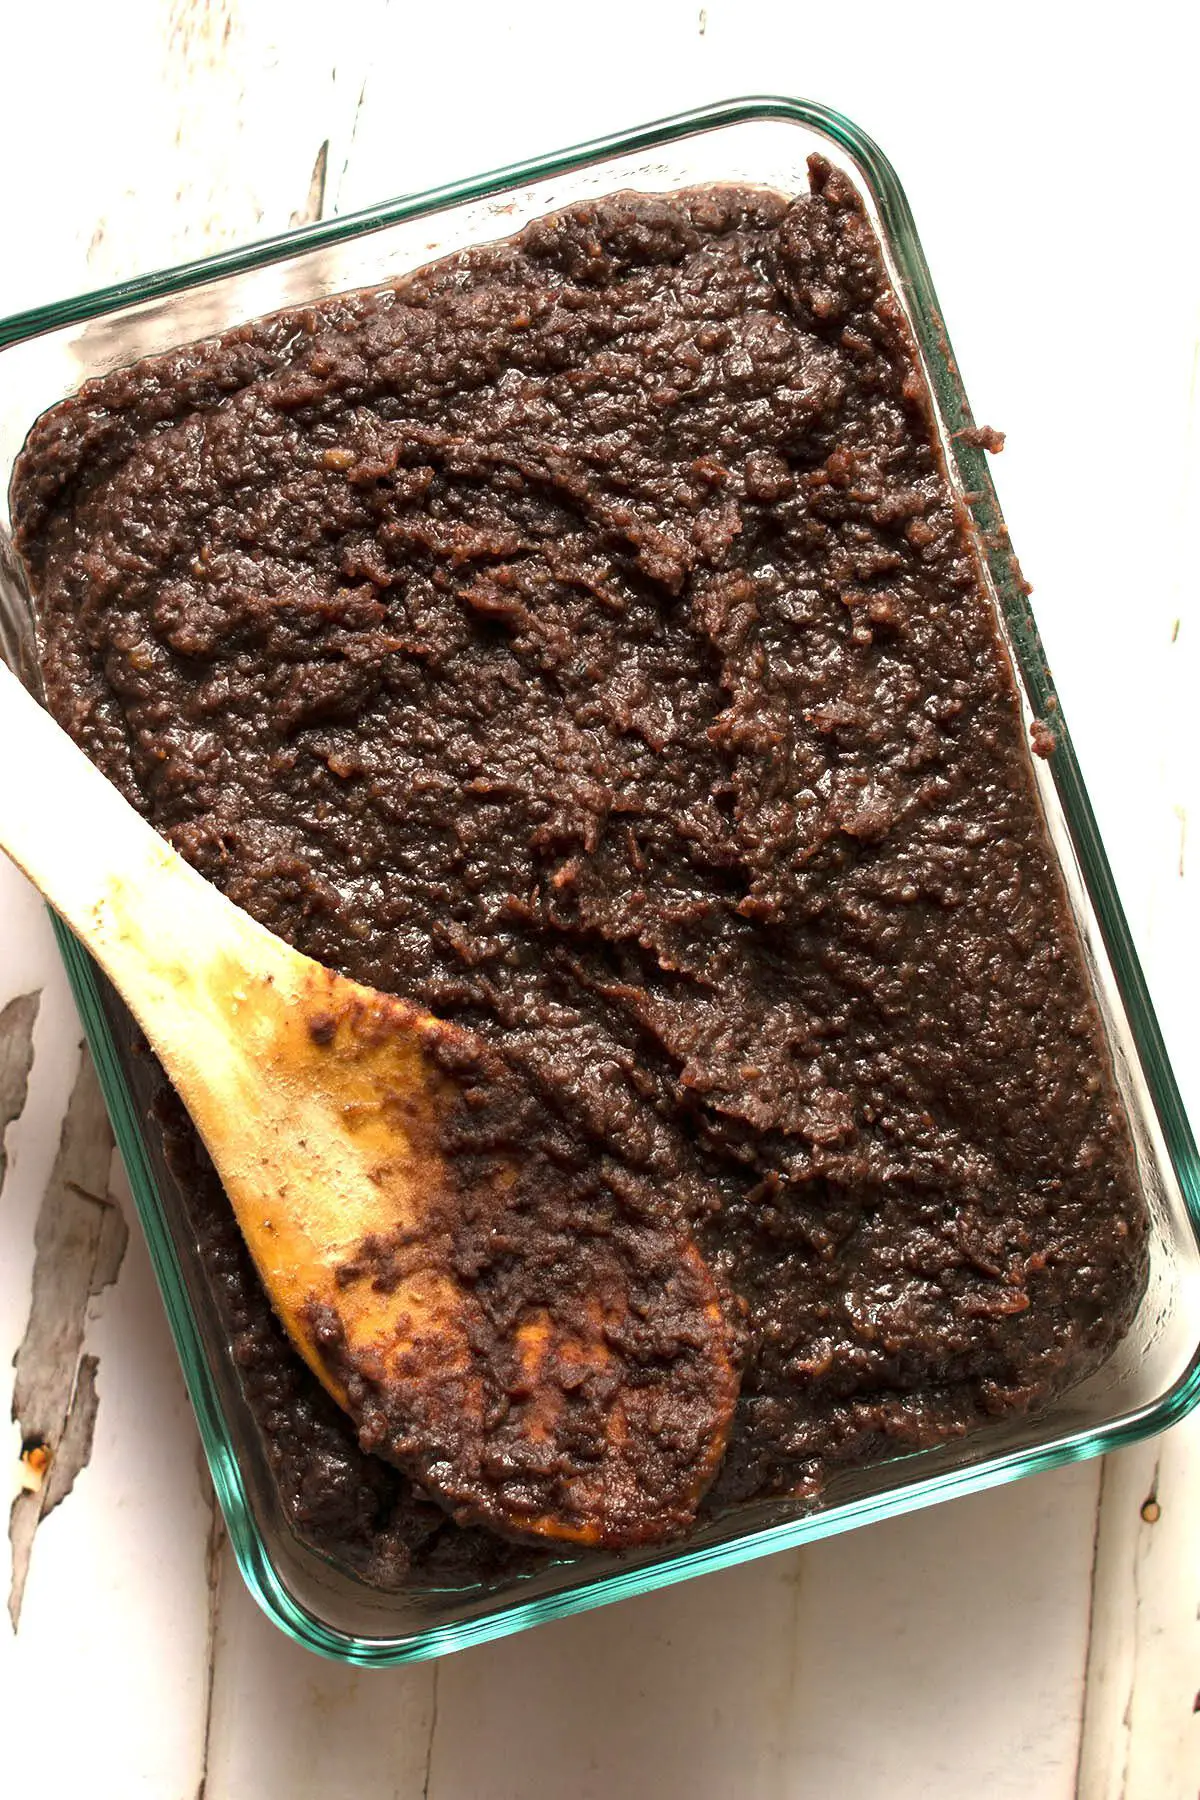
My favorite filling is homemade red bean paste using simply three mother nature’s whole ingredients. They are adzuki beans {Chi Xiao Dou 赤小豆}, organic coconut oil and organic cane sugar. So naturally delicious, healthy and versatile. I use them to make Qing Tuan, Sweet Rice Flour Dumplings and Red Bean Steamed Buns. Read here for a guided recipe on how to make red bean paste from scratch easily using the most healthy ingredients.

Tip No.2 is to blend honey and avocado oil vigorously for the dough of Cantonese Mooncake
Add honey and avocado oil into a bowl and mix very well using a whisk. If you own a stand mixer like me, I recommend using the mixer to mix honey and avocado oil. It is the key for a refreshing, tasty crust.

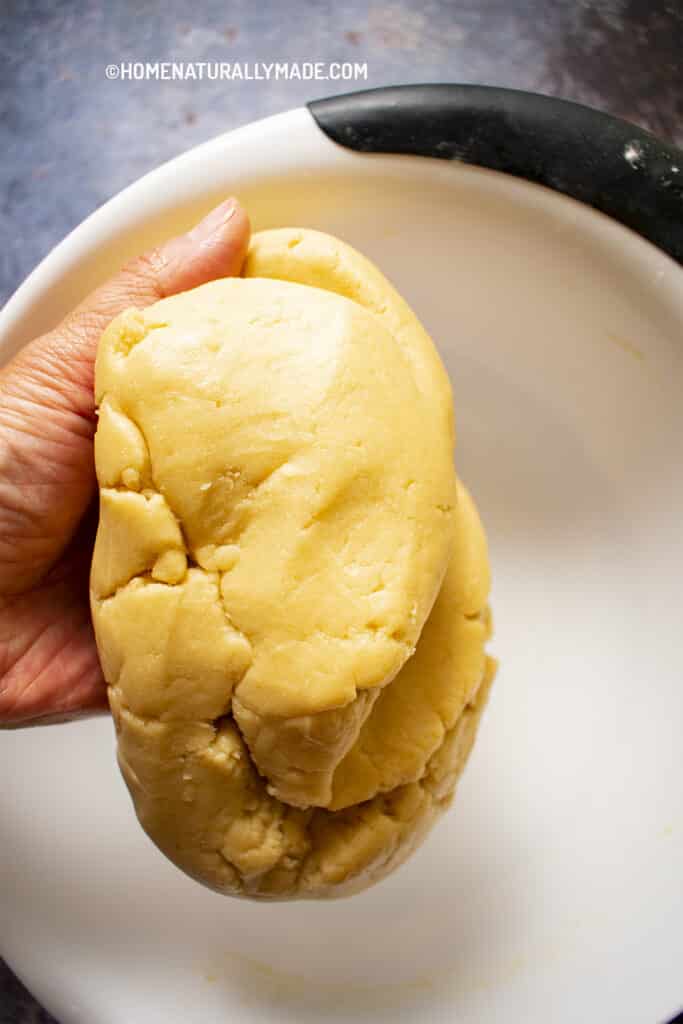
Tip No.3 is to let the dough rest for 2-3 hours
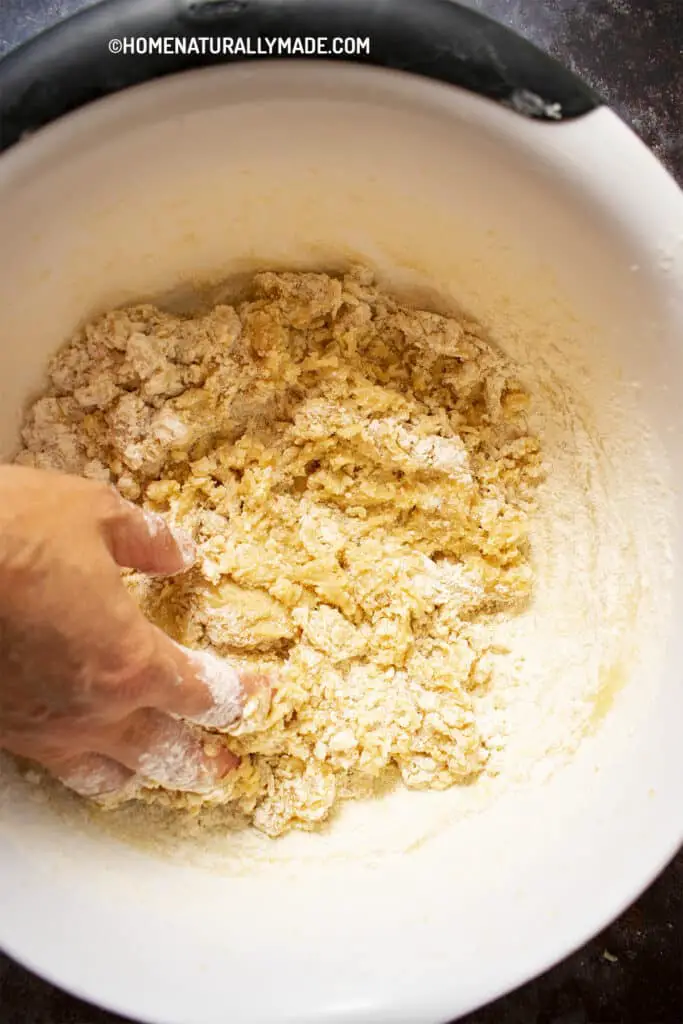
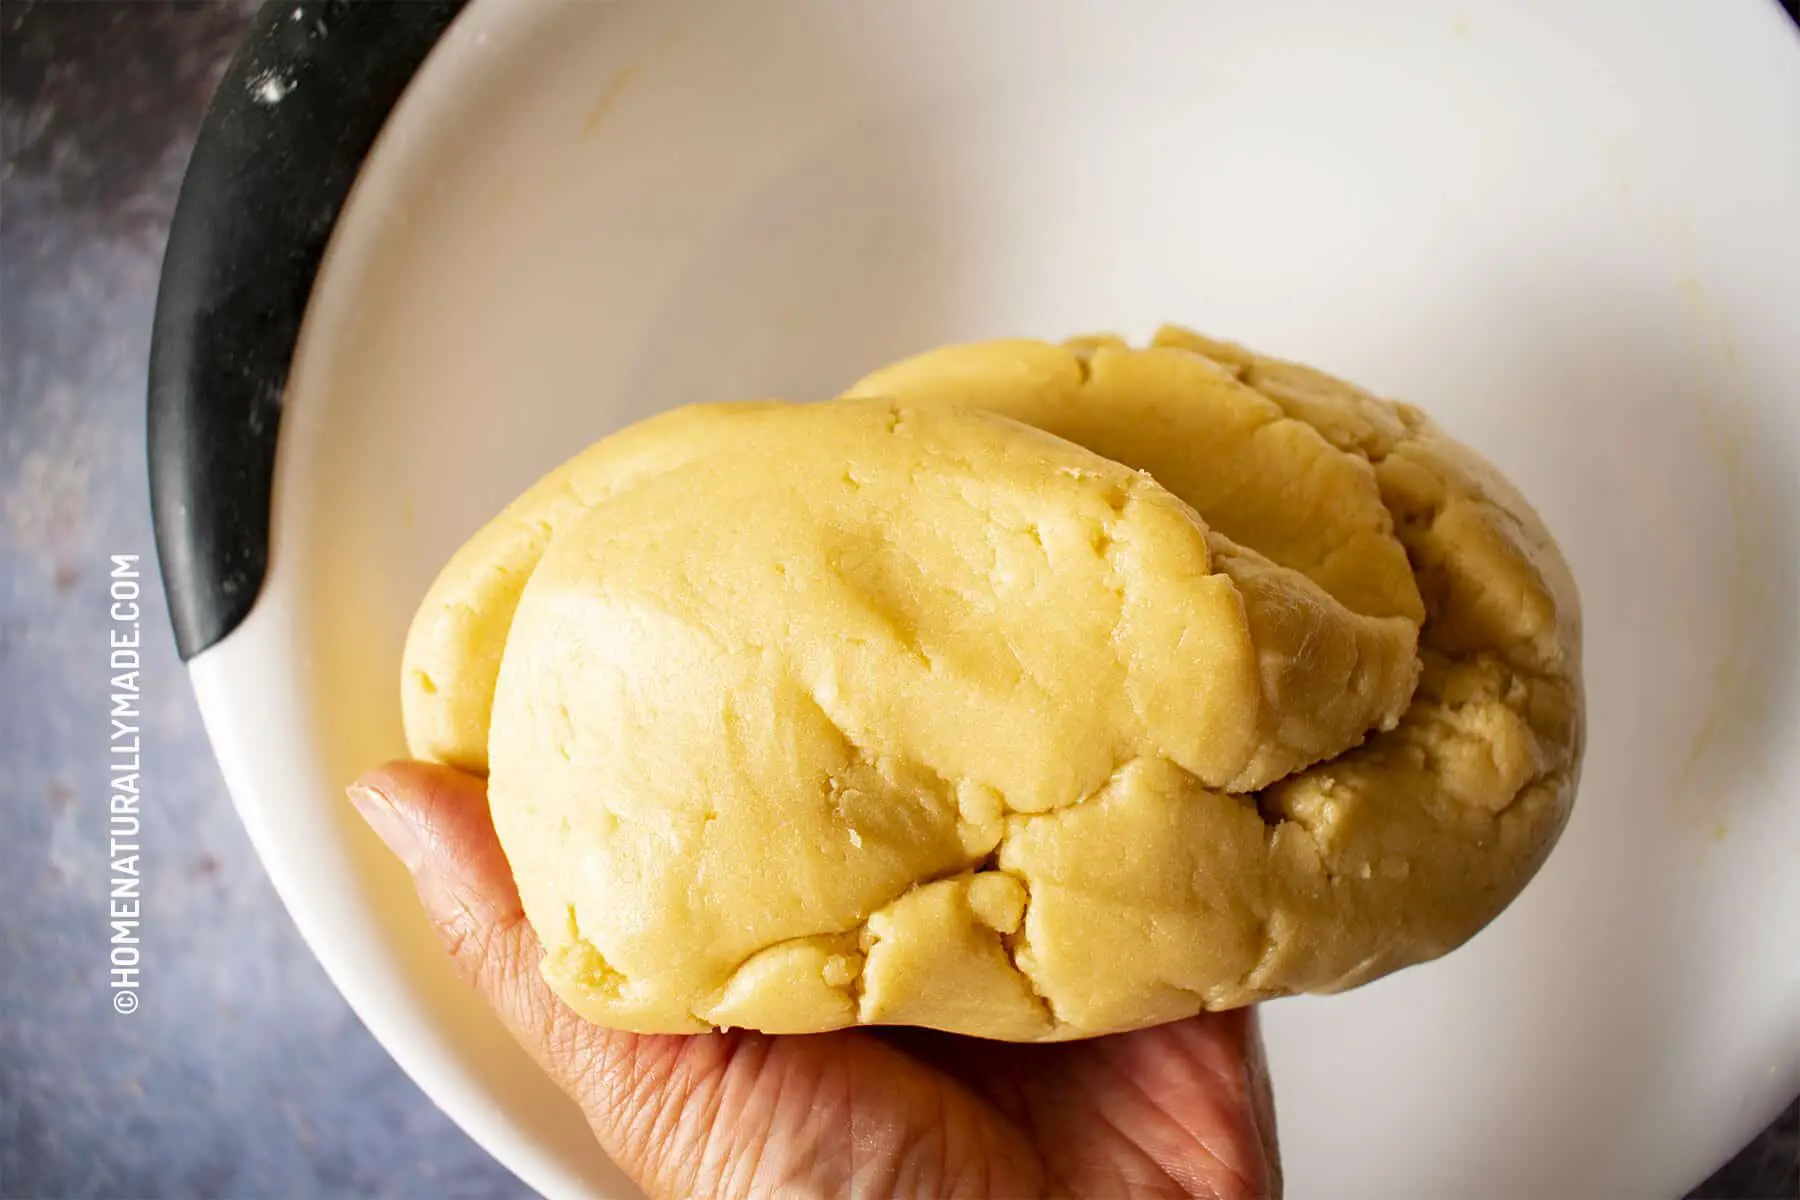
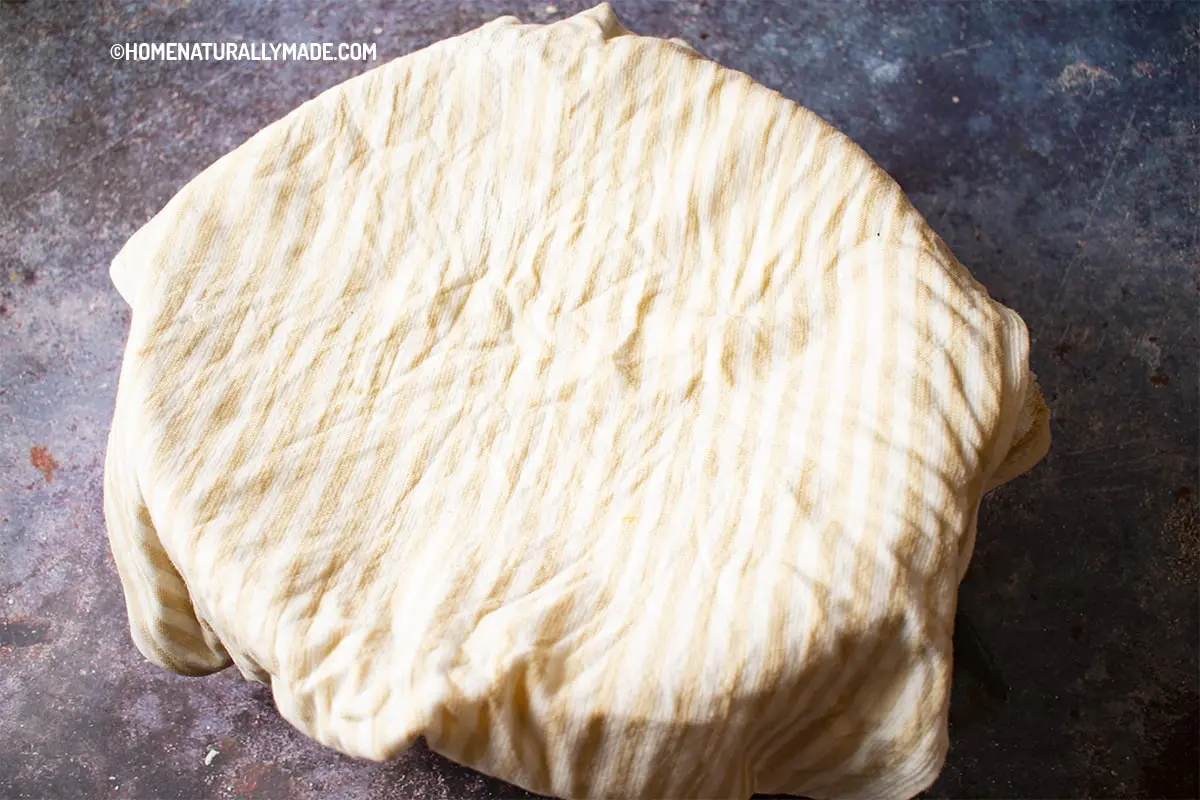
Once you have a soft dough, cover the mixing bowel with a damp kitchen towel and let it rest at room temperature for 2-3 hours. It is the key to a soft, yummy crust.
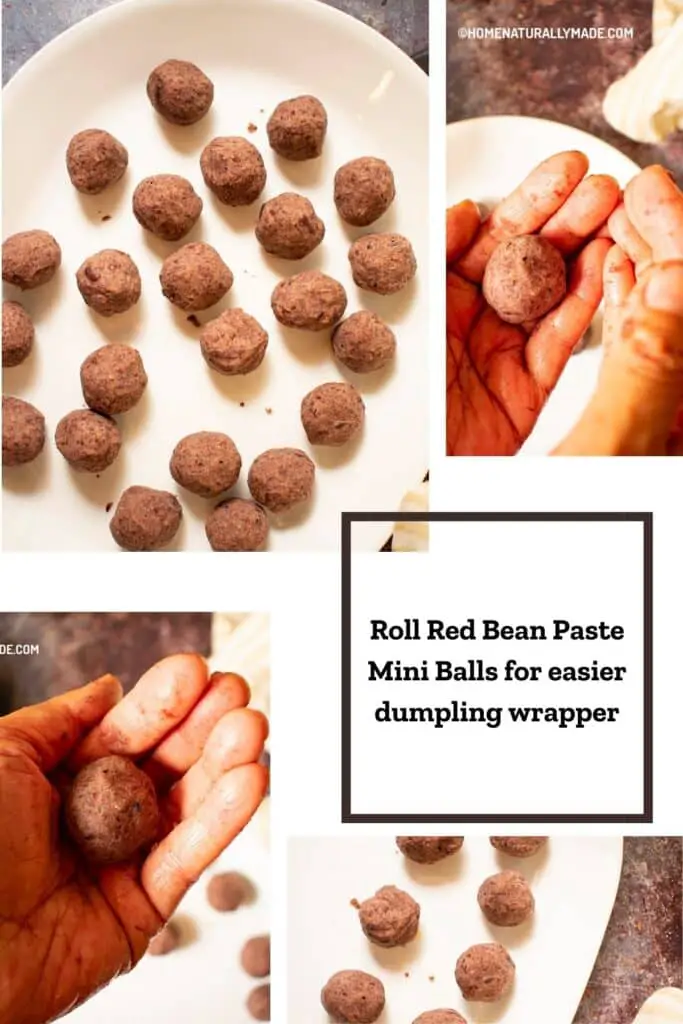
Tip No.4 is to divide dough and red bean paste into mini portion size mini balls for easier wrapping of Cantonese Mooncake
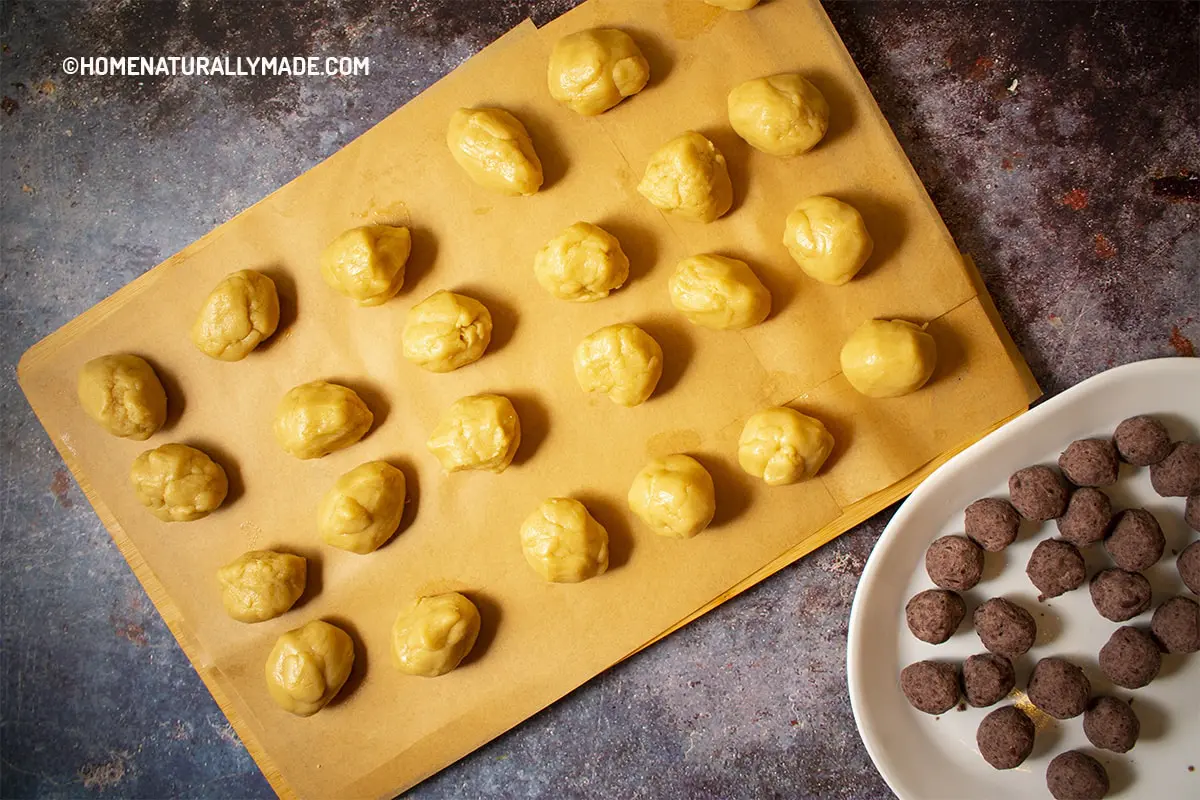
This recipe makes about 12 mooncakes. I usually double the recipe and make two dozens of mooncakes at once. To streamline the wrap process, divide the dough into 12 equal portions, with each portion about 42 grams; and divide the red bean paste into 12 portions with each portion about 12 grams.

To make red bean paste mini balls, use a bit of coconut oil to rub your palms to moisturize the red bean paste and then press into mini balls. This is especially helpful if the homemade red bean paste gets hardened in the refrigerator.
The warmth of the hands will help soften the coconut oil in the red bean paste. The extra bit of coconut oil will further moisturize the red bean paste and make it easier to press into mini balls.
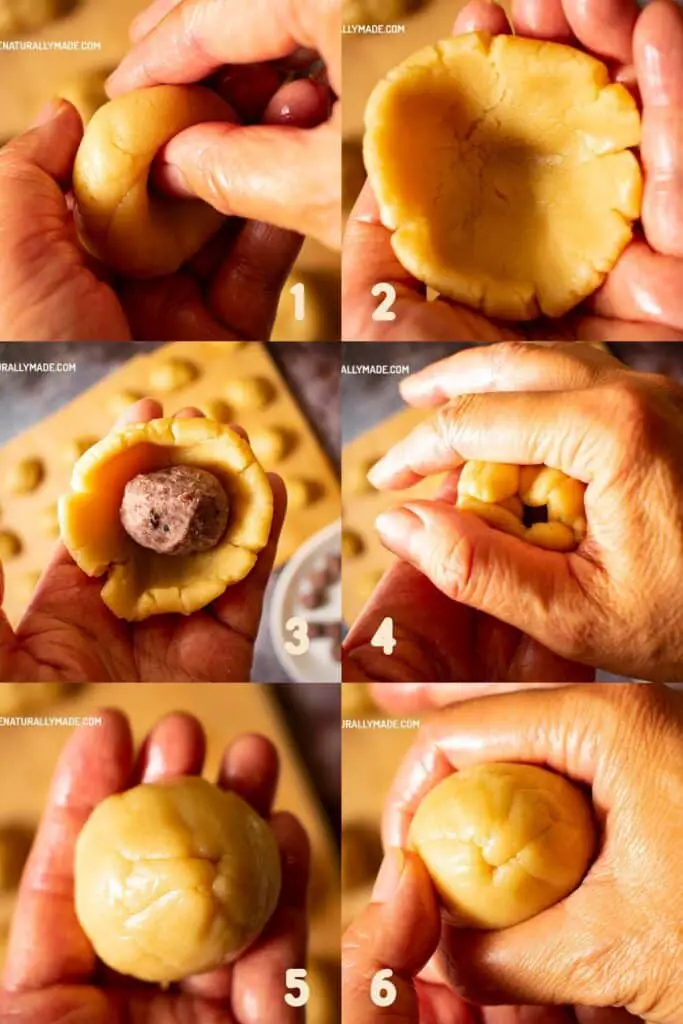
The 5th Tip is to use the same wrapping technique for sweet rice flour dumplings
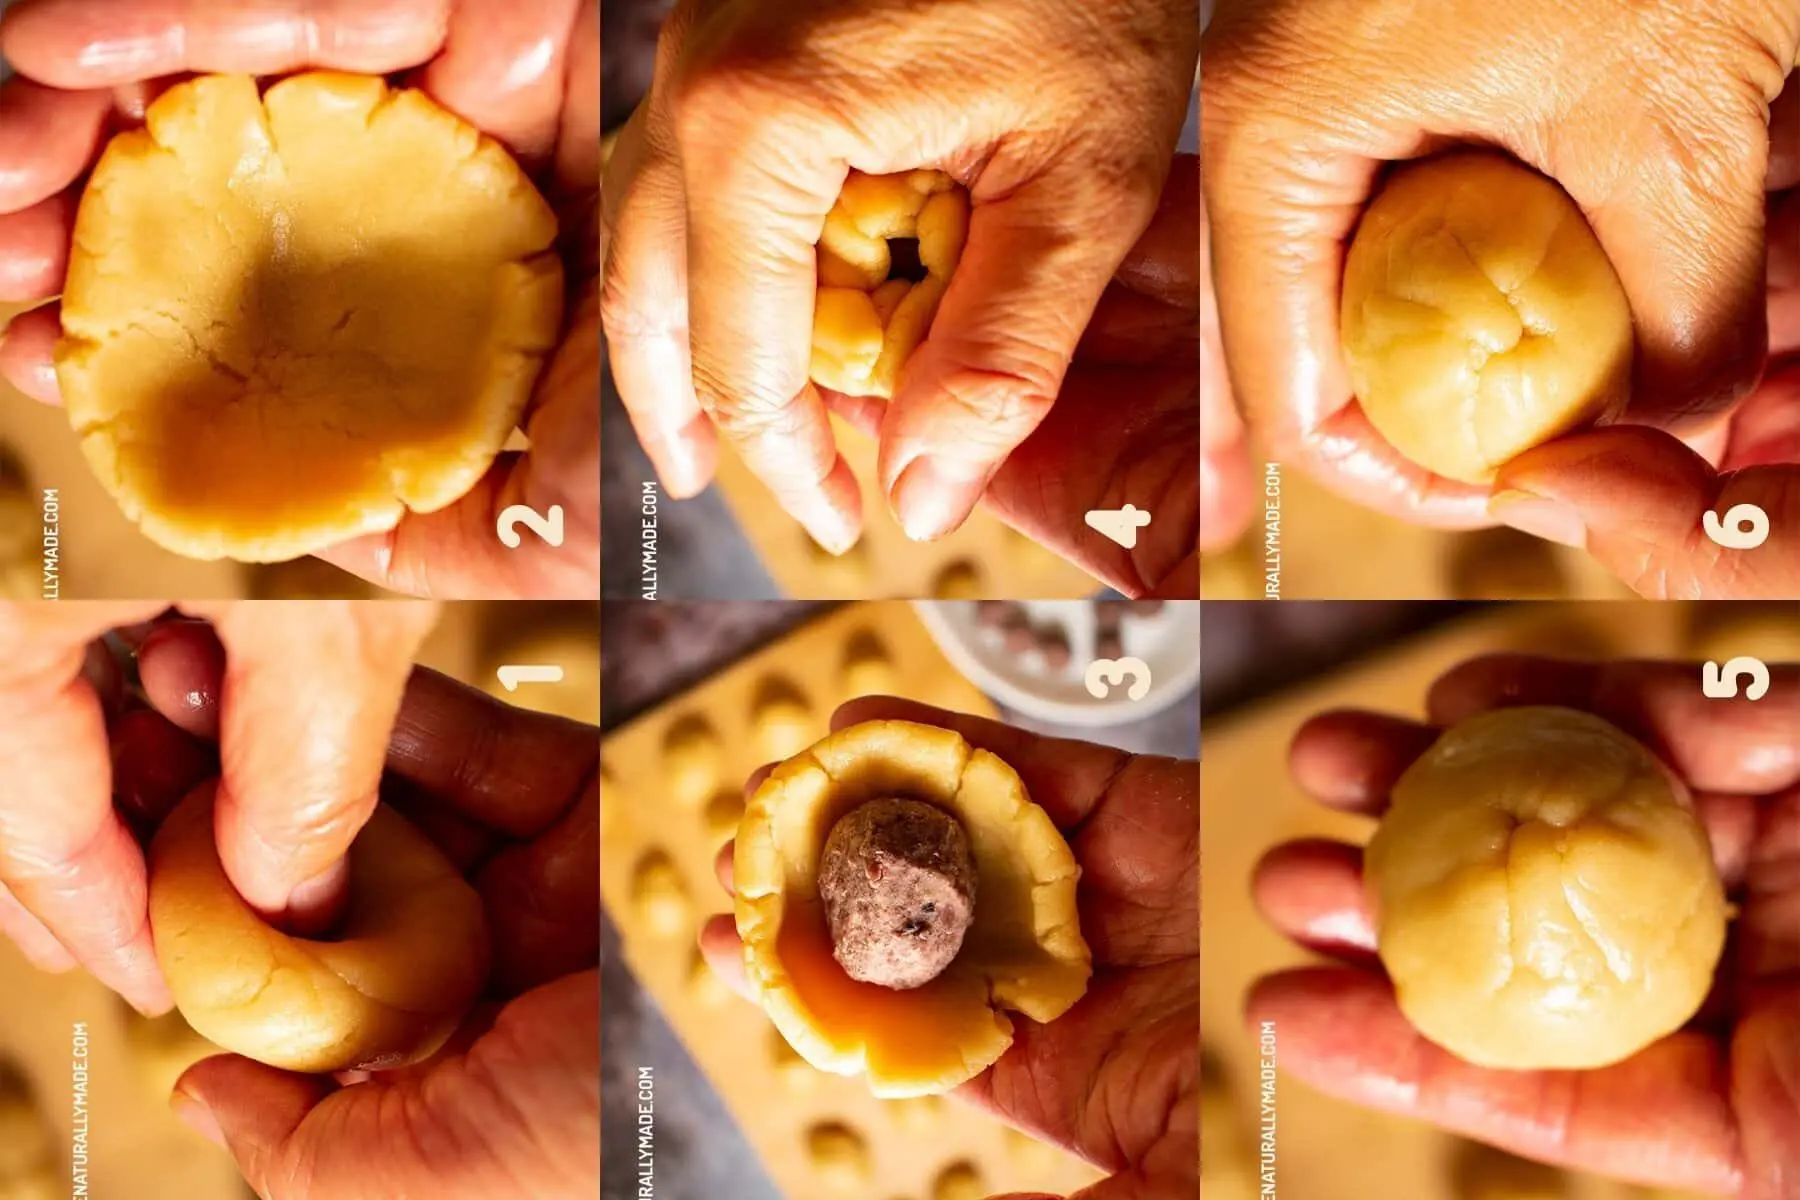
I use a very similar technique to wrap mooncake as to wrap sweet rice flour dumplings. Read here for a detailed step-by-step tutorial.
The key is to damp your palms with water before you handle the dough to keep the dough soft and moisturized. This makes the wrapping so much easier. The dough is delicate and easy to fall apart since there is limited gluten in the dough. However, there are still certain flexibilities you can play with.
Once you have enclosed the red bean paste mini ball inside the dough wrapper, make sure you gently rotate and squeeze for a tall looking dumpling. This makes molding process easier.
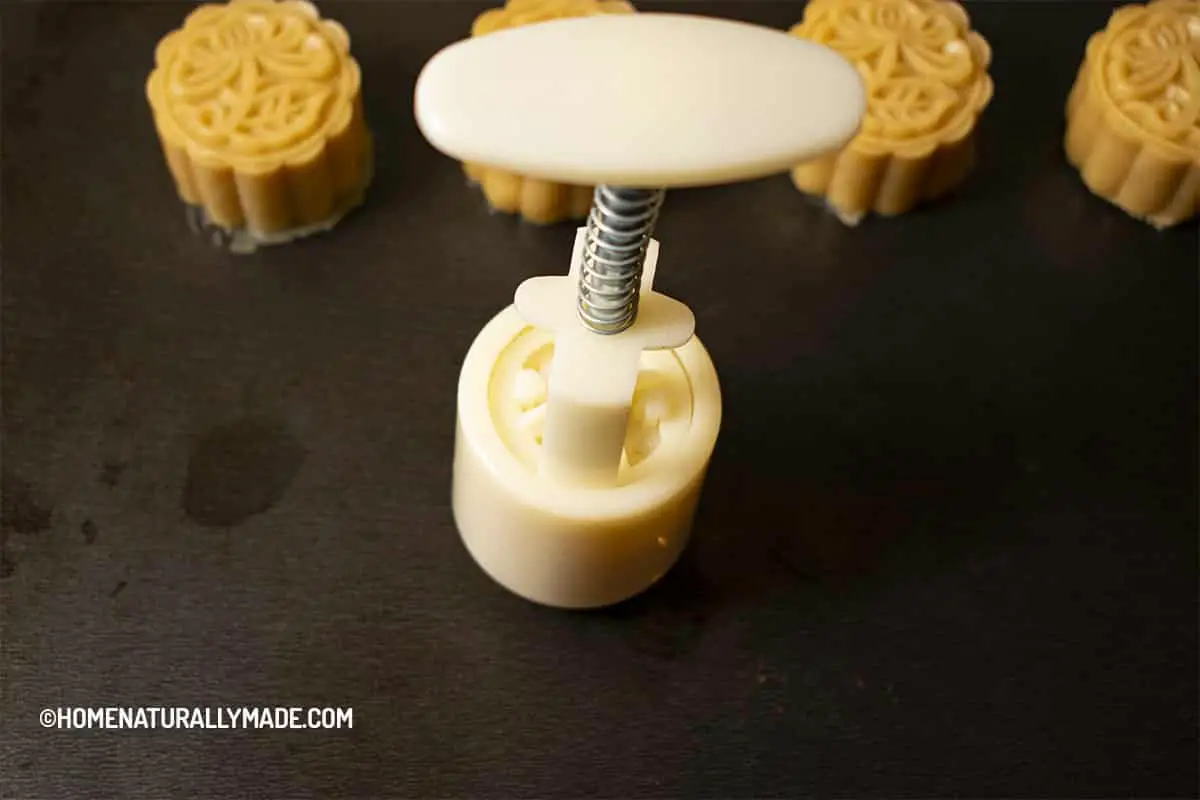
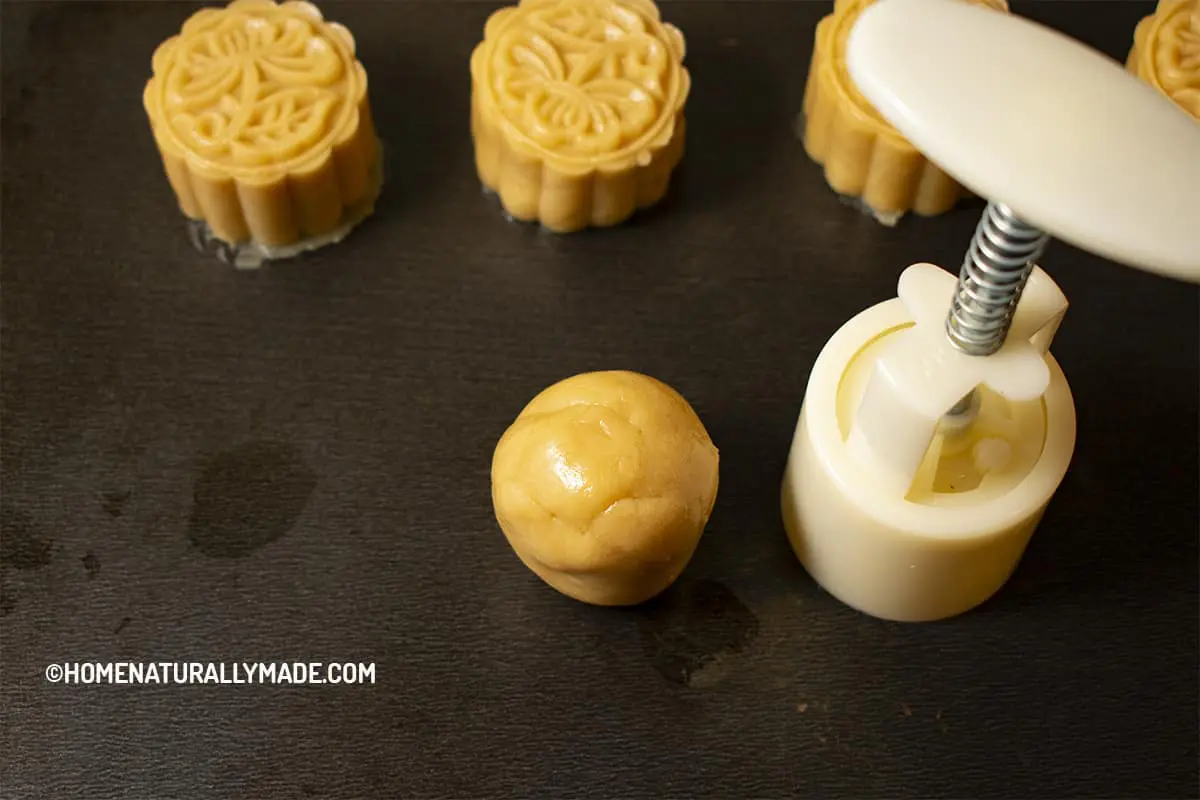
Tip No.6 is to use a mooncake mold
This simple, inexpensive mooncake mold does a phenomenal job pressing the mooncake. I designed this recipe for the common size mooncake. The mold comes with 6 various patterns. For mooncake, the chrysanthemum flower, symbolizing autumn season, is by far my favorite one.
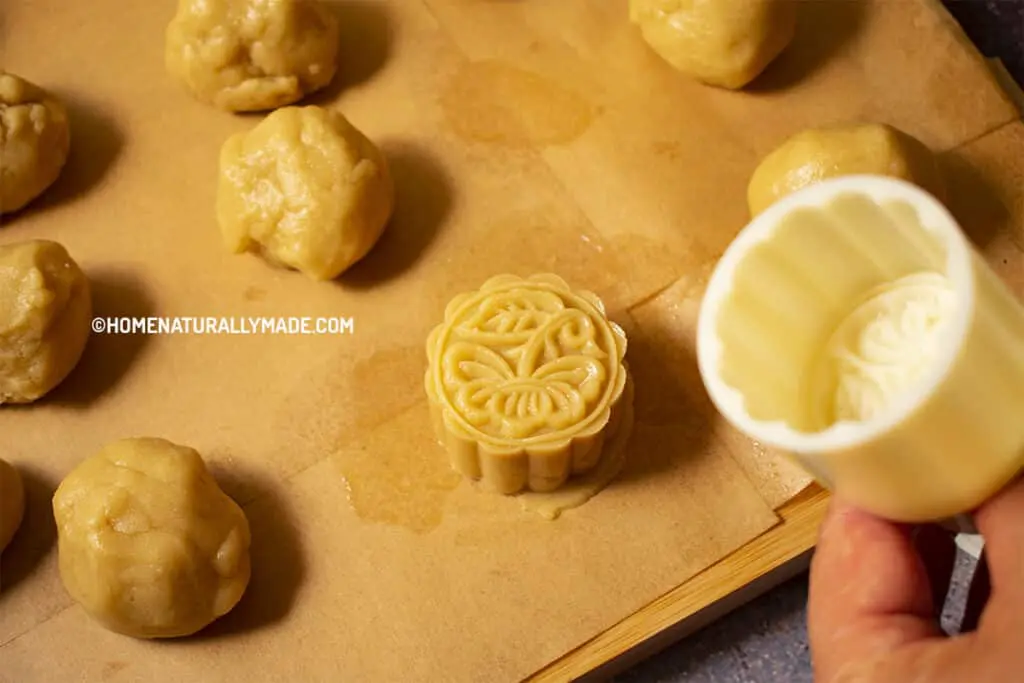
How to use mooncake mold?
It is straightforward to use the mold. The first step is to pick the disk with the pattern you like. Insert into the barrel of the mold with the pattern facing outside. Twist the handle slight to ensure it is locked in place.
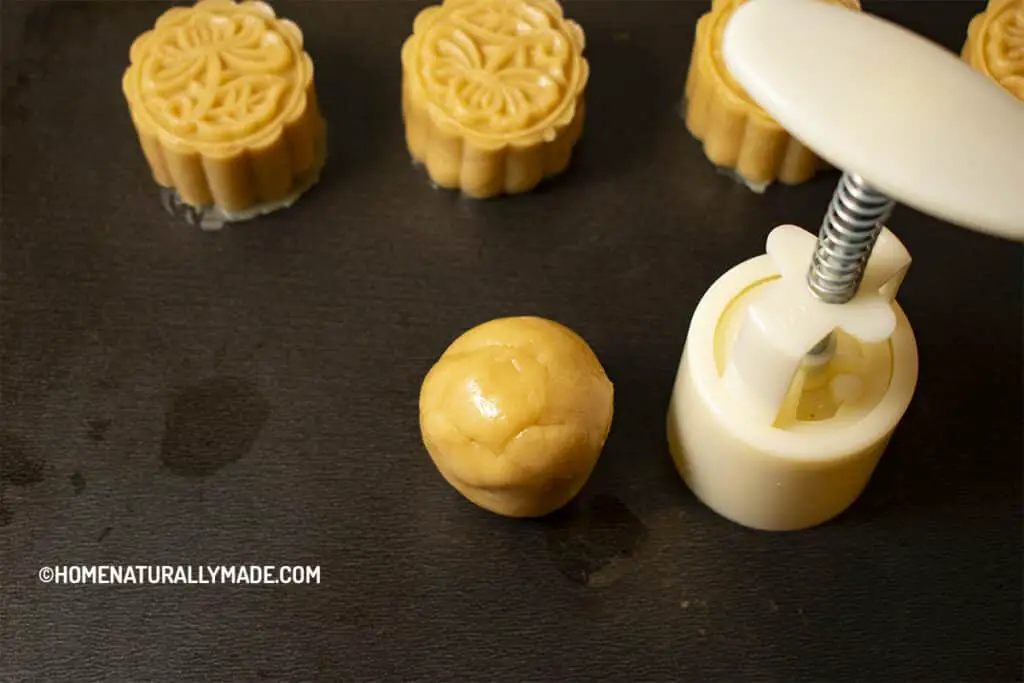
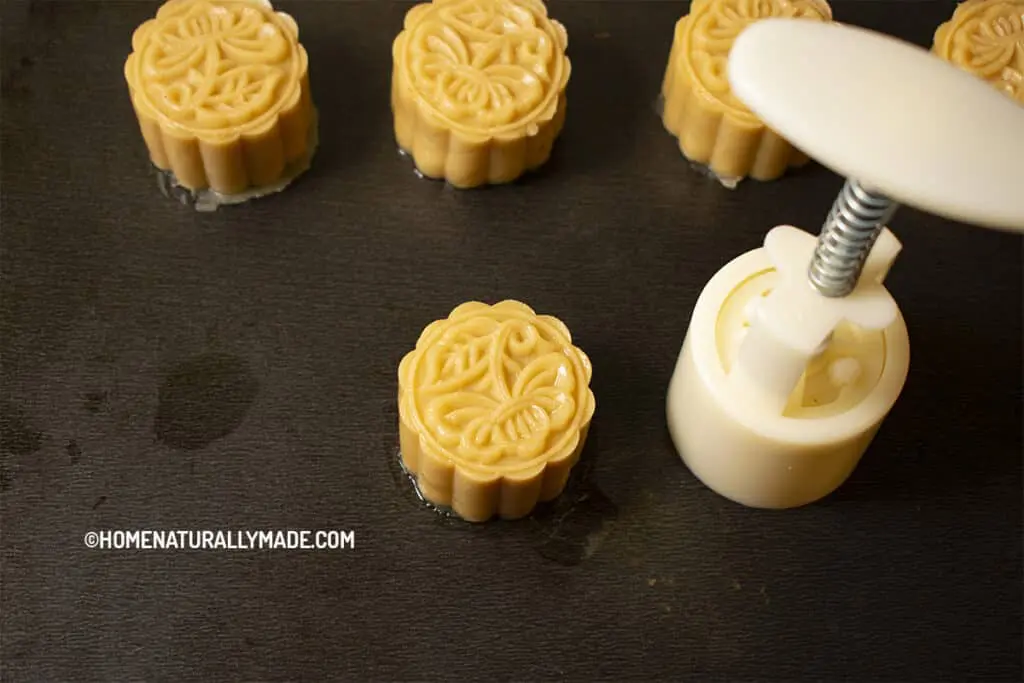
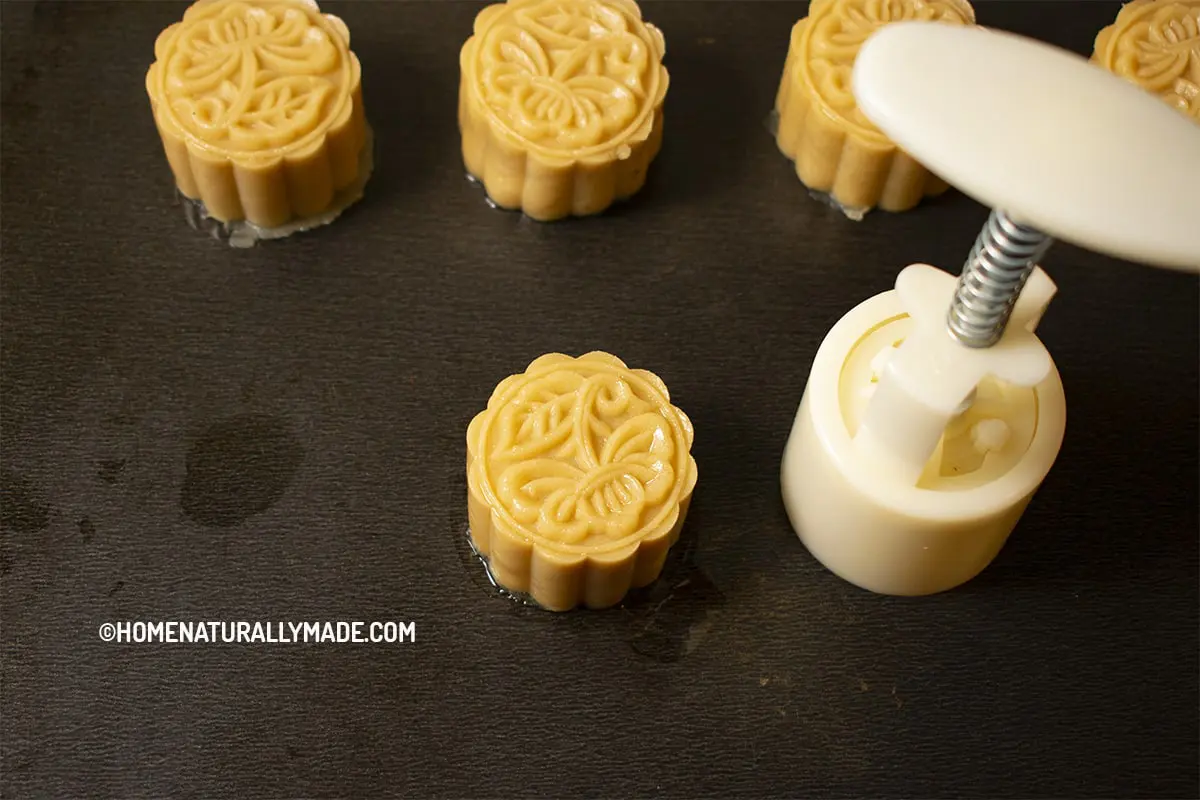
Place the tall mooncake dumplings upright on a baking pan and let the barrel of the mold cover the entire dumpling. Then firmly press the handle straight down until you receive major resistance. Then you stop and gently let go of the handle. Wait for the spring attached to the handle to retract and then lift the mold.

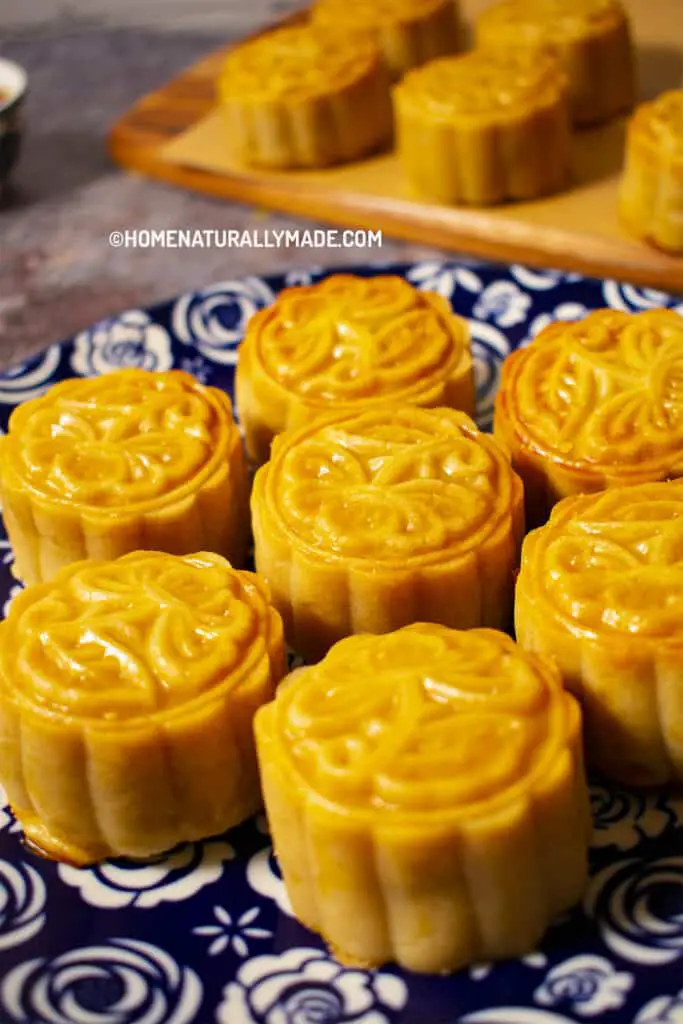
Yay, a beautiful-looking mooncake is in front of you!
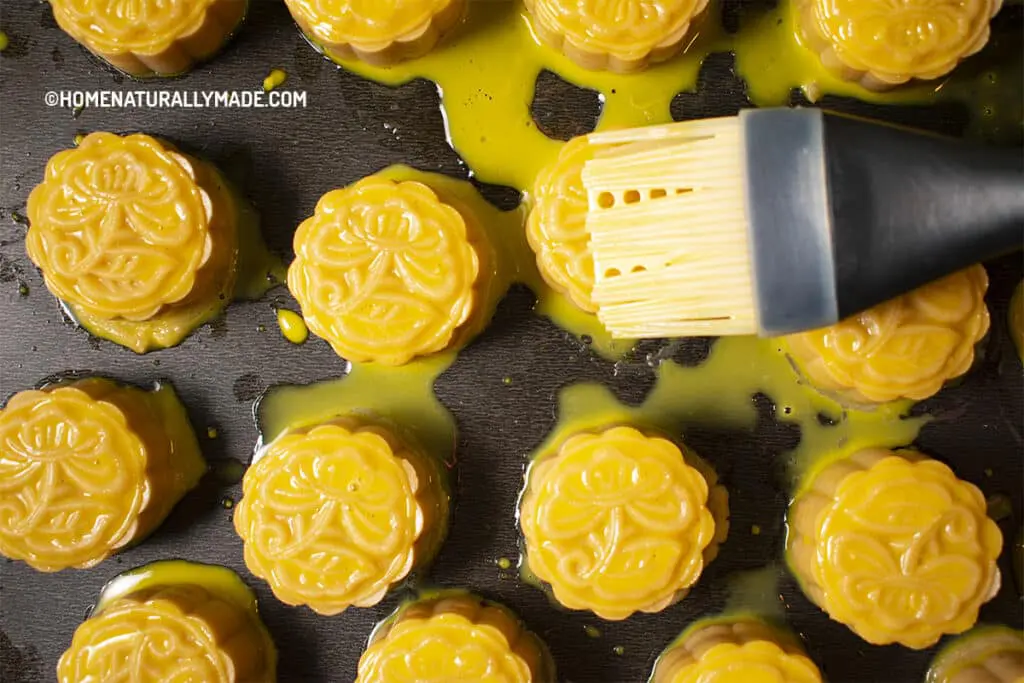
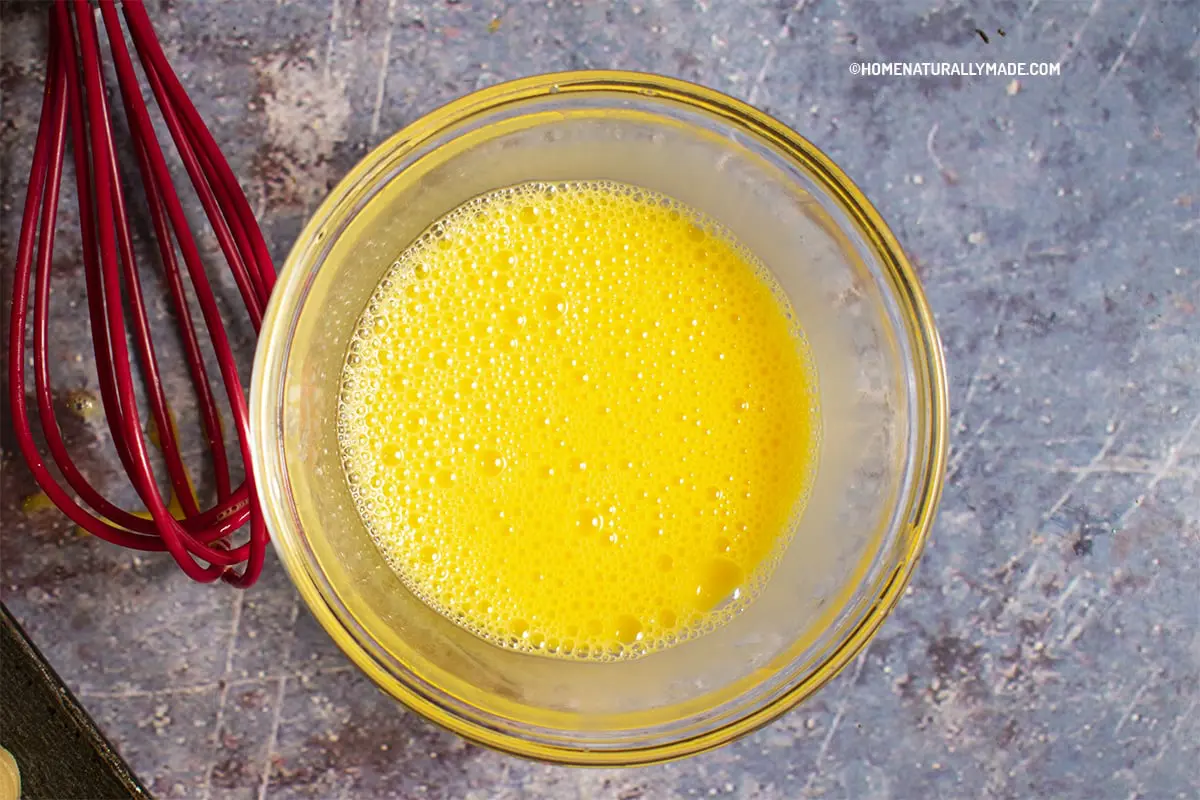
The 7th Tip is to bake 5 minutes at high temperature and coat the Cantonese Mooncake with egg yolk liquid
Bake the mooncake at 375 degree Fahrenheit { 190 degree Celsius} for 5 minutes and then coat them with yolk liquid generously. You will need 1 egg yolk and about 10 grams of water for the coating liquid. Mix well using a mini whisk and then use a soft brush to apply to the top, side, and bottom of each mooncake.
Tip No.8 is to use an unbleached wax paper for the baking of Cantonese Mooncake
After you have applied the egg yolk liquid to the mooncake, place them on a cookie sheet on top of an unbleached parchment paper. This is one essential tip for a presentable mooncake. Otherwise, the egg yolk will make the moon stick to the baking pan.
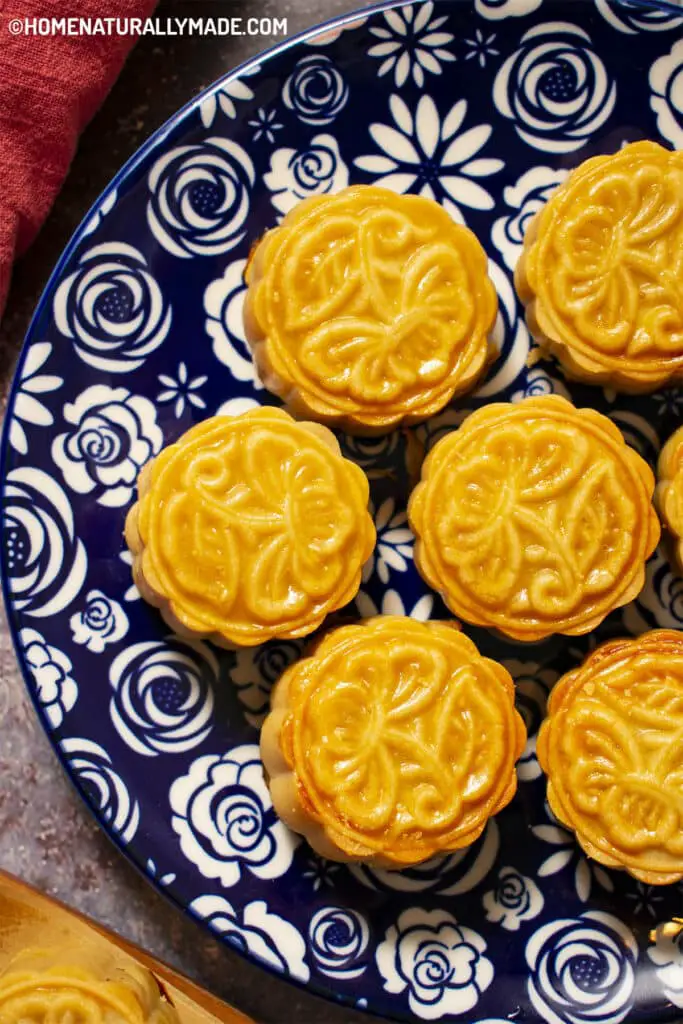
The last but not least tip No. 9 is to let the freshly baked mooncakes rest for 2 days before consuming for best results
Freshly baked mooncakes may appear to be a bit dry. Don’t worry, that’s just temporary. Store them in an airtight glassware storage either in a fridge or a cool environment for 2 days before consuming. This will allow the oil to settle in for a soft golden brown looking mooncake.
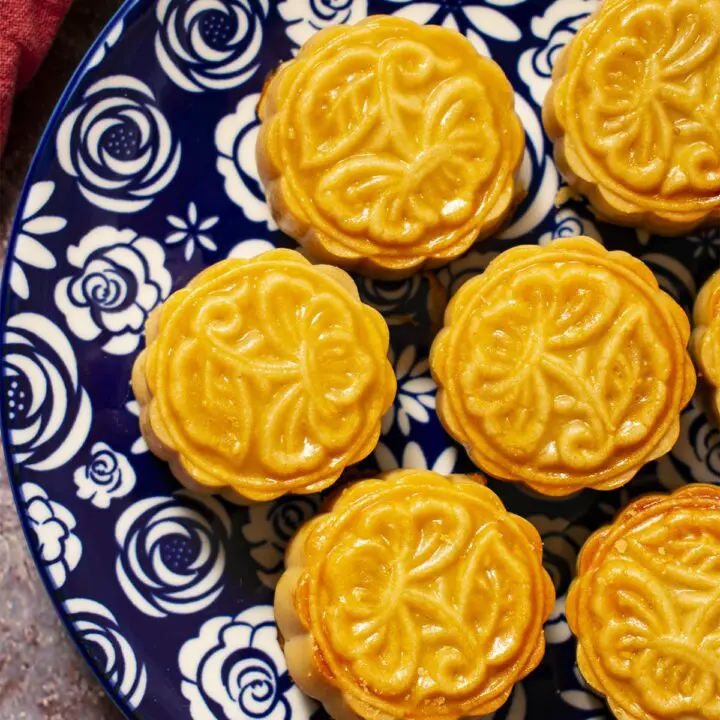
Cantonese Mooncake {Easy Healthy Yummy Way}
Homemade Cantonese Mooncake {Guang Shi Yue Bing 广式月饼} is so yummy and healthy. The crust is coming from merely four amazing ingredients. They are honey, avocado oil, organic all-purpose flour, and a bit of whole milk powder. They are so naturally delicious. A must-have during the Chinese Mid-Autumn Festival celebration.
Ingredients
- 130 g honey, organic raw
- 80 g avocado oil
- 250 g all-purpose flour, organic
- 30 g whole milk powder
- 150 g- 180 g red bean paste, homemade preferably
For the basting:
- 1 egg yolk
- 10 g water, room temperature
Instructions
- Gather ingredients:

- Get the mooncake mold in advance.

- Prepare egg yolk basting liquid - add one egg yolk and 10 g water into a small bowl. Mix and blend well using a mini whisk.
Prepare the red bean paste filling:
- Go directly to the next step if you use other types of filling or store-bought red bean paste.
- Read here for a detailed guided recipe on how to make a healthy yummy red bean paste using only three simple ingredients: adzuki beans {Chi Xiao Dou 赤小豆}, organic coconut oil, and organic cane sugar.

Prepare the dough for Cantonese Mooncake:
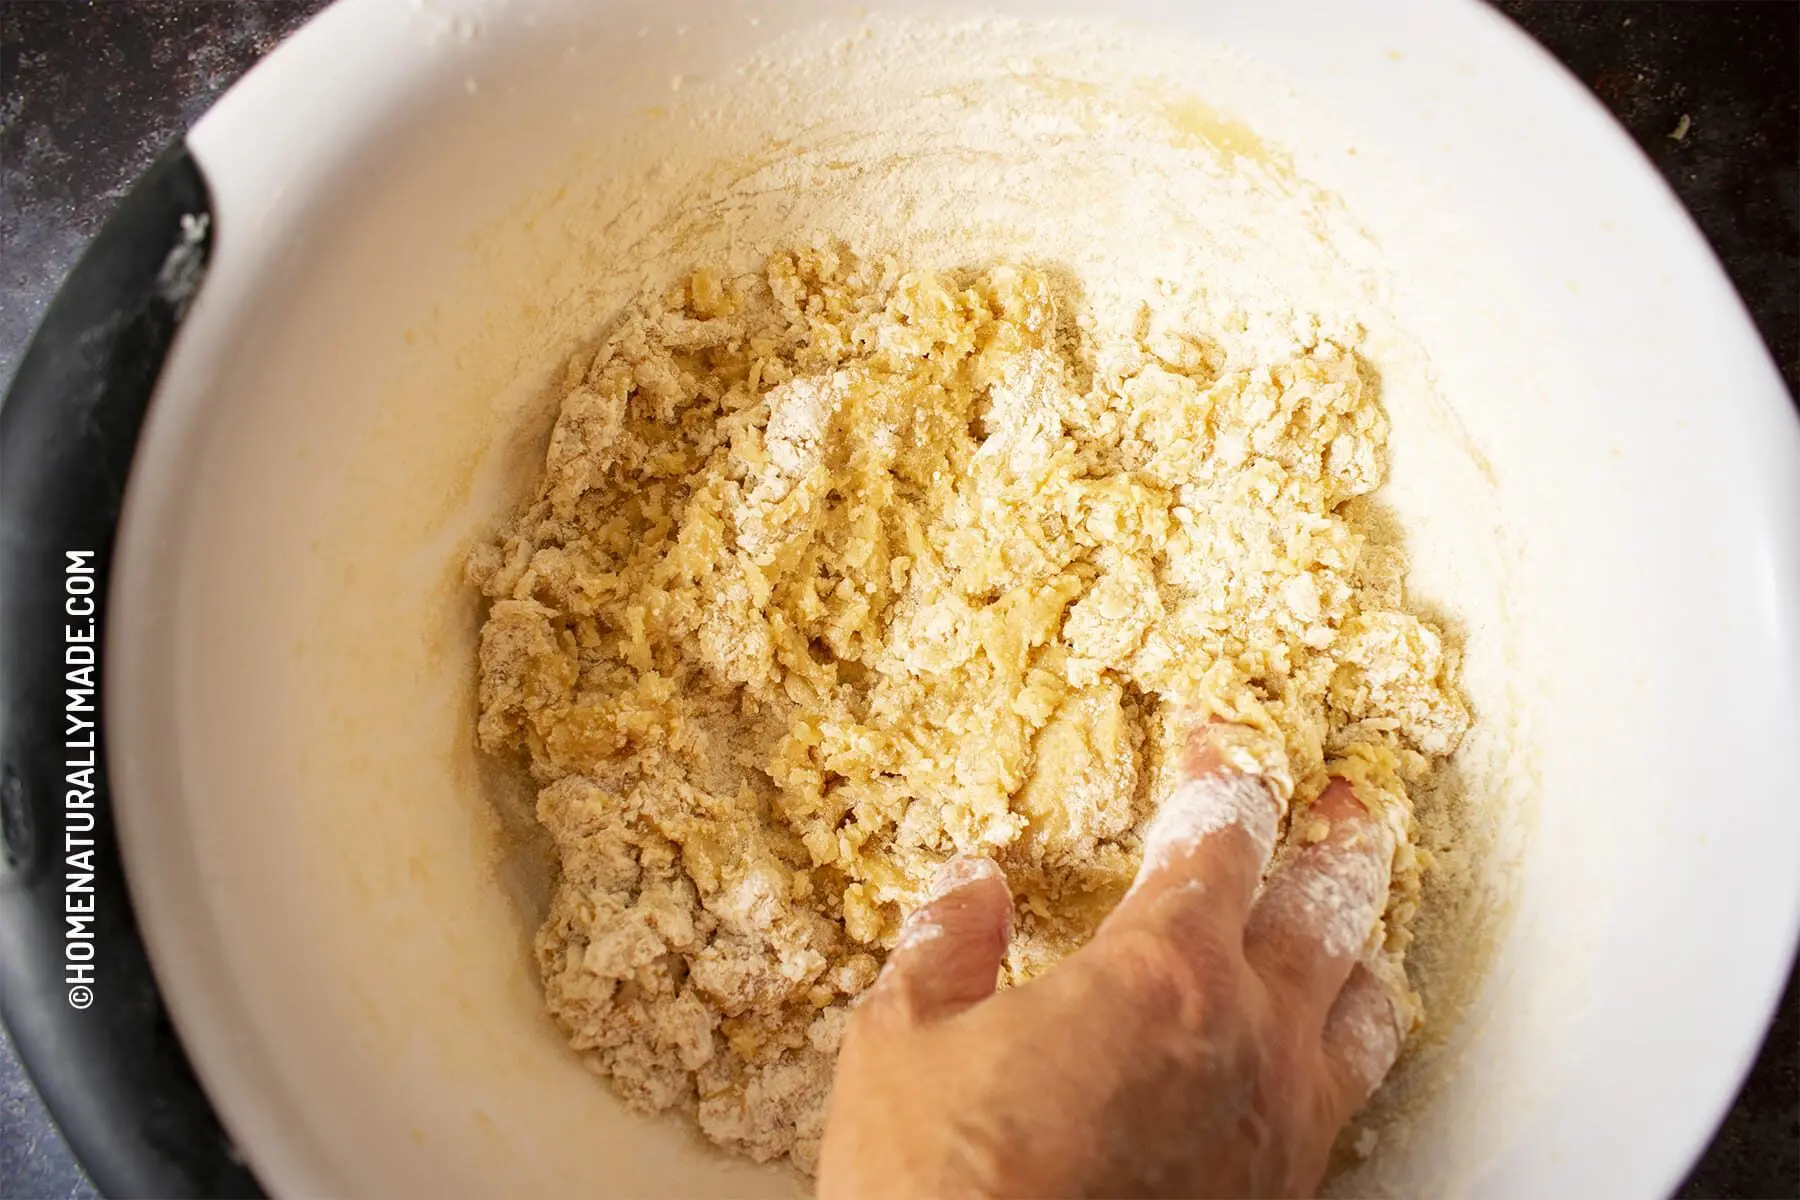
- Add honey and avocado oil into a large mixing bowl, and whisk vigorously for a well-blended mixture. If you have a stand mixer, highly recommend you use it.
- Add flour and milk powder into the mixing bowl. Mix and knead until you have a soft dough.
- Cover the mixing bowl with a kitchen towel and let it rest for 2 hours at room temperature.

Prepare mooncake portion of dough and red bean paste mini balls:
- This recipe makes about 12 mooncakes. To streamline the wrapping process, divide the dough into 12 equal portions, with each portion about 40 g -42 g; and divide the red bean paste into 12 portions with each portion about 12 grams.
Wrap Mooncake dumpling for molding & pressing:
- I use the same technique as wrapping sweet rice flour dumpling. Read here for a step-by-step guided tutorial.
- Remember to gently toss and rotate the dumplings to make it tall, more like a cylinder shape to accommodate the mooncake mold.
Mold & Press Cantonese Mooncake:
- pick the disk with the pattern you like. Insert into the barrel of the mold with the pattern facing outside. Twist the handle slightly to ensure it is locked in place.
- Place the tall mooncake dumplings upright on a baking pan and let the barrel of the mold hover over and cover the entire dumpling.
- Firmly press the handle straight down until you receive major resistance. Then you stop and gently let go of the handle.
- Wait for the spring attached to the handle to retract and then lift the mold. Yay, a beautiful-looking mooncake is in front of you!

Basting the Cantonese Mooncake:
- Set the oven temperature to 375 degrees Fahrenheit, and bake for 5 minutes.
- Turn off the oven, and remove the baking pan from the oven. Use a soft silicone brush to apply to the top, side, and bottom of each mooncake.
- Place the coated mooncake on a clean baking pan on top of unbleached parchment paper.
Baking Cantonese Mooncake:
- Set the oven temperature to 350 degrees Fahrenheit, baking for 20 minutes.
- Turn off the oven, remove the baking pan from the oven and let it cool down on a wire rack.
Resting the Mooncake:
- Freshly baked Cantonese Mooncake may appear to be dry. Please don’t worry, that’s just temporary. Store them in airtight glassware storage either in a fridge or a cool environment for 2 days before consuming. This will allow the oil to settle in for a soft golden brown-looking mooncake.
- Enjoy the super yummy and healthy Cantonese Mooncake!
Recommended Products
As an Amazon Associate, I earn a small amount of commission from the qualifying purchases.
-
 Bamboo Spoons & Spatula
 - Hard Anodized Nonstick Fry Pan
- Grinder Attachment
- OXO Good Grips 3- Piece Mixing Bowl Set
- Organic Cane Sugar
- Organic Cold-Pressed Virgin Coconut Oil
- Organic Adzuki Sprouting Beans, 1 Pound - Non-GMO, Kosher, Dried, Bulk
- KitchenAid Stand Mixer
- Whisk
- Unbleached Parchment Paper Baking Sheets 12 x 16 Inch
- Nutrichef Non-Stick Kitchen Baking Pans w/Heat Red Silicone Handles, Oven Safe, 3 Piece Set
- Avocado Oil
- Amazon Brand - Happy Belly Raw Wildflower Honey, 32 oz (Previously Solimo) (Packaging May Vary)
- Organic All-Purpose Flour
- Anthony's Whole Milk Powder, 2 lb, Gluten Free, Non GMO, Made in USA
- BenRan moon cake mooncake mold molder mould set Bath Bomb molds 50g/ 75g/100g/150g (A-100g-6 Flower)
- OXO Good Grips Silicone Basting & Pastry Brush - Small


Nutrition Information
Yield 6 Serving Size 1Amount Per Serving Calories 436Total Fat 18gSaturated Fat 3gTrans Fat 0gUnsaturated Fat 14gCholesterol 36mgSodium 71mgCarbohydrates 64gFiber 2gSugar 32gProtein 7g
Nutrition calculation is provided by Nutritionix to the best knowledge per ingredients description and isn't always accurate.